
E30 Front Door Panel Replacement (Sedan)
How-To Credit
This how-to is a Classic Bimmer Bits original, with much credit due to the many members of the community who have helped us learn along the way!
Parts
Replacement Part Number:
- Door Panel Clips (PN 51411870718) – 9 per door
Original Part Numbers (2 part clips):
- Door Panel Clips – Upper Part (PN 51411922137) – 9 per door
- Door Panel Clips – Lower Part (PN 51411922138)– 9 per door
(We make a commission for parts purchased through the Amazon links above, which helps keep this site hosted and free. We only link to OEM or OE parts, the same quality parts that we use on our cars.)
Tools
- Flathead screwdriver
- Phillips head screwdriver
- Trim removal tool
Torque Specs (ft-lbs):
- N/A
Prodedure
-
The procedure for sedan and coupe front door panels are almost identical, the one difference is the location of the clips. This procedure covers sedan doors specifically.

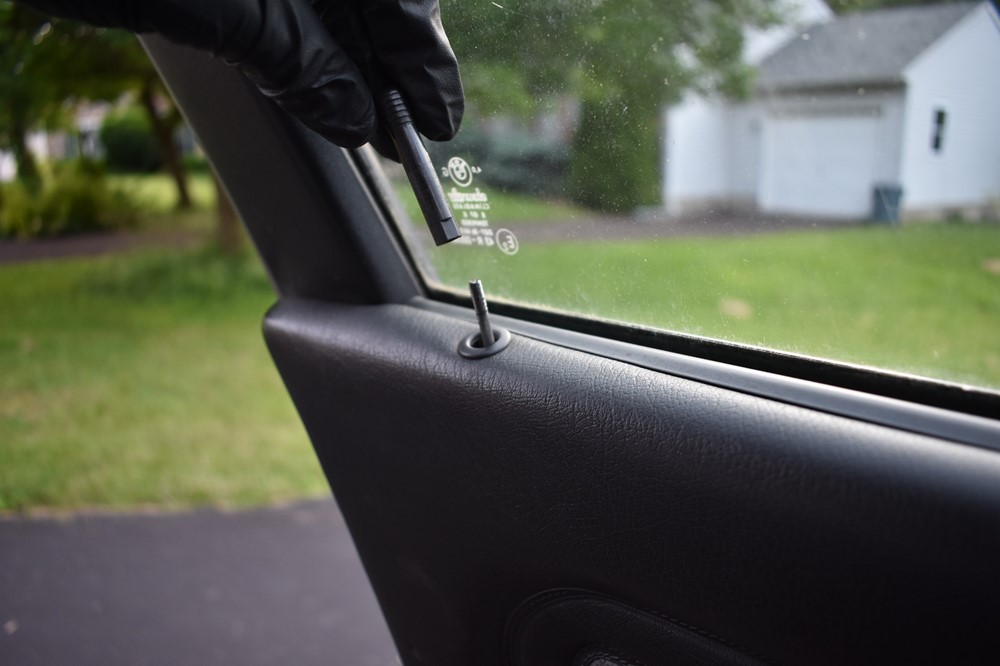
-
Unthread the lock actuator counter-clockwise and remove it.
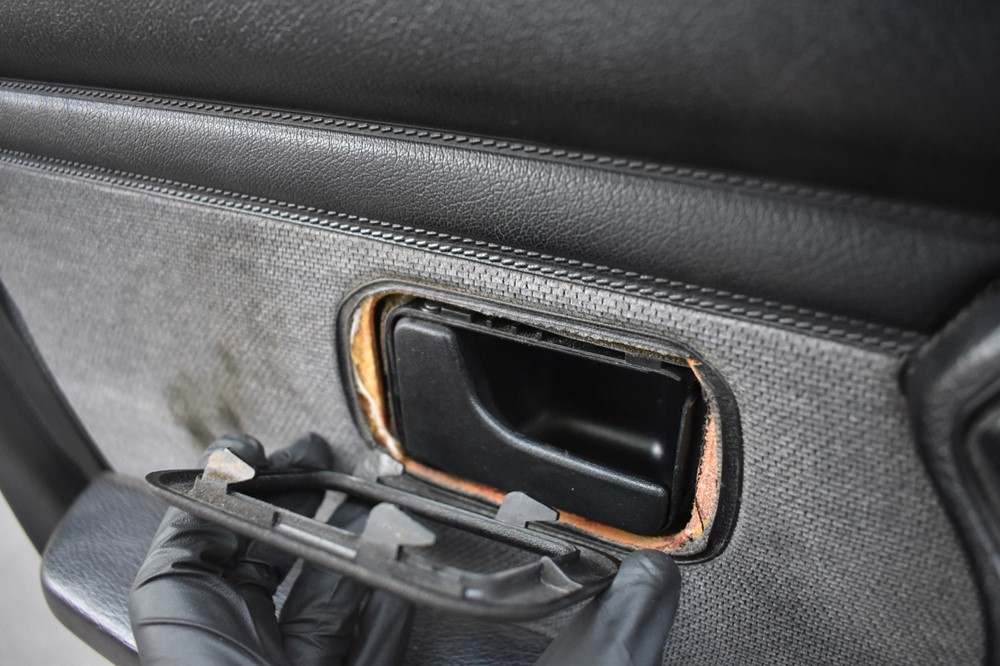
-
Next, move door handle trim. Push it towards the rear of the door, while gently pulling outwards on the front edge.

-
Here’s a picture of it removed, you can see the 4 locking tabs on the back of the trim.
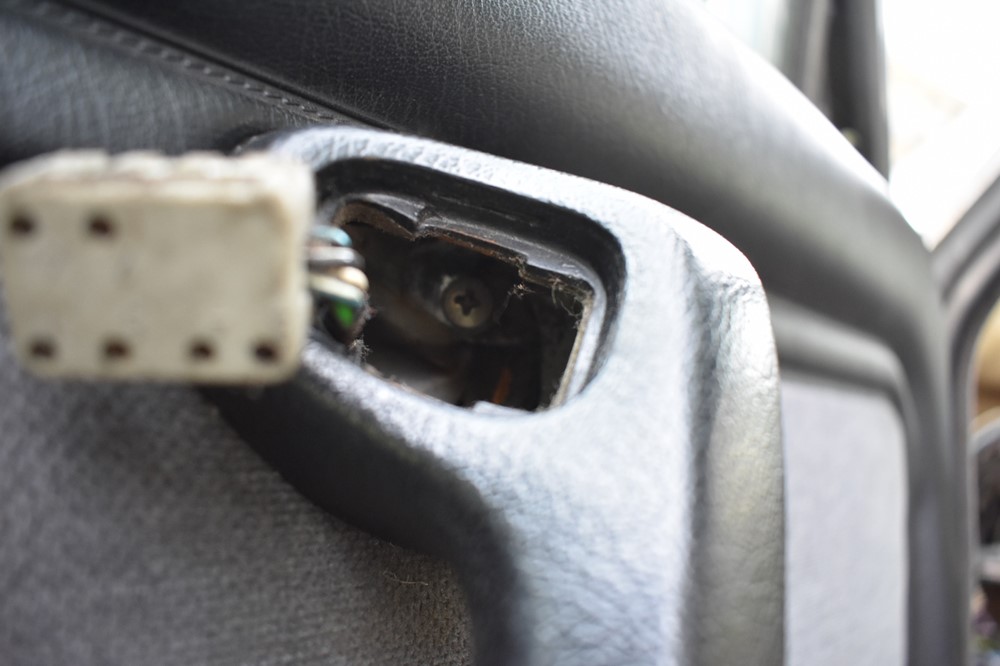
-
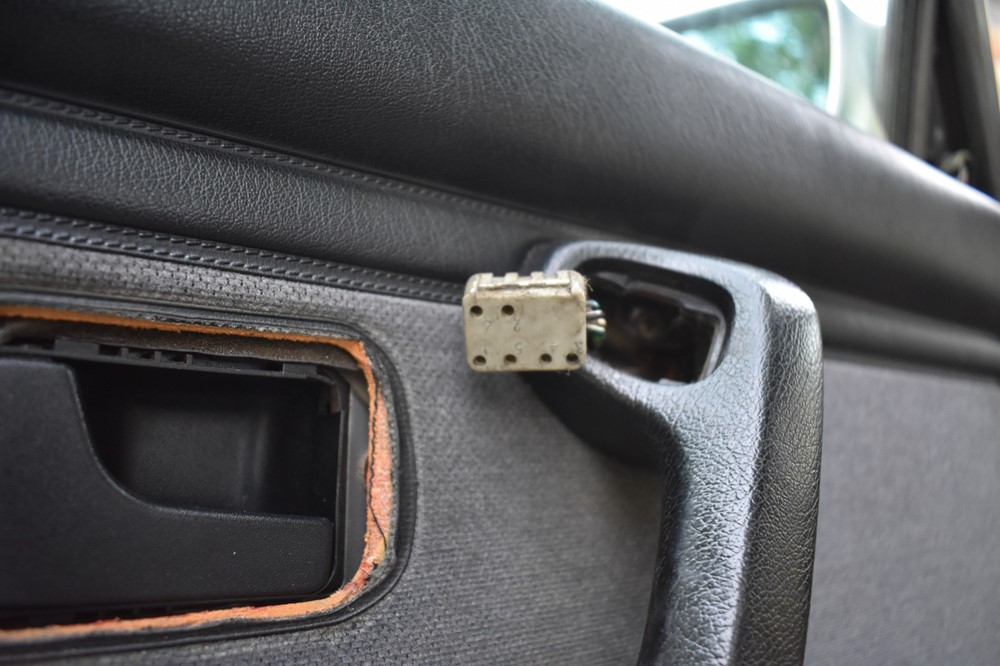
The top of the door handle is next. If you’re on the driver side, this contains the mirror controls. Regardless of which side you’re working on, carefully slide a flathead screwdriver behind the side of the handle insert and pry it out.
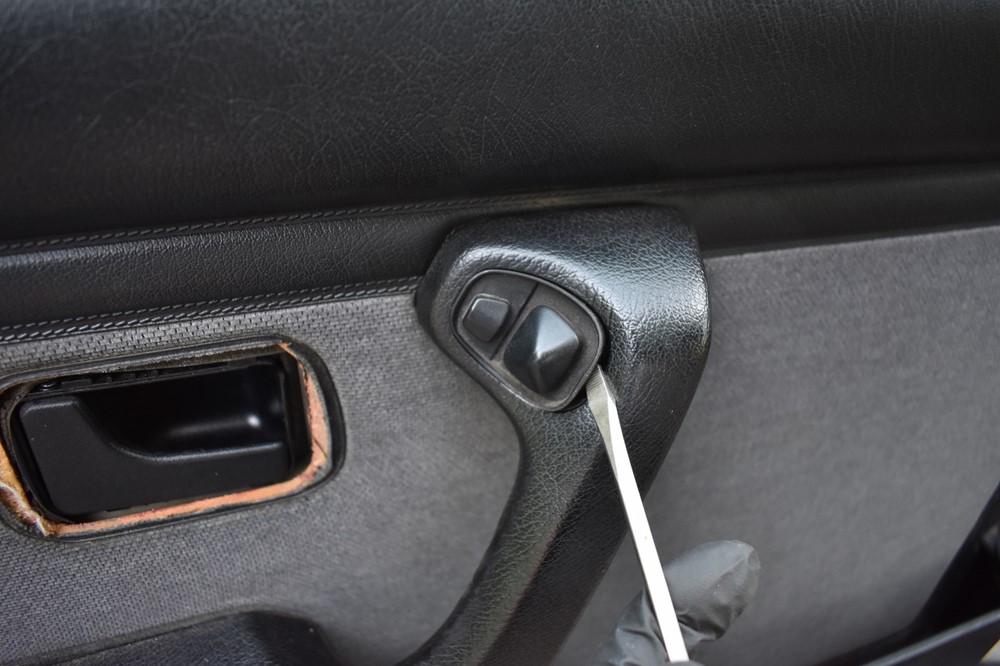
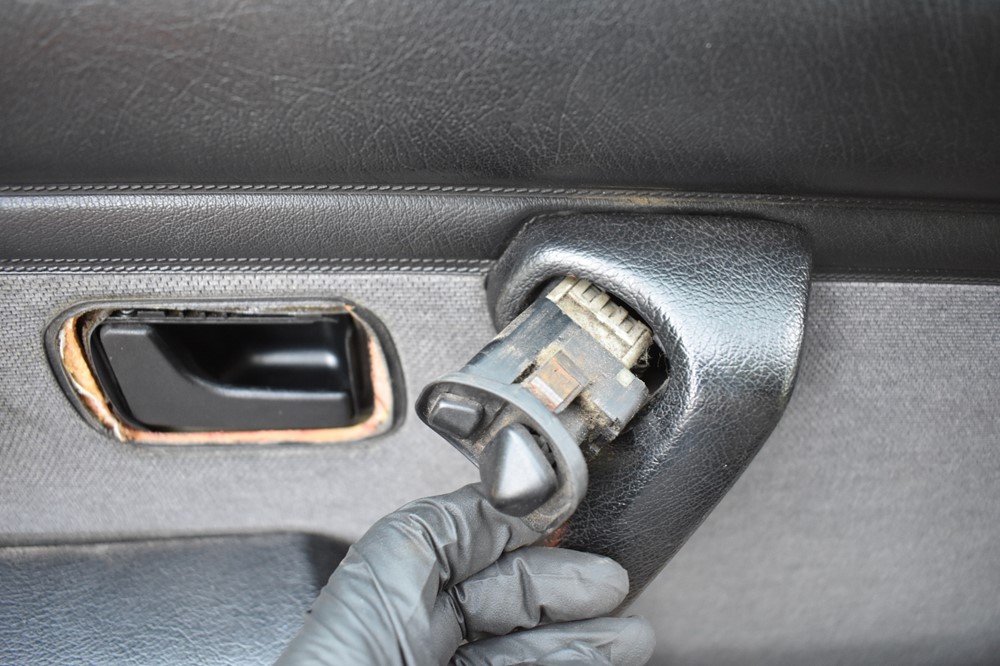
-
If you’re on the passenger side, the insert just pops out. If you’re on the driver side, unplug the mirror controls and set aside. There’s a screw inside the handle, use the phillips head screwdriver to remove it.
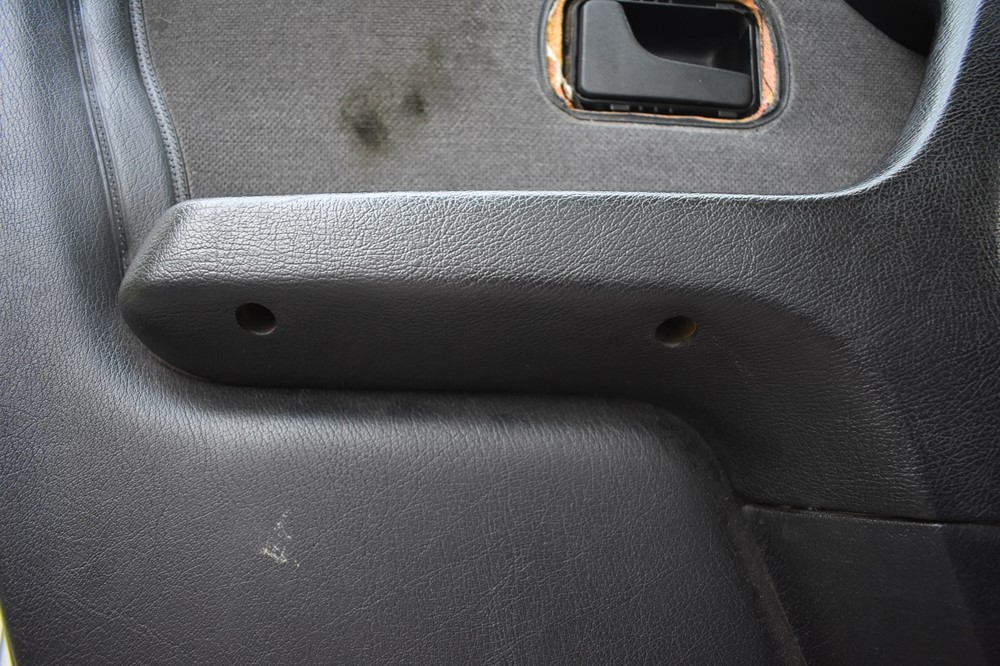
-
There are two more screws under the armrest. Use the phillips head screwdriver to remove them. These two can be a little tricky, you’re best bet is to get low and sight the screwdriver into the head of the screw, it’s surprisingly hard to hit it blind.
-
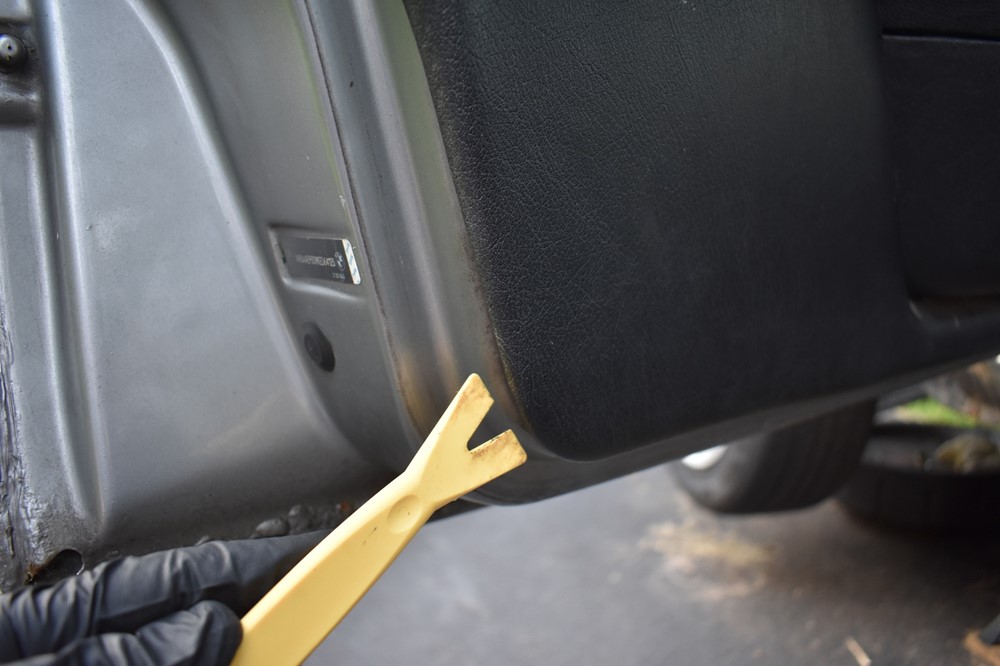
Finally, you need to pop all the trim clips that hold the panel to the door. As these cars get older, the particleboard that the panels are made of deteriorates, and it’s ridiculously easy to tear the clips out of the panel. While it’s not the end of the world, and some fabric and glue can repair the torn sections, it’s much easier if you don’t have to. Your best bet is a forked trim removal tool, like this one.
-
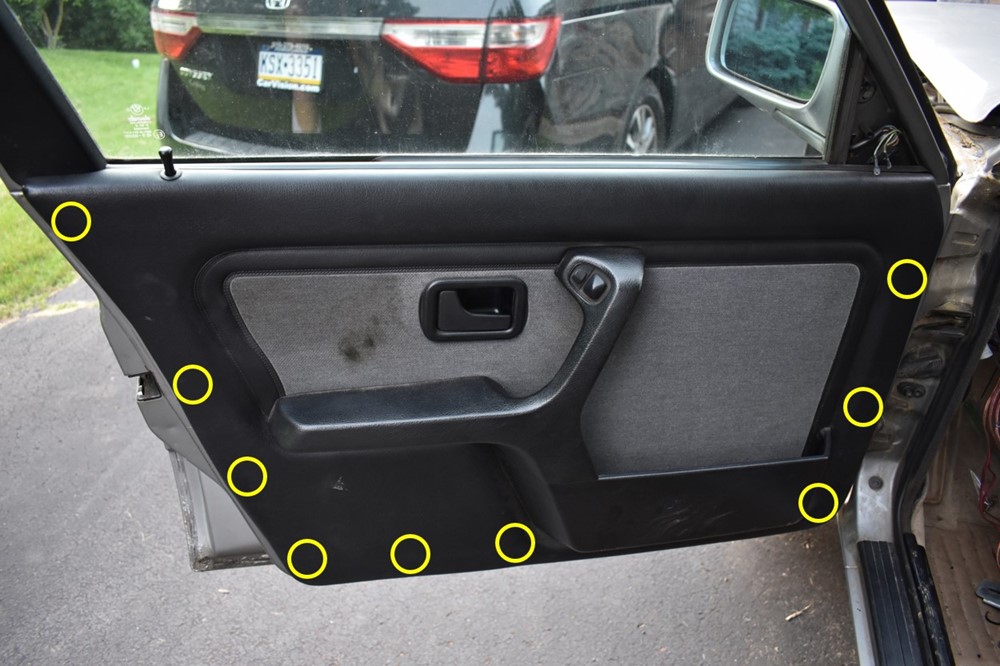
The 9 trim clips are located approximately as shown below.
-
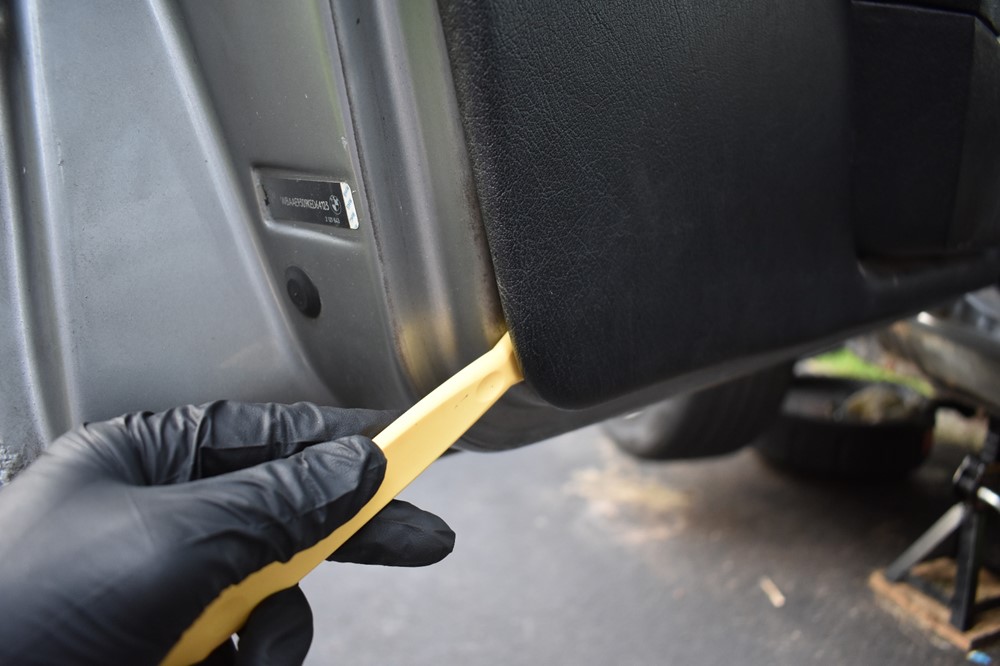
Carefully slide the trim removal tool behind the panel, keeping it as close to the metal skin of the door as possible. You want to get under the clip, not between the clip and the door panel.
-
Gently (!) pry the end of the trim removal tool out away from the door. If it doesn’t feel like you’re pulling on the plastic clip (i.e. it feels soft or like It’s giving too easily), stop immediately and reposition the tool. You can usually peek in behind the panel and see where the tool is if you’re careful. Once you’ve got the tool in the right spot, pry outwards until the clip pops.
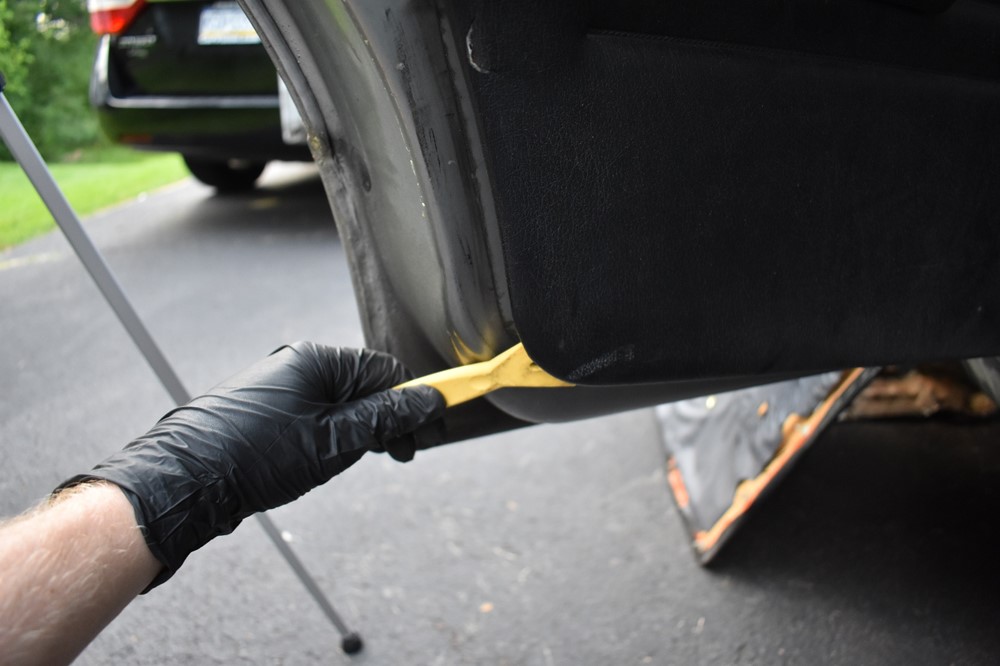
- Repeat steps 10 and 11 until you’ve removed all 9 clips. When they’re all removed, you should be able to easily swing the bottom of the panel away from the door.
-
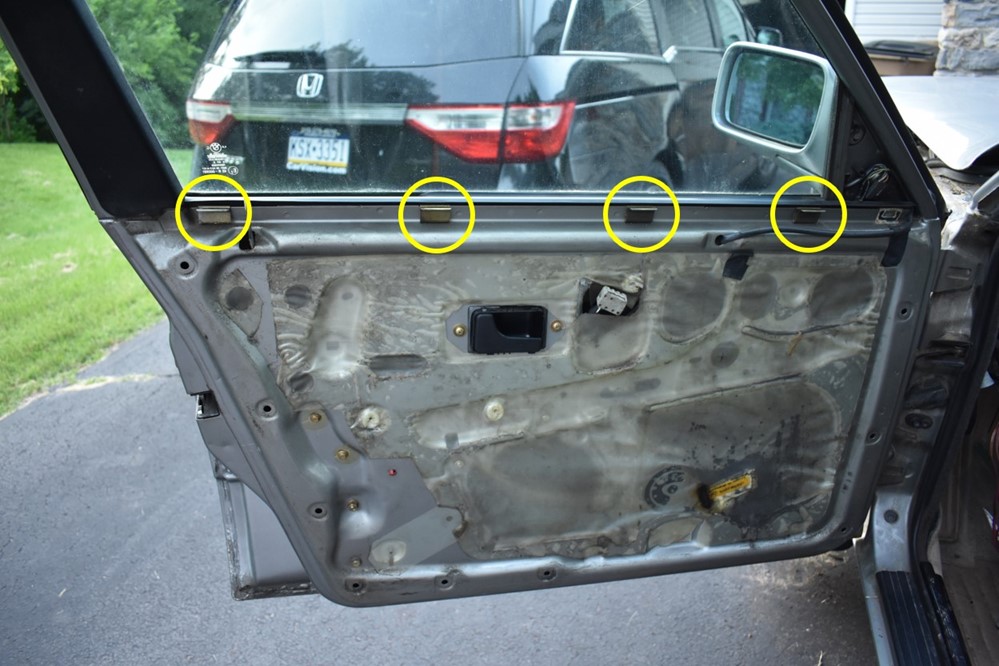
The only thing holding the door in place now are 4 clips across the top of the door. Pull the rear-most side of the panel directly upwards; it may take a little force but should pop. Pull the front of the panel upwards to pop the last clip, and the panel should come free. (Forgive the pic of the rear door panel, but for this step they both work the same way.)

-
With the panel free, you can flip it over and see the exact locations of the clips.
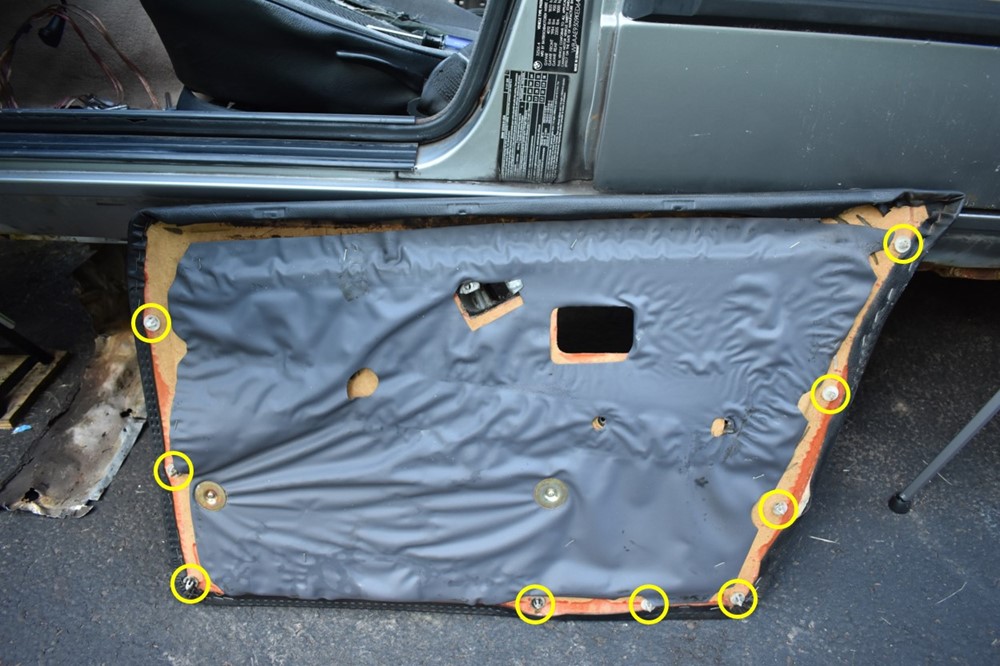
- Most of the time when you pull the clips out, some of them will break. If your clips are original, they are probably the two-part clips (PNs 51411922137 and 51411922138). If you want to stay original, you can replace them with these part numbers. To save a few dollars and ease assembly, the one-piece clips work just fine (PN 51411870718). Whichever part number you choose, replace any broken clips on the panels. Even better, replace them all since any that aren’t broken are still 30-year-old, brittle plastic.
-
Assembly is truly the reverse of disassembly in this case. Hang the panel on the top of the door, making sure the edge is sitting in the tops of the 4 clips at the top of the door. Also make sure the door lock is in the hole in the door panel (the thing you want is to punch the door lock through your door panel so close to the end!)

-
If your car is equipped with power mirrors, pull the plug through the hole in the door panel.
-
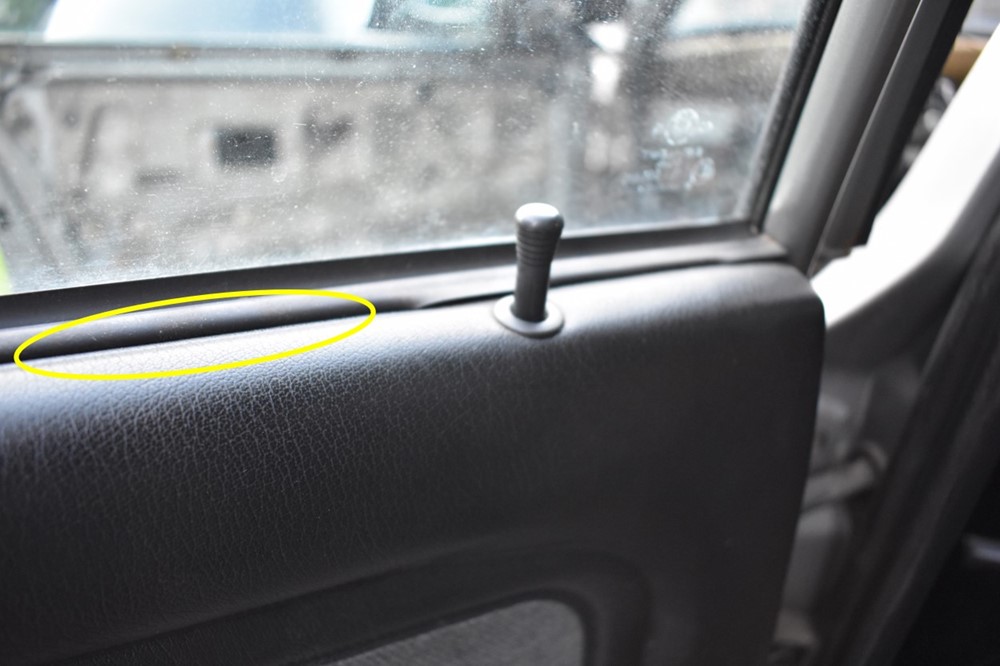
Push the panel down so that it snaps into the clips at the top of the door. If needed, run your trim tool under the rubber lip at the top of the door, to prevent the lip from tucking behind the door panel, as shown.
-
Go around the panel and push the trim clips into the door until they snap into place. Do your best to push directly on the clip itself, not just the door panel. As a reminder, here are the clip locations.

- Reinstall the 3 screws (2 under the armrest, 1 inside the top of the handle, where the mirror controls are).
-
Plug the mirror controls in their socket and press back into the handle.

-
Reinstall the door handle trim ring. With the “hooks” facing towards the front the car, place the trim ring around the outside of the handle and slightly rearward of its final position. Push it in and forwards, it should snap cleanly into place. Sometimes this takes a little wiggling and pulling the handle open.

- Screw the door lock knob back onto the post, and you’re done!
Sign up to never miss a new How-To from Classic Bimmer Bits!