
E30 Fuel Hose Replacement (Engine Bay)
How-To Credit
This how-to is a Classic Bimmer Bits original, with much credit due to the many members of the community who have helped us learn along the way!
Parts
- ~5m of 8mmx13mm fuel injection hose (minimum 100 psi working pressure) (16121180409)
- (6) 13mm fuel injection hose clamps (07129952104, or these as an alternative)
(We make a commission for parts purchased through the Amazon links above, which helps keep this site hosted and free. We only link to OEM or OE parts, the same quality parts that we use on our cars. However, you should always look around to see which site has the best prices.)
Tools
- Flathead screwdriver OR socket wrench with socket for hose clamps
- Razor blade
- Drain pan (like this)
- Needle nose pliers (like these)
Torque Specs (ft-lbs):
- All hose clamps should be tight, but not so tight as to pinch the hose. A screw driver with a socket end is the best way in our opinion to feel how tight is tight enough.
Prodedure
- If your fuel hoses are original, there’s a good chance they’re fairly dry-rotted by now. Dry-rotted fuel lines are an invitation for leaks, which can be very dangerous in the engine bay. There was also a recall for engine bay fuel hoses for some E30’s, which hasn’t been completed on many non-dealer-serviced cars. All in all, if you don’t know how old your hoses are, replacing them is cheap and fairly easy, we’ll show you how to do it here.
- The closer your gas tank is to empty, the easier this job will be. If you can time this job between fill ups, you’ll have to deal with much less fuel wanting to spew out of the hoses when you disconnect them.
- While you don’t have to, it’s much easier to get to the hoses if you jack up the front of the car and set it on jack stands.
-
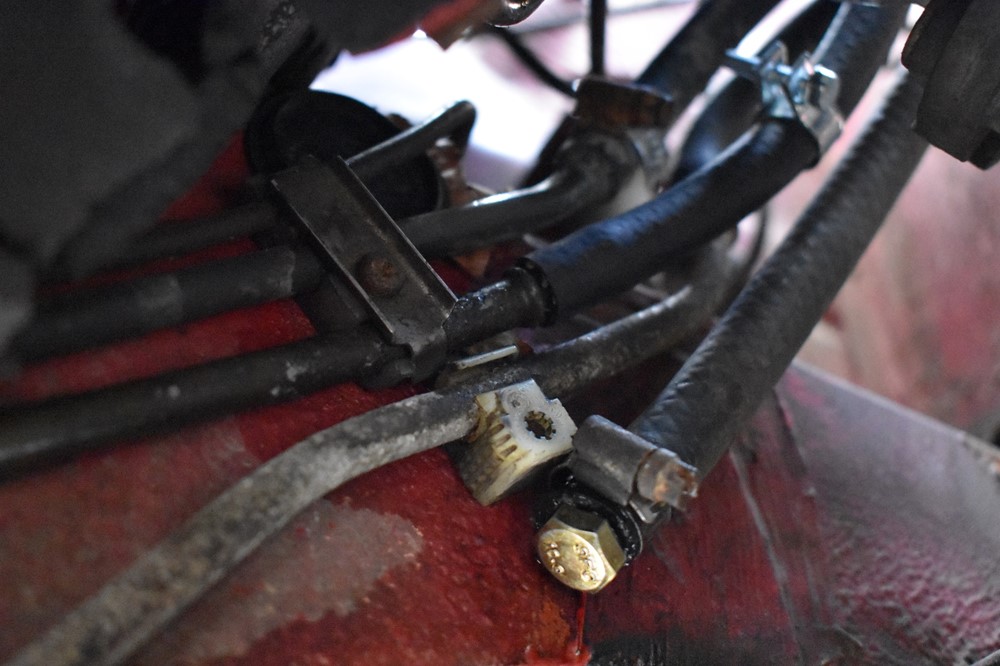
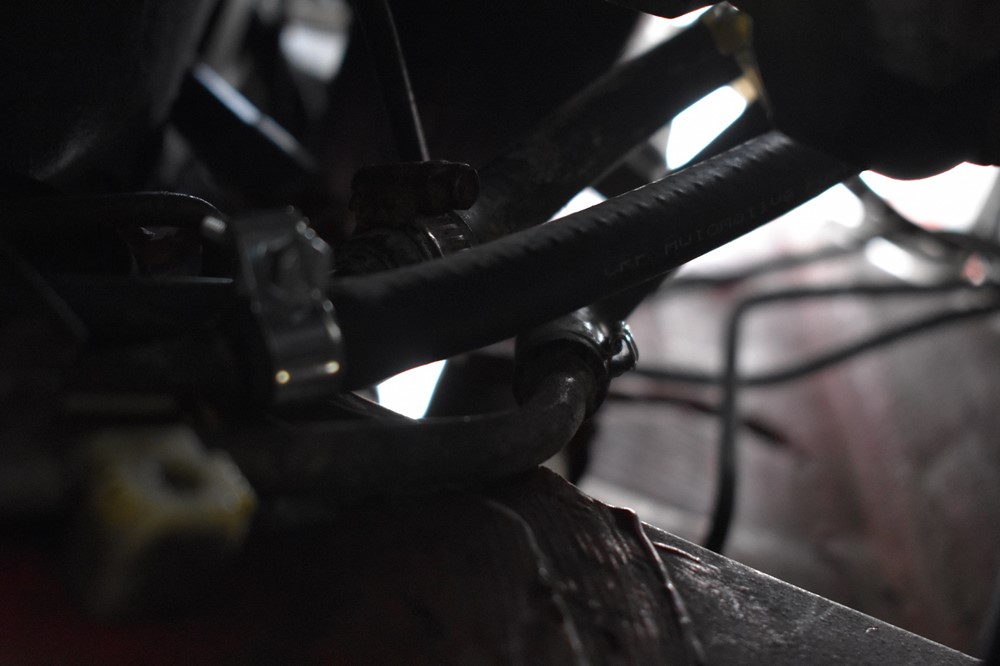
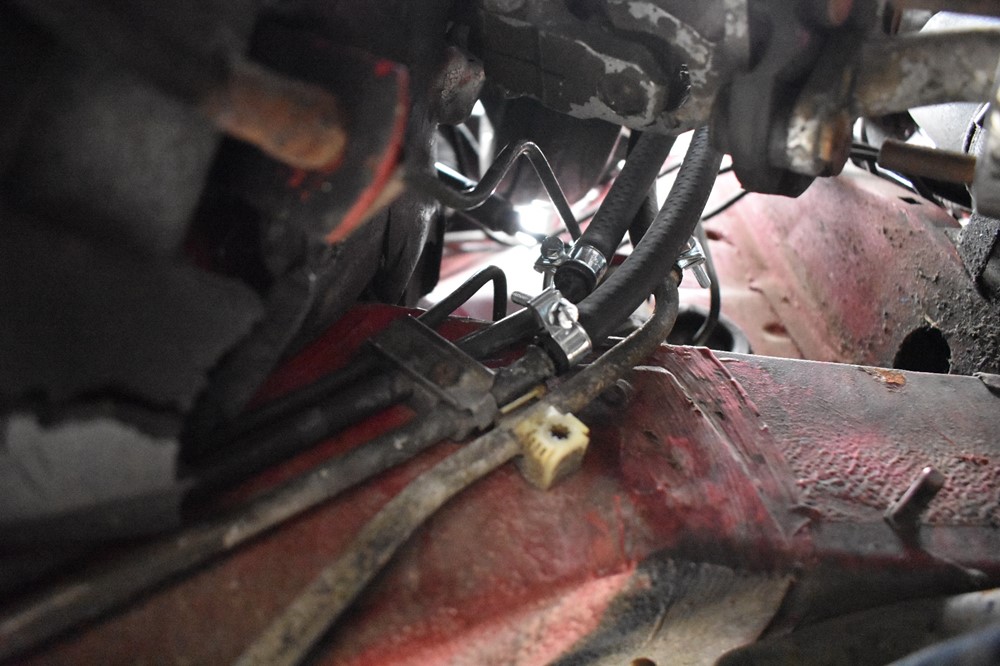
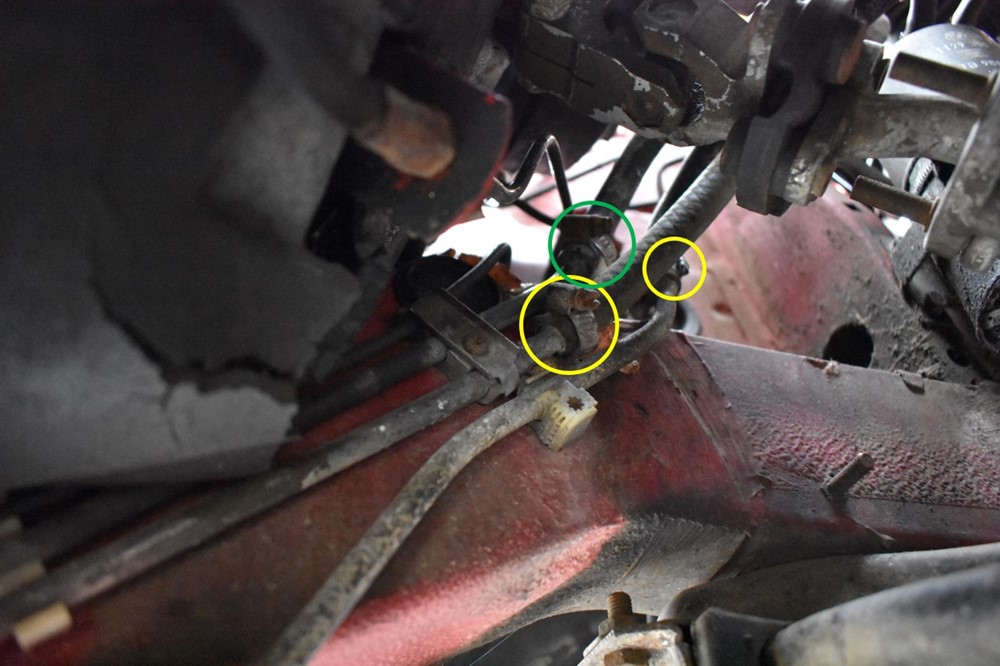
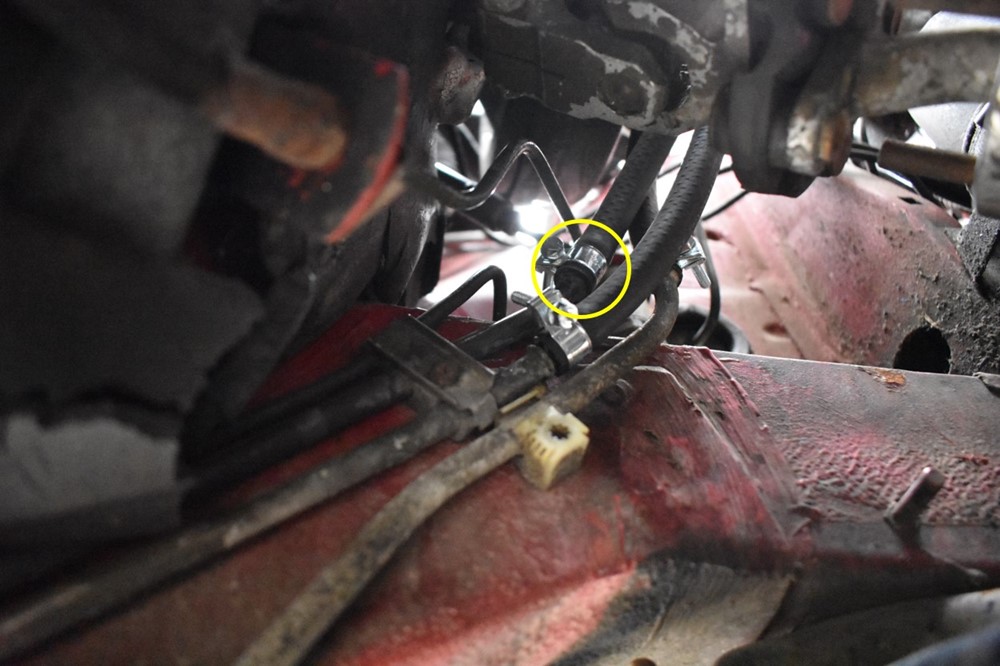
Here are the lower connections for the 3 hoses you’re replacing, their connections to the hard lines are on the inside of the driver-side frame rail, just in front of the firewall. The lower two hoses (yellow) are the supply and return lines. The line above them (green) runs to the charcoal canister. We’ll be replacing all three.

-
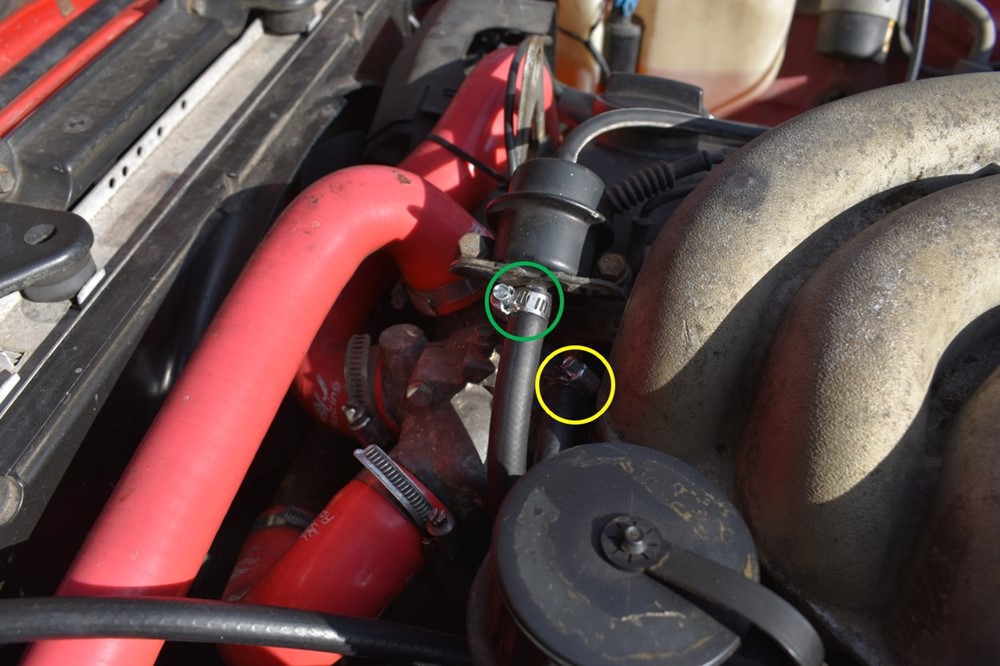
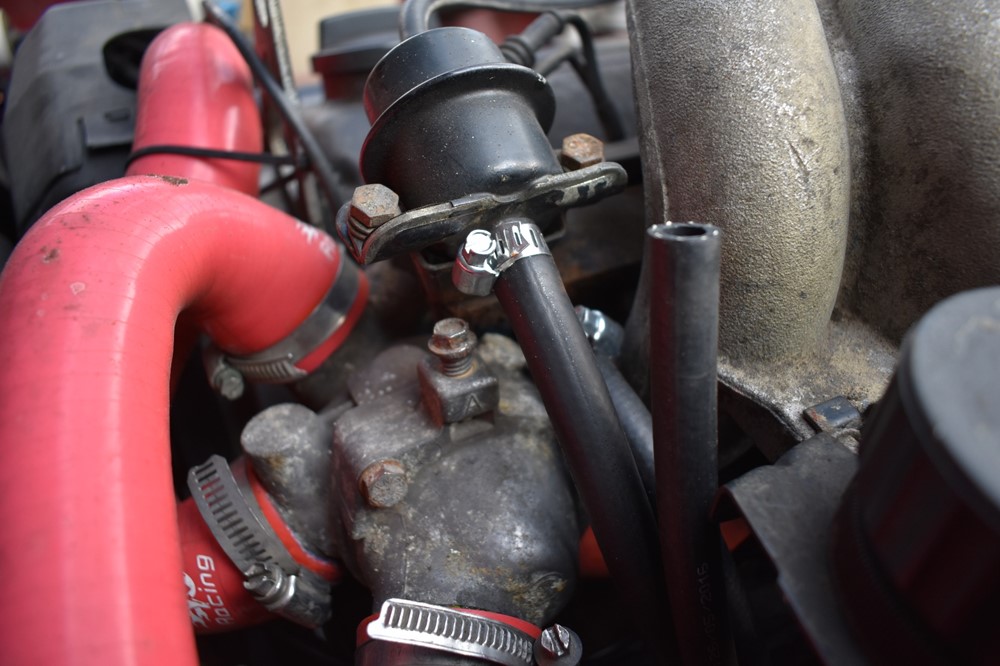
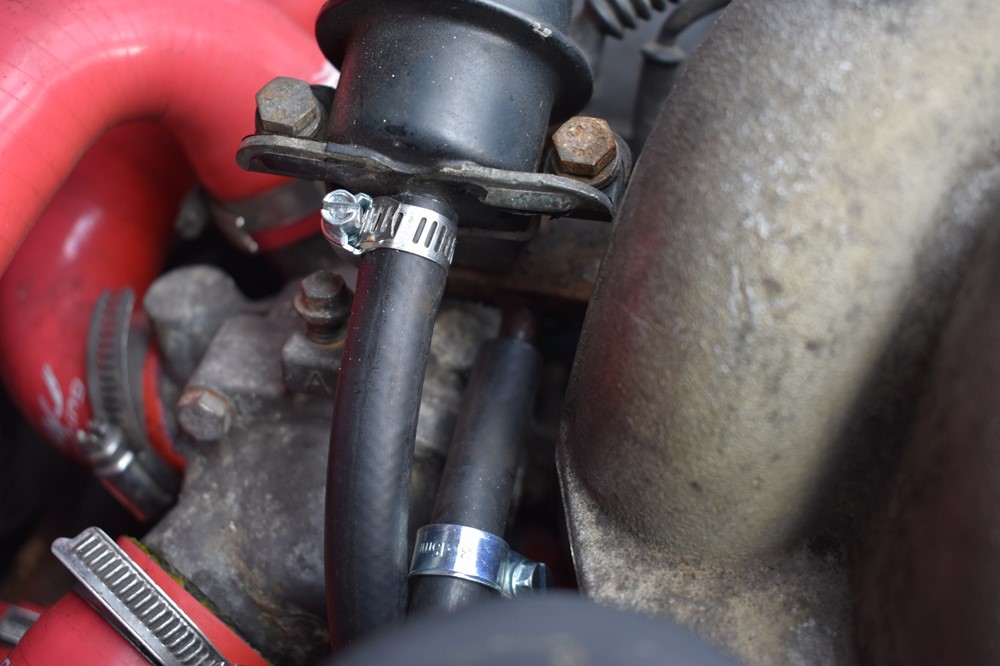
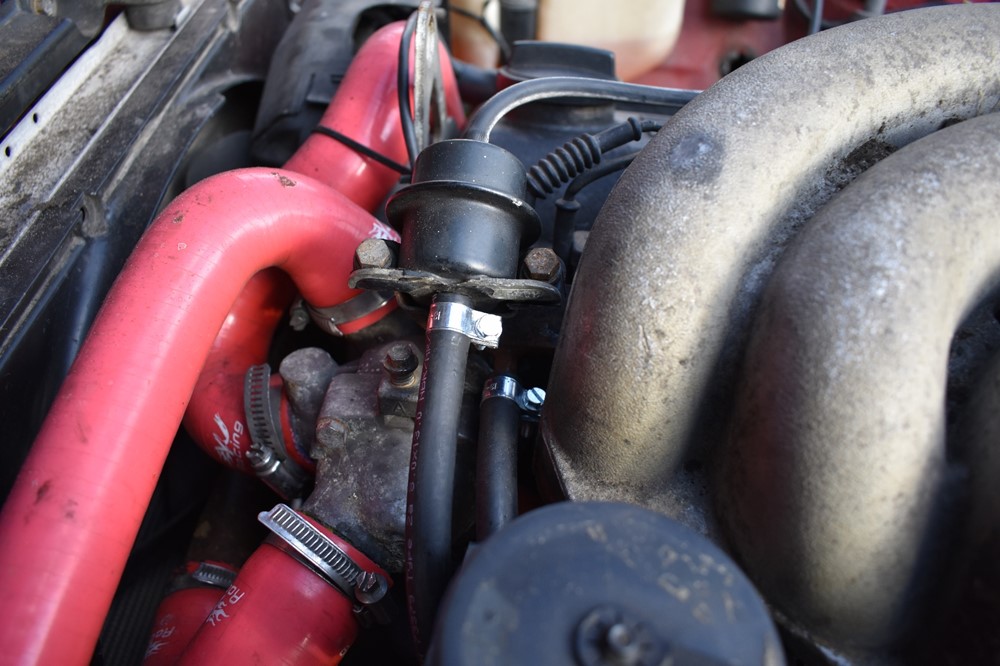
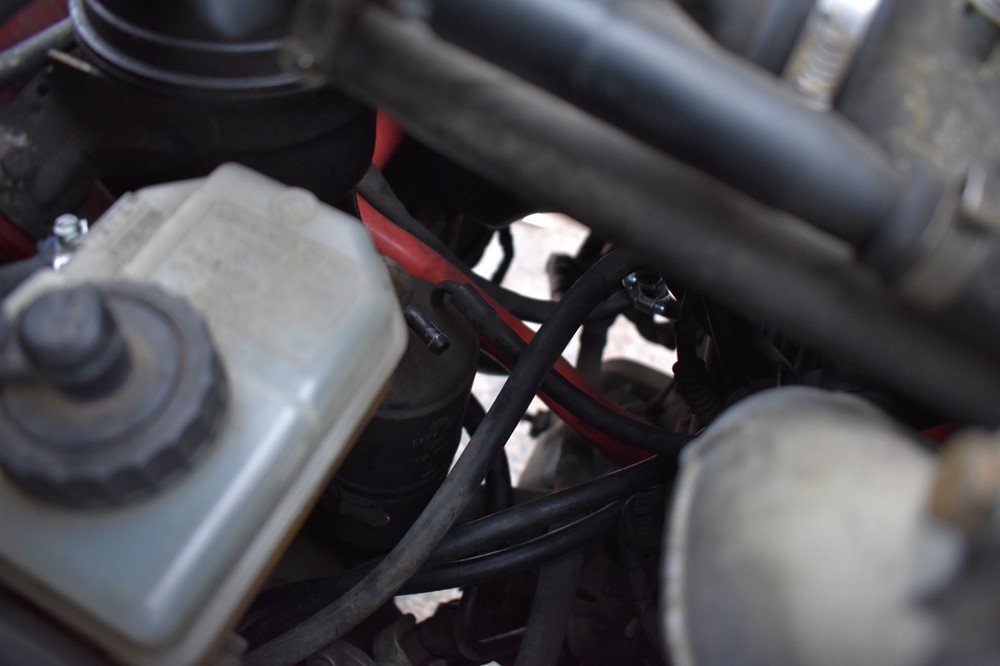
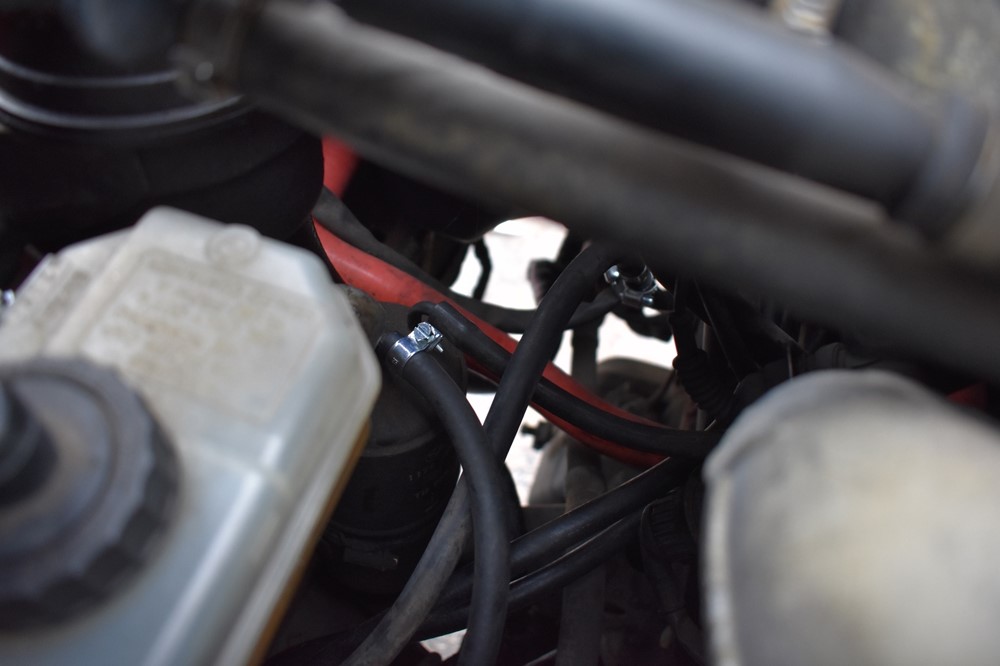
Here are the upper connections, the supply line (yellow), and the return line (green) attached to the pressure regulator.
-
We’ll start at the top. Unroll your length of fuel hose, and run a line from the top connections down to the bottom, following the path of the existing lines.
- Move back to the bottom connections. We’ll start with the supply line. When you disconnect the line at the bottom, there will be two ways that gas wants to leak: first, from the gas left in the fuel rail, and second, from the fuel tank. The rail will leak a little fuel, but the tank is much more significant. That’s why you ran a hose down from the top of the engine bay to start; you want it ready to connect to the hard line immediately.
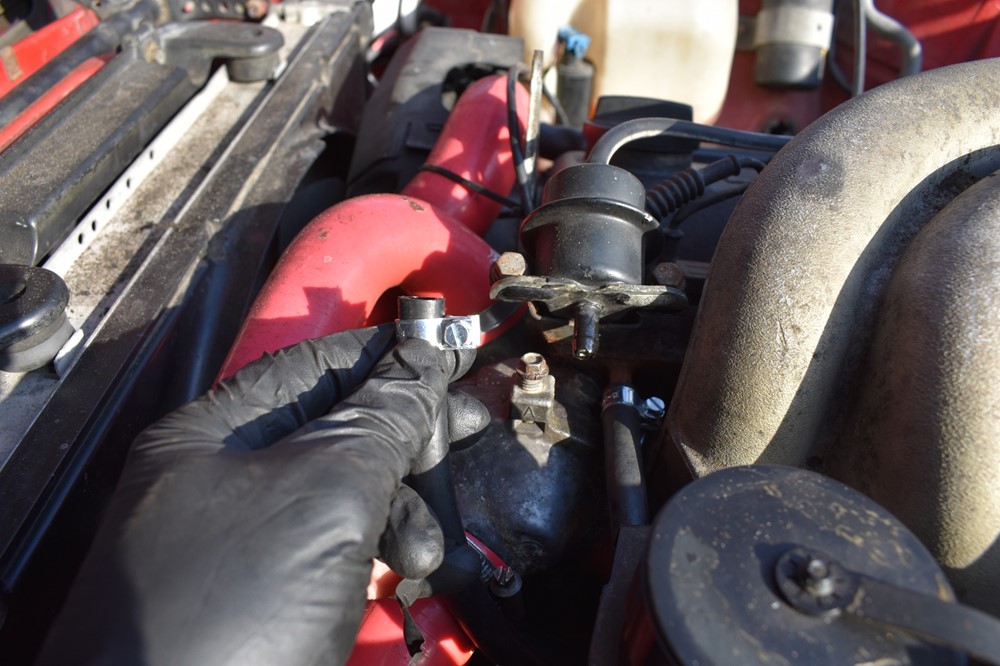
- Slide a hose clamp onto the end of the fuel line, about 2″ up from the end. Tighten it just enough to keep it from sliding down the line.
- At the bottom connections, loosen the hose clamp from the middle hose. Depending on the originality of your hoses, the clamp may be a crimped band clamp. If so, you’ll need to use a pair of needle nose pliers to pop the clamp free. You may start to leak some fuel at this point, so have a rag ready and slide the drain pan underneath. Loosen the clamp enough that you can push it up the hose to clear the hard line.
-
Grab the fuel hose, and firmly pull it off of the hard line. If it’s original, it might be really stuck, in which case you can carefully slice it along its length to free it. As soon as the line comes off, push the end of the new fuel hose onto the hard line until it butts up against the ring on the line. Let the hose drain into the pan. If you’re quick, you can also try sticking an M8 bolt into the end of the hose (as pictured here).
-
Loosen the hose clamp on the new line and slide it down into place. You want a small space between the end of the hose and the clamp, but you want the clamp fully over the hard line. Tighten it.
-
Move to the top connections. Pull any extra slack out of the new fuel line, so that it follows the path of the existing fuel lines nicely. Line the new hose up with where the old line is still connected to the fuel rail, then use the razor blade to cut the hose to the correct length.
-
Place a new hose clamp over the end of the new hose.

- Loosen the hose clamp on the old hose (the lower one), and pull the clamp back to clear the hose clamp.
-
Pull the old hose off of the fuel rail connection. As with the bottom, if it’s really stuck, you can slice it with a razor blade. Quickly slide the end of the new hose over the connection to avoid spilling more fuel.

- Slide the hose clamp over the connection and tighten it. As with the bottom, you want the clamp fully over the hard line connection, but with a little space before the end of the hose.
- Now you’ll need to run the return line. Run another length of hose down, following the path of the existing hoses as before.
-
Repeat steps 8-16 for the return line.
-
Pull the old supply and return lines out of the engine bay, from the top. You may need to snip a zip tie or two depending on how the old lines are retained in the engine bay. In our case, you can see the emergency roadside repair we made with some brass hose connectors.
- Lastly, we need to replace the line to the charcoal canister. The charcoal canister allows fuel vapors to condense and be fed back into the throttle body, reducing emissions. There shouldn’t be any fuel in the rubber line, so no need to worry about leaks for this one.
-
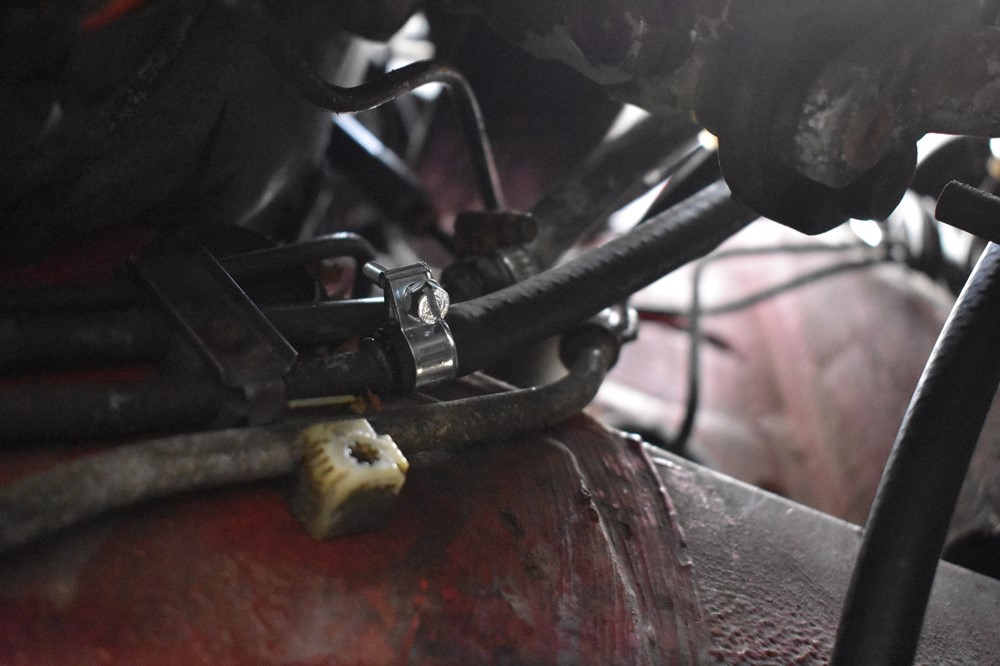
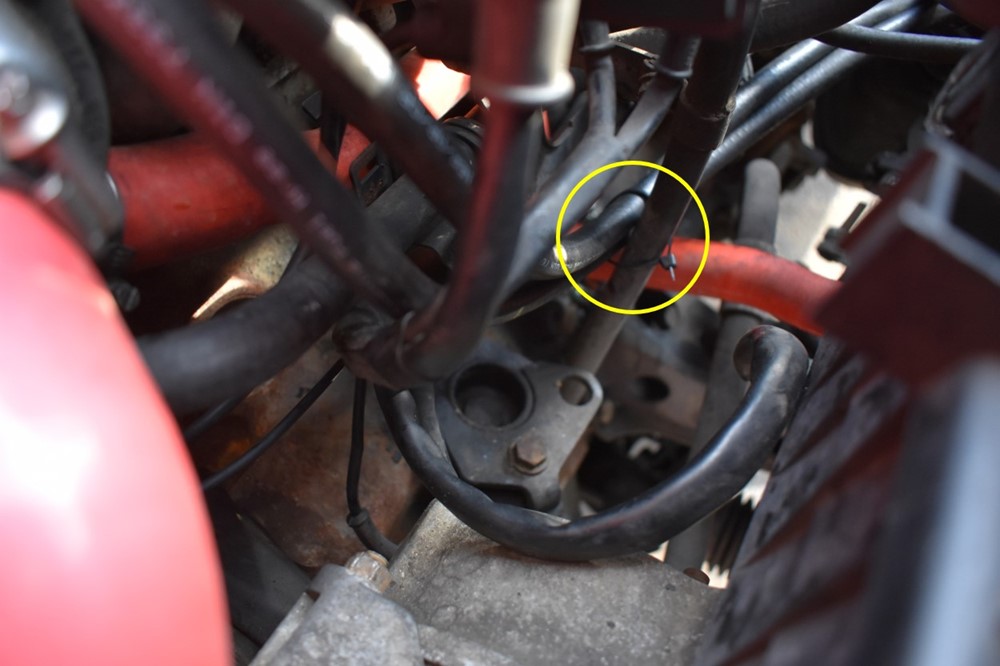
From underneath the car, remove the hose clamp from the bottom end of the hose, and pull the hose off the hard line (it’s the green circled one below). Again, cut it with a razor blade if it’s really stuck, just be very careful not to nick the new supply and return lines you just installed.
-
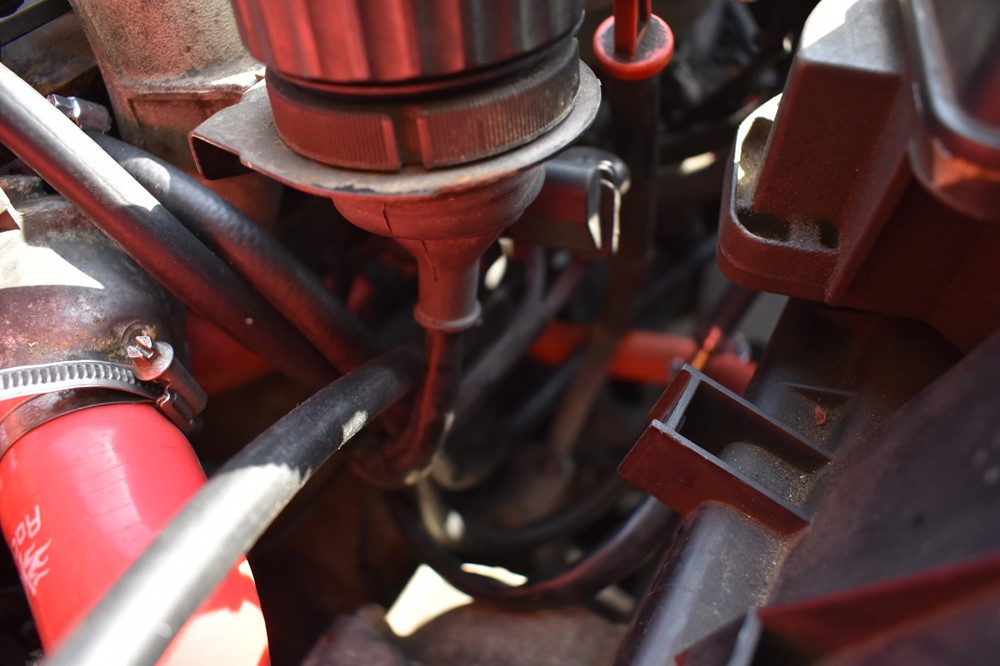
Move above the car. The charcoal canister is located underneath the brake fluid reservoir and power steering pump reservoir. You can see it best standing right in front of the driver side mirror and looking down and forward into the engine bay. If the hose is original, it will be secured with a crimped band clamp. Remove it using a pair of needle nose pliers to twist it and pop the clamp open.

-
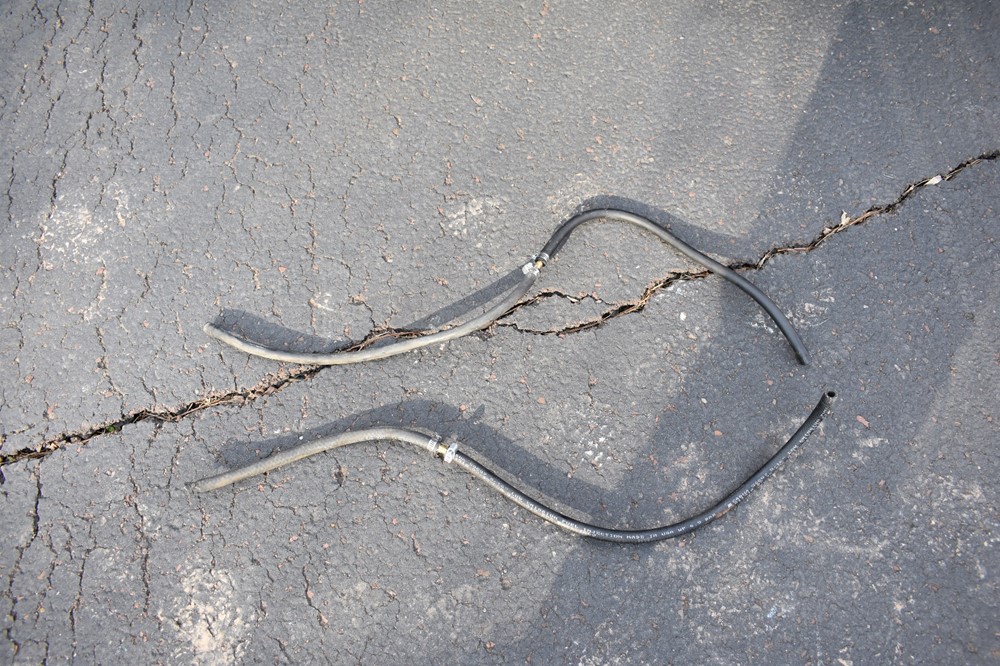
Pull the hose off the nipple on the canister and pull the hose out of the car. Lay the old hose out along your new hose, and cut a piece to the same length.
- Slide a hose clamp over the end of the hose, about 2″, and snug it up just enough to keep it from falling off the hose.
-
Slide the end of the hose over the nipple on the canister. Push it on until it runs into the bend in the hardline. Loosen the hose clamp, slide it near to the end of the hose (so that it’s definitely behind the nipple) and tighten it.
- Move back under the car. Slide a hose clamp over the end of the hose, and push the hose onto the end of the hard line.
-
Slide the hose clamp over the nipple near the end of the hose, and tighten.
-
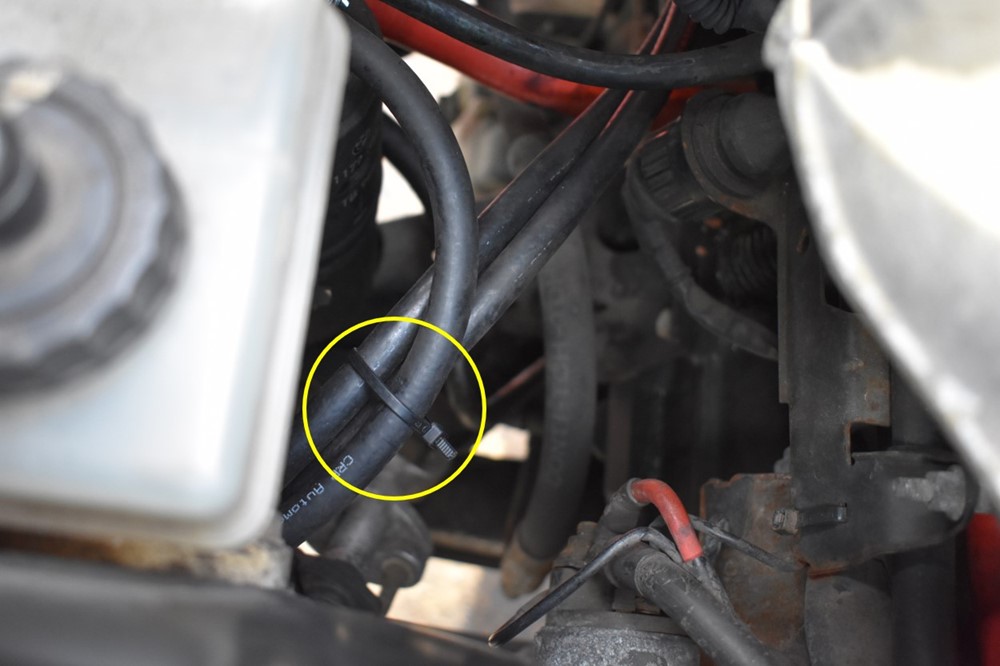
It’s best to add zip ties to make sure the lines stay where you want them. You can place one around the supply and return lines, and the pipe for the oil dipstick. Snug it up just enough to keep the line in place, you don’t want it to actually compress the hoses.
-
Add another zip tie around the return, supply, and charcoal canister hoses right before they separate to go their separate ways.
- Start the car and inspect all of the hose ends for leaking. Let the car run for a couple minutes. If you see any leaks, turn the car off and tighten up the hose clamps. Wipe off any leaked fuel, start the car, and re-inspect.
- Jack the car back up, remove the jack stands, and lower the car. You’re done!
Sign up to never miss a new How-To from Classic Bimmer Bits!