
E30 Hood Strut Replacement
How-To Credit
This how-to is a Classic Bimmer Bits original, with much credit due to the many members of the community who have helped us learn along the way!
Parts
- Hood Strut (51231906286)
- (2) Strut Clips (51231943279)
Tools
- Flathead Screwdriver
Torque Specs (ft-lbs):
- N/A
Prodedure
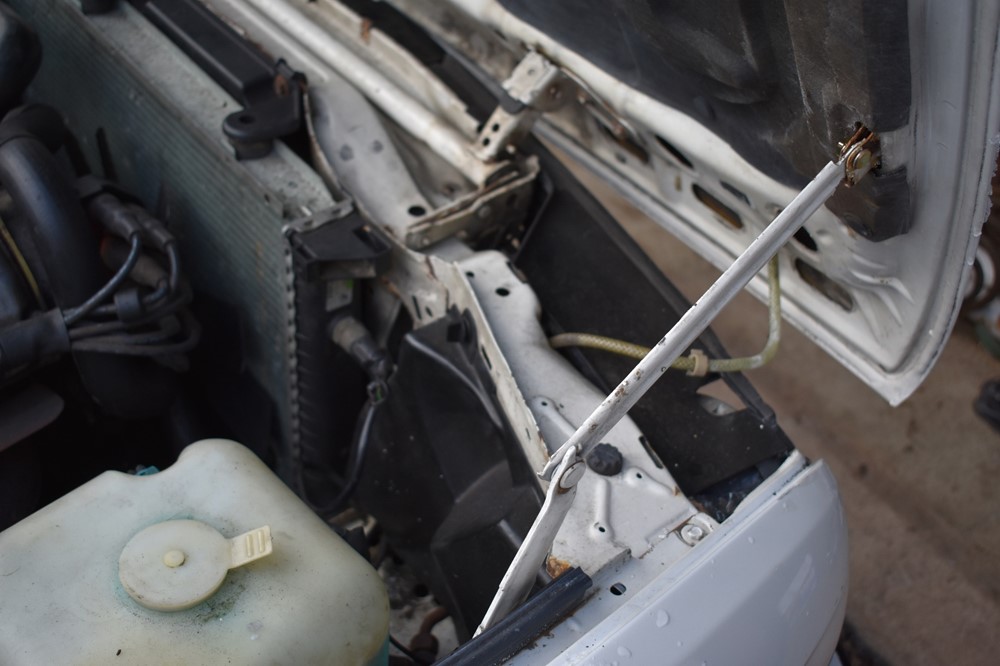
- Hood struts, like most hydraulic cylinders, eventually go bad. If your hood won’t stay up anymore thanks to a bad strut, follow the steps below to replace it.
-
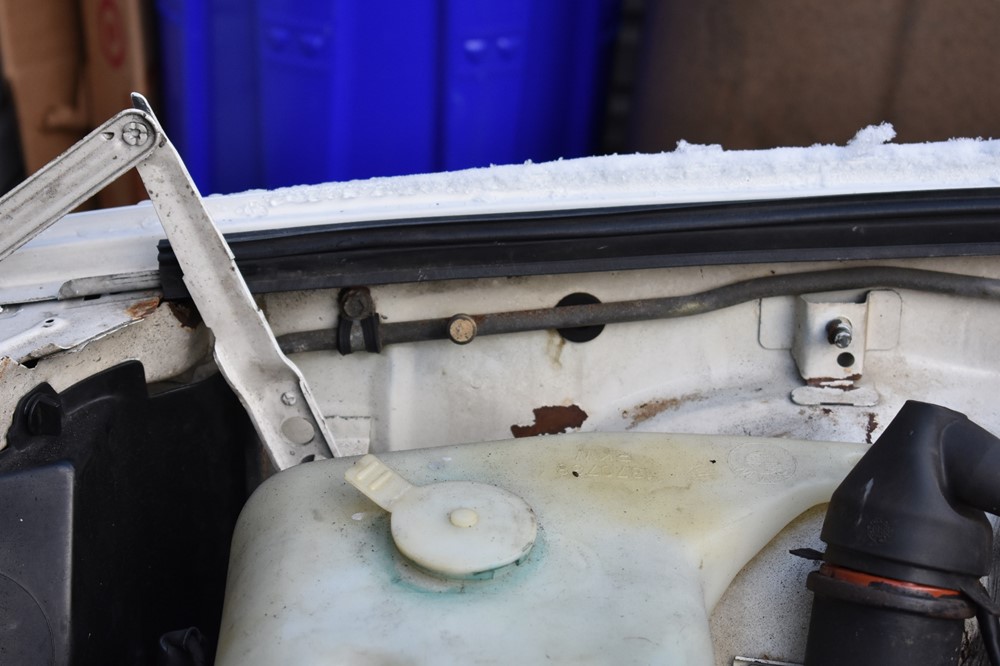
Open the hood. This job is a little easier if you have a 2×4 handy to prop the hood open. If not, you can get away without it if you’re willing to support the hood with your shoulder while you replace the strut.
-
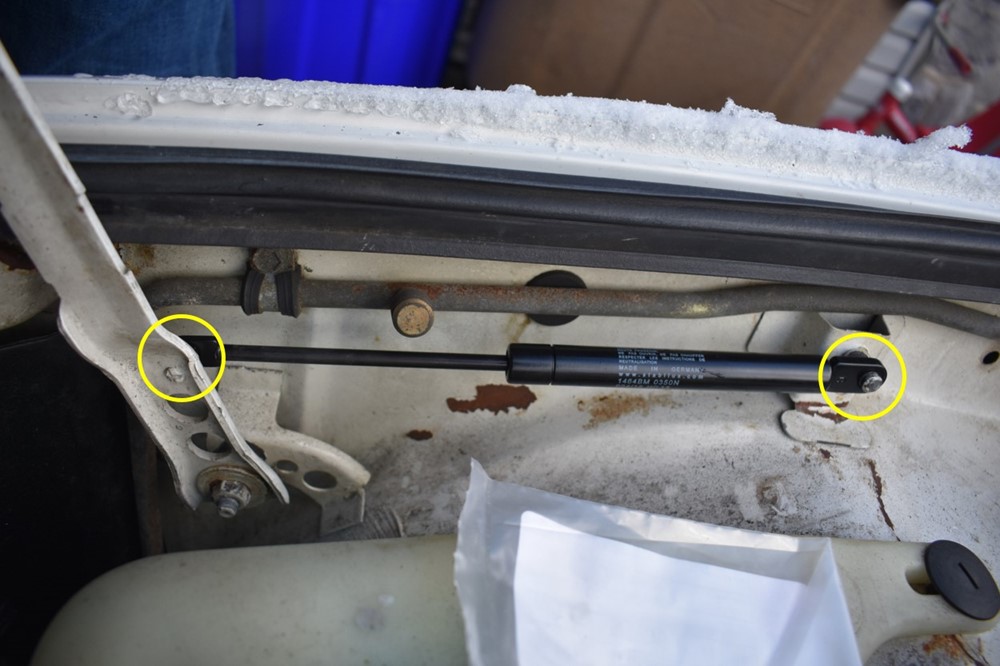
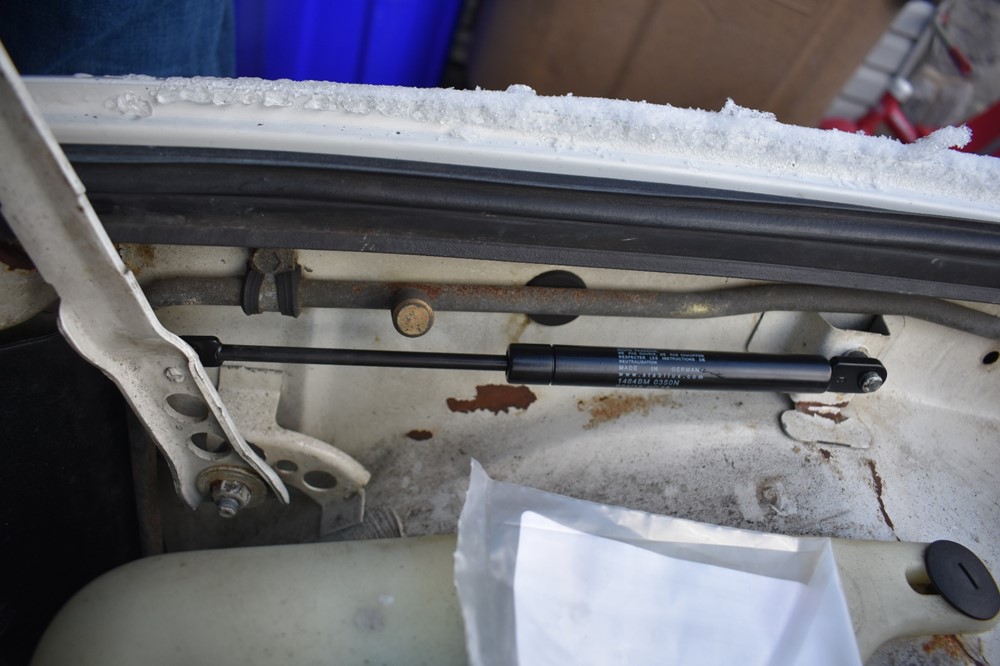
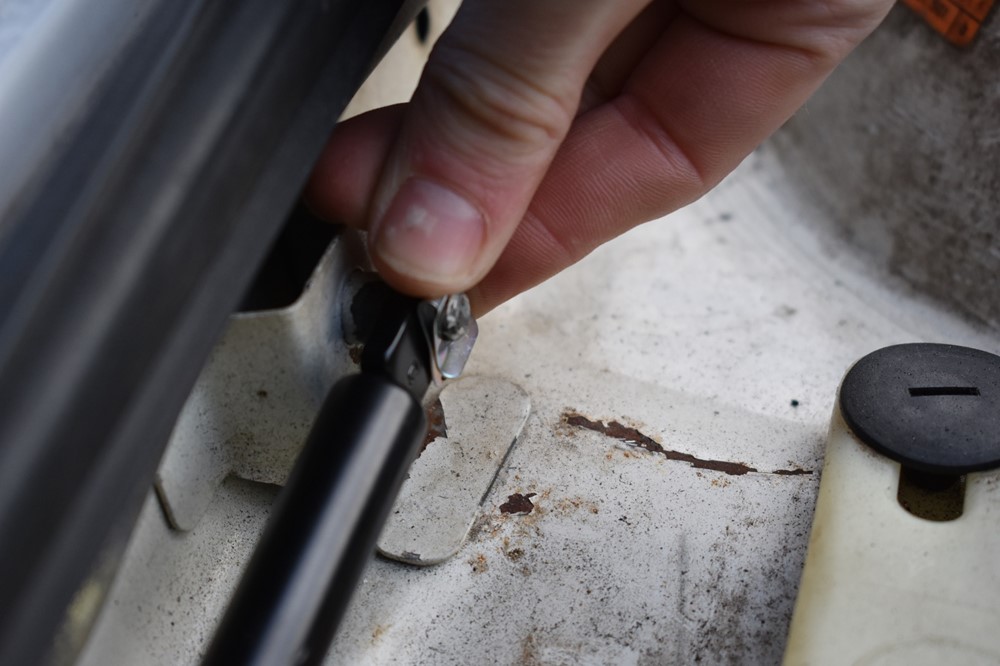
There are two clips that hold the strut in place.
-
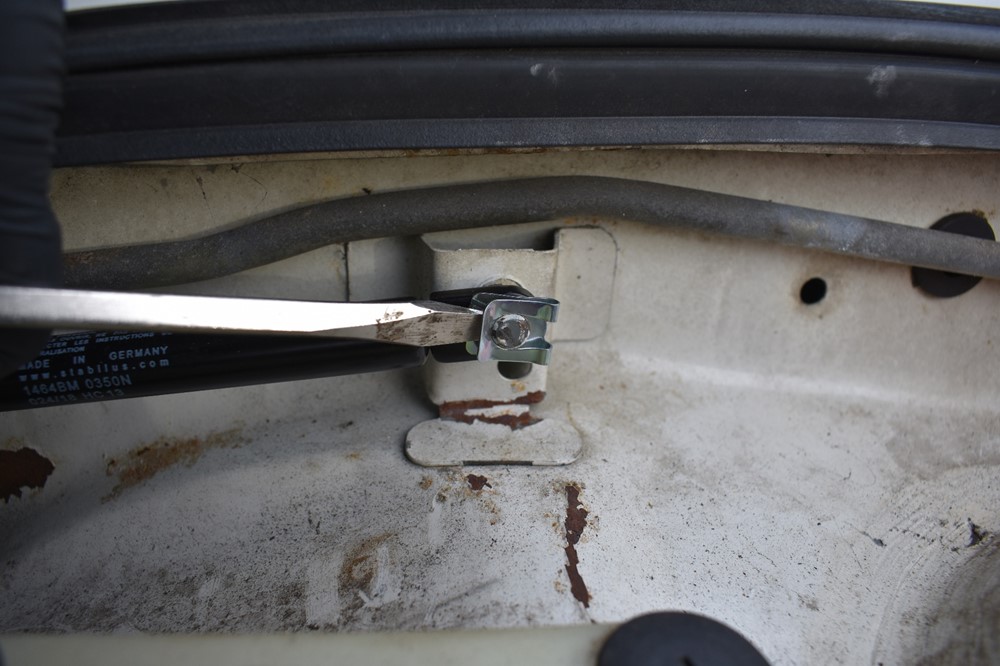
The clips are locked in grooves on the strut studs. Use a flat head screwdriver to flex the open edge of each clip up to clear the post, and push it off of the post.
-
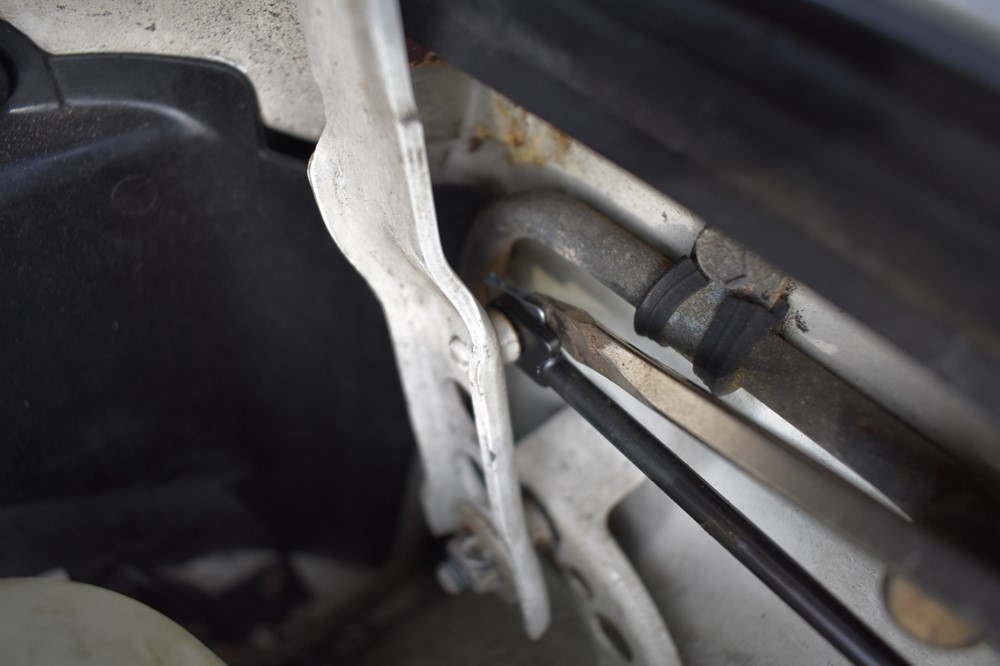
This is where you’ll need to support the hood, so either prop the 2×4 between the inside edge of the fender and the hood, or get ready to support it with your shoulder. Have your new strut within reach. Remove the old strut from the two posts, then slip the new one into place. The large end of the strut goes towards the back of the car.
-
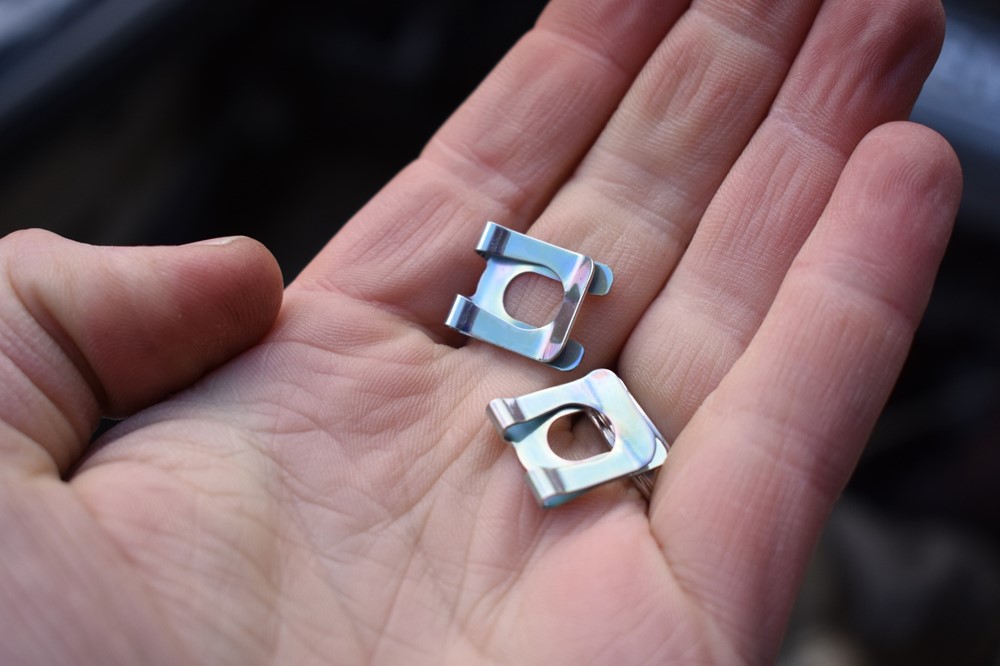
Here’s what the clips look like off the car. The slotted side slides into the groove on the post.
-
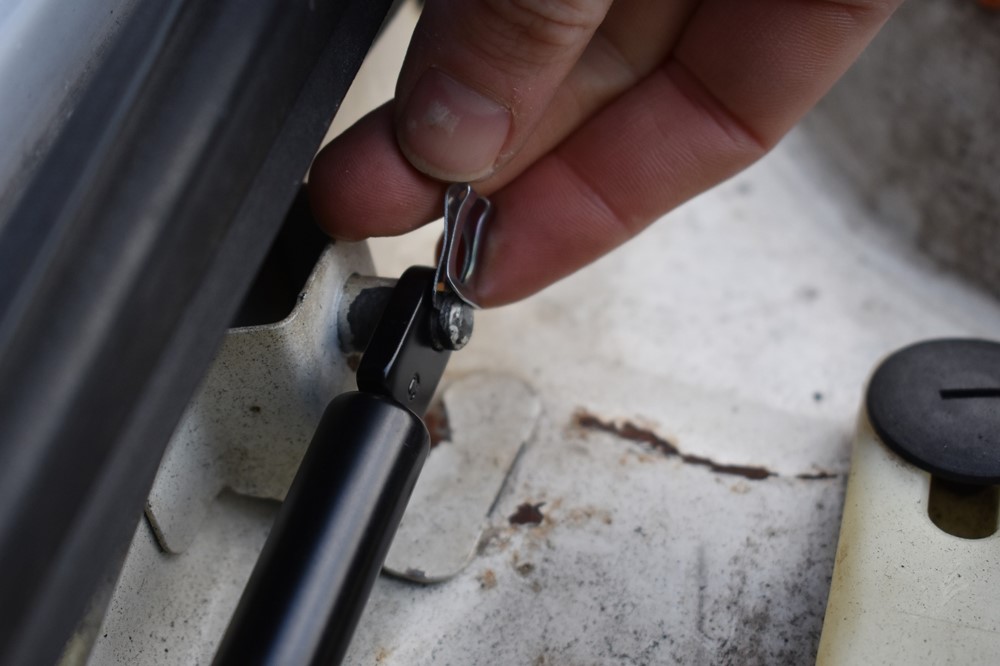
Slide each clip onto the post, making sure it’s catching in the groove on the post, and that the end snaps over the end of the post.
-
Repeat on the other end of the strut.

- That’s it! You can rest your neck from holding up your hood now. One note: if your hood support has a lot of slop in it and the hinge is wobbly, a new strut can tend to bend it inwards when you close the hood. Before you call this job done and quickly close your hood, close it slowly and watch the support. If the movement isn’t smooth and it feels like things are bending, or you can see the support flexing towards the center of the car, you may want to consider replacing it.
Sign up to never miss a new How-To from Classic Bimmer Bits!