
E30 Steering Rack Rebuild
How-To Credit
This how-to is a Classic Bimmer Bits original, with much credit due to the many members of the community who have helped us learn along the way!
Parts
-
Steering Rack Rebuild Kit (CRP-32131132798EC) which includes:
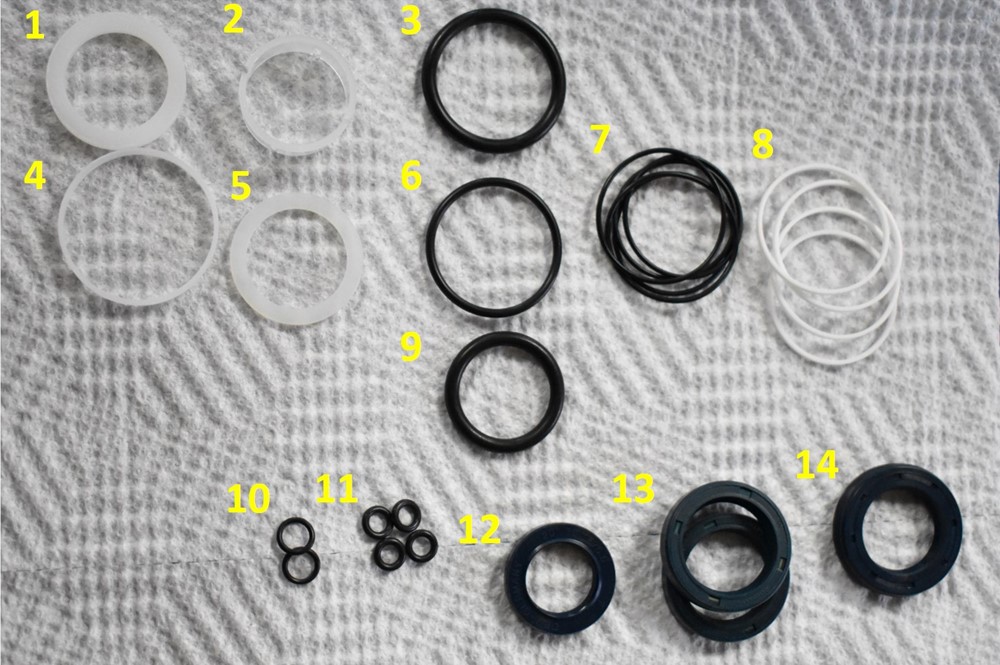
- (1) Internal Rack Guide
- (1) Passenger Rack End Liner
- (1) Passenger Rack End O-ring
- (1) Rod Scraper
- (1) Passenger End Cap Guide
- (1) Upper Pinion Shaft O-ring
- (5) Pinion Shaft and Rod O-rings
- (4) Pinion Shaft Scrapers
- (1) Rack Plunger O-ring
- (2) Vent Hose O-rings
- (4) Oil Hard Line O-rings
- (1) Upper Pinion Shaft Seal
- (2) Passenger End Cap & Internal Rack Seals
- (1) Lower Pinion Shaft Seal
- High Quality Wheel Bearing Grease
Tools
- 13mm socket or wrench
- 15mm socket
- Internal circlip pliers (the kind that close when you squeeze, not open)
- ~19mm deep socket (any long socket that’s just slightly smaller in diameter than the toothed rod inside the rack)
- 22mm socket or wrench
- ~23mm socket (any socket that’s just under 35mm outer diameter, to seat the 35mm seal (#13 in the kit)
- Medium size punch (or ¼” socket extension in a pinch)
- Flathead screwdriver
- 12mm flare nut wrench
- O-ring pick
- Long (~10″ extension for the 19mm socket)
Torque Specs (ft-lbs):
- Pinion Shaft Nut: We haven’t been able to track down a torque spec for this yet, so guten-tight it is. Make a note of how much muscle it took to break it loose, and try to use a similar amount to tighten it.
- Pinion Shaft Nut Cover: guten-tight
Procedure
This job is no joke; you’re going to need to set aside several hours for this. But it’s completely do-able if you’ve got a little patience. If your rack is leaking and has lost its “power” functionality, we’ll show how to get it done!
Disassembly
-
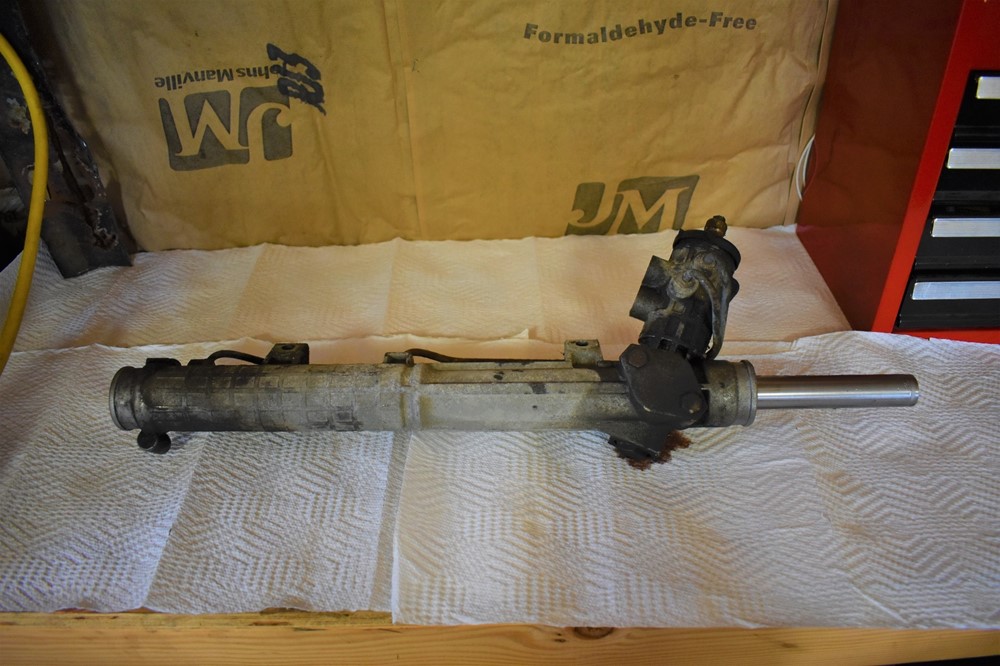
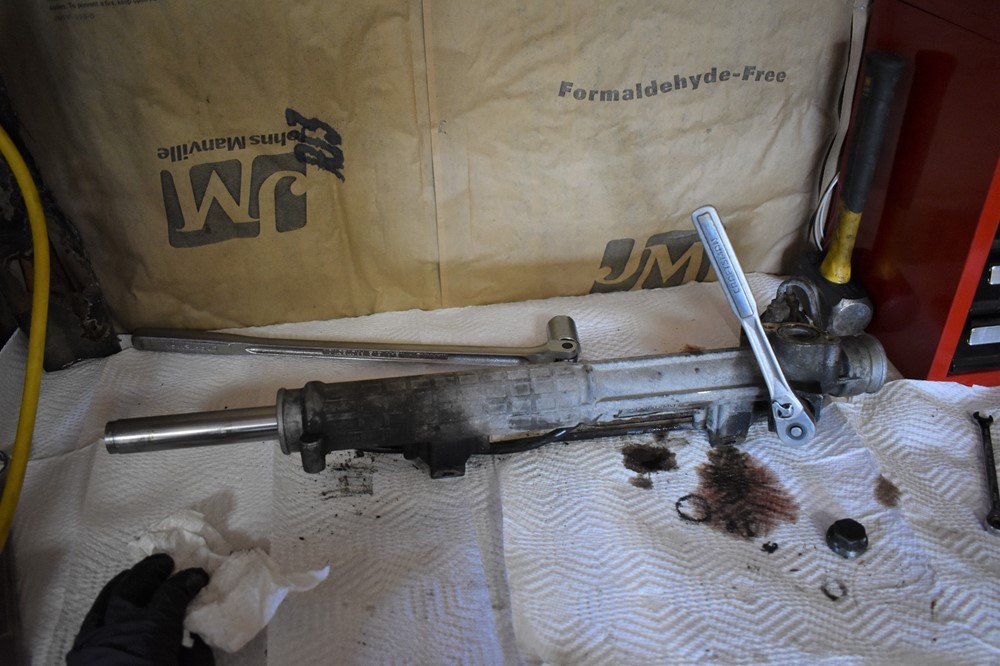
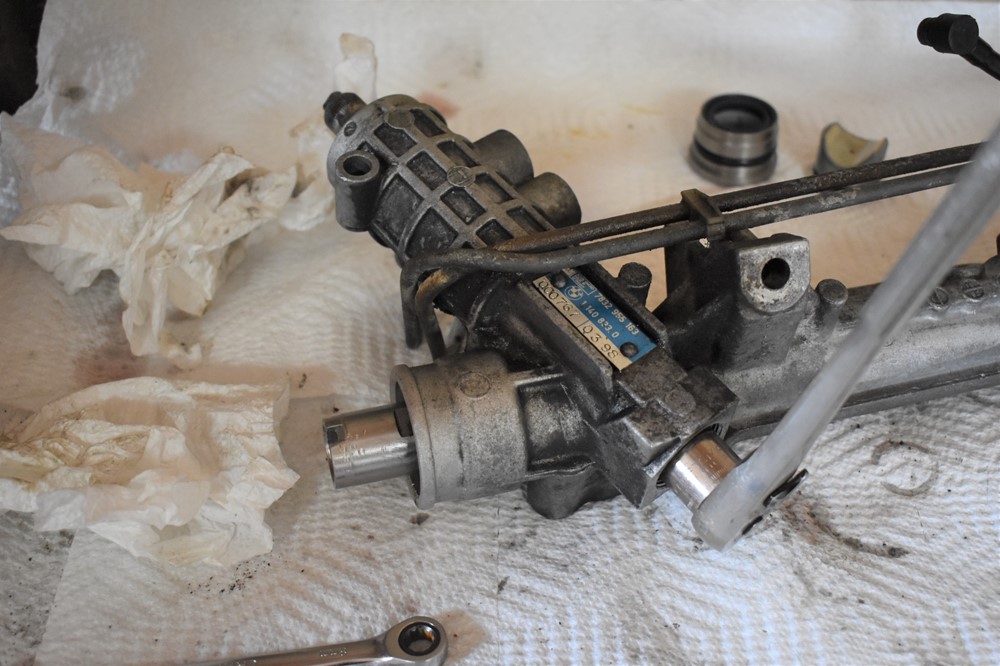
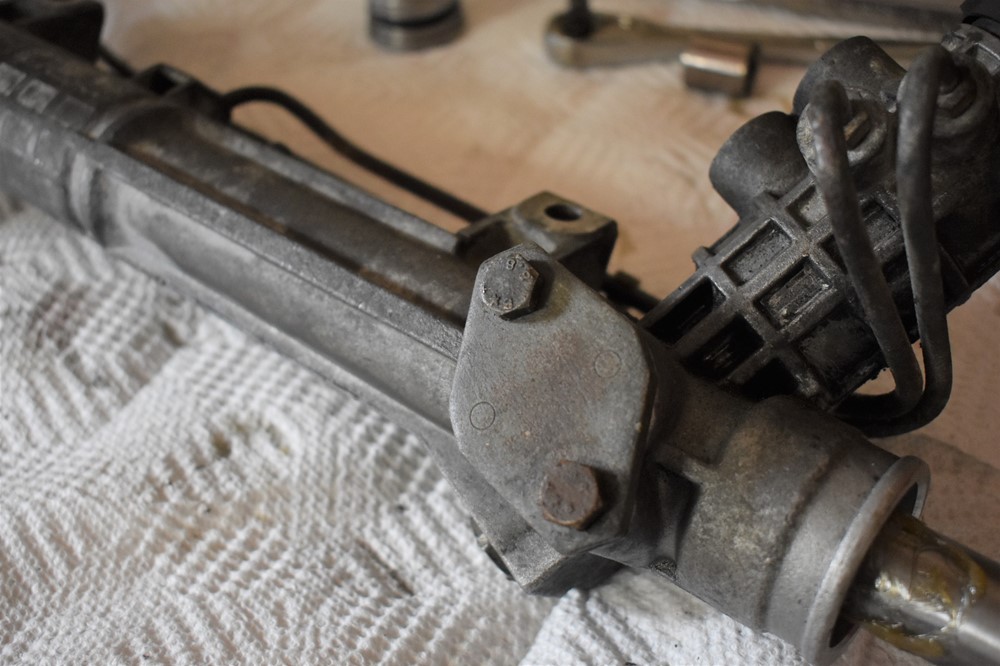
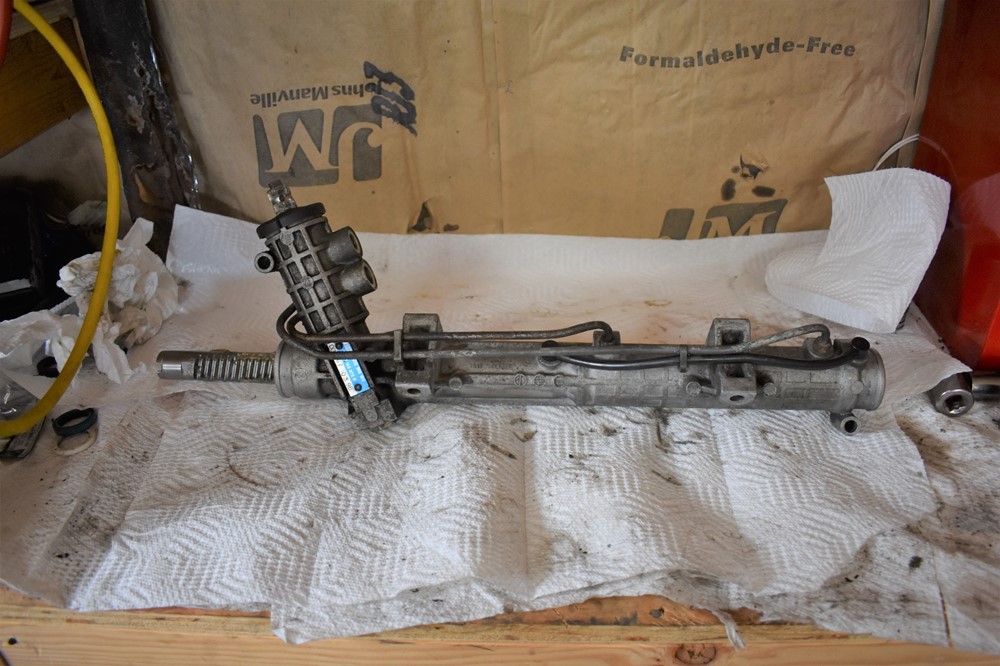
Start by removing the rack from the car, including removing the tie rods and boots.
-
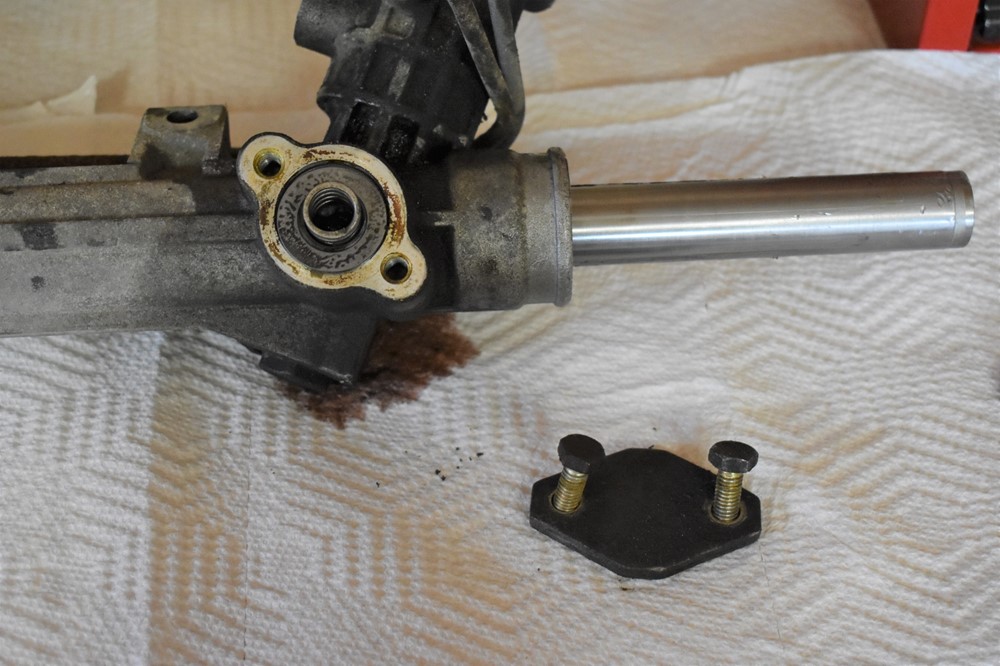
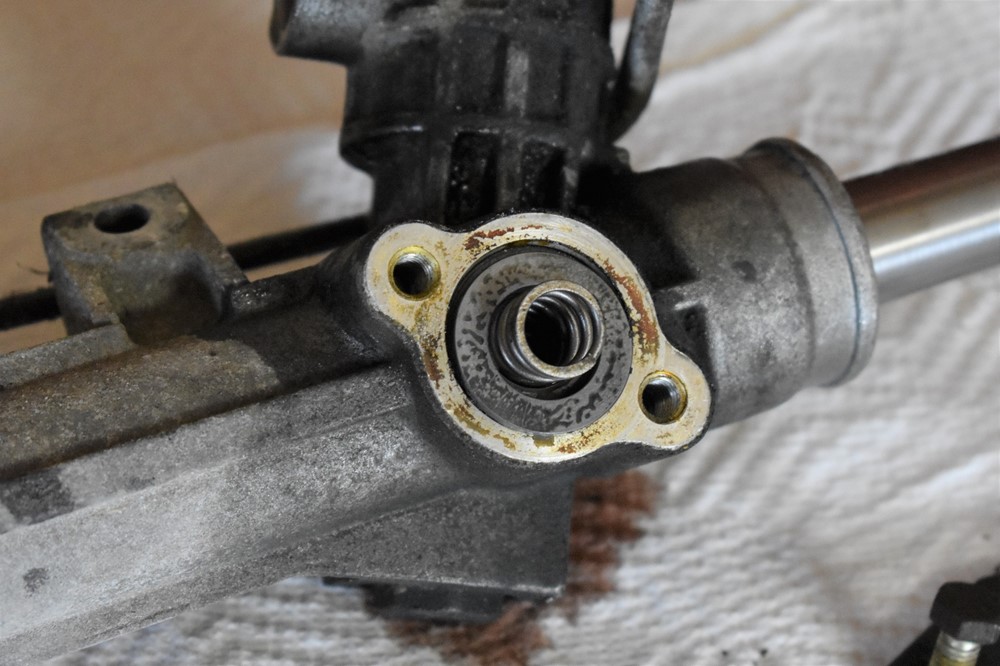
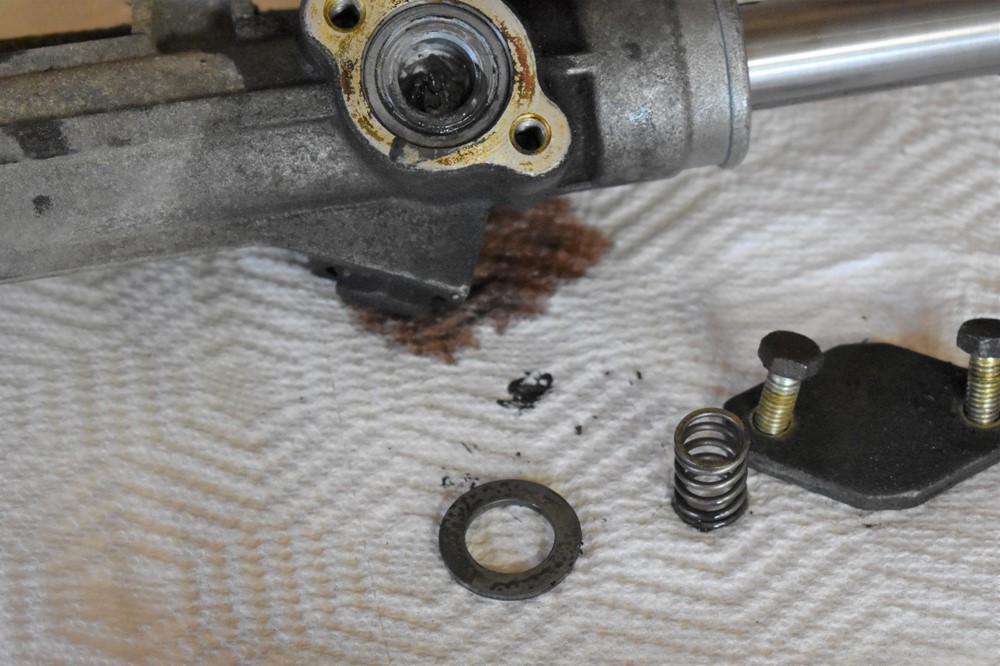
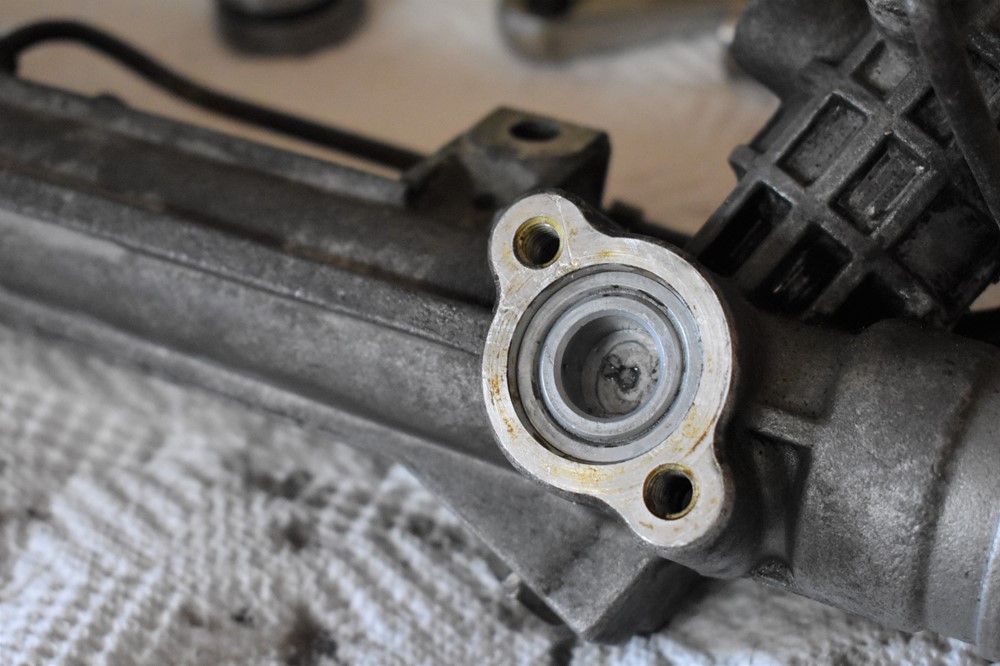
Start by using the 13mm socket to remove the two bolts from the lower cover panel, and remove the cover. Be careful, there’s a spring sitting underneath.
-
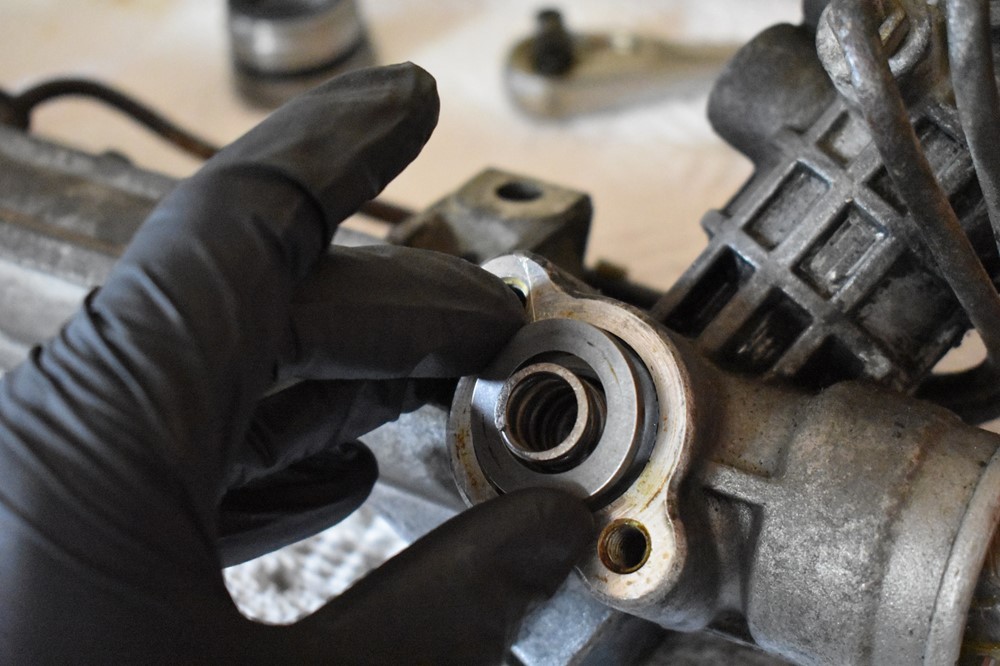
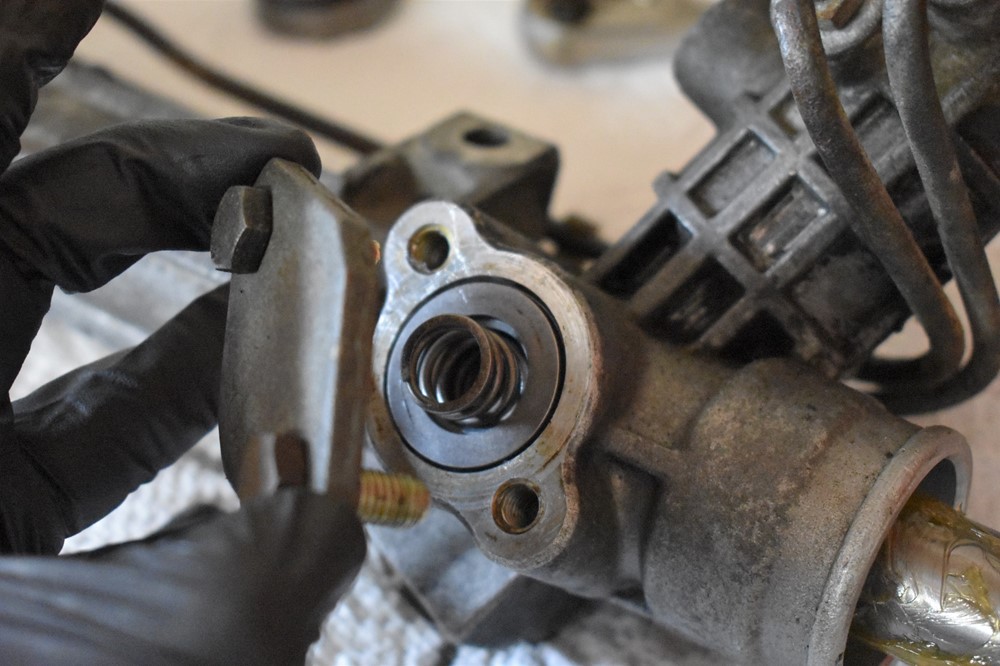
Pull the spring out of the rack, followed by the large washer.
-
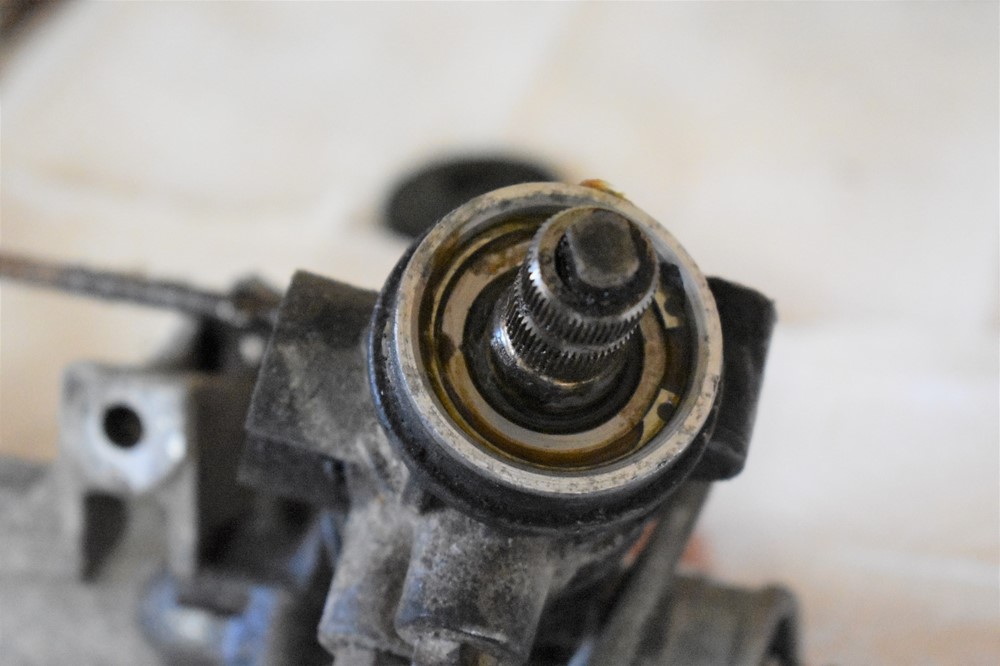
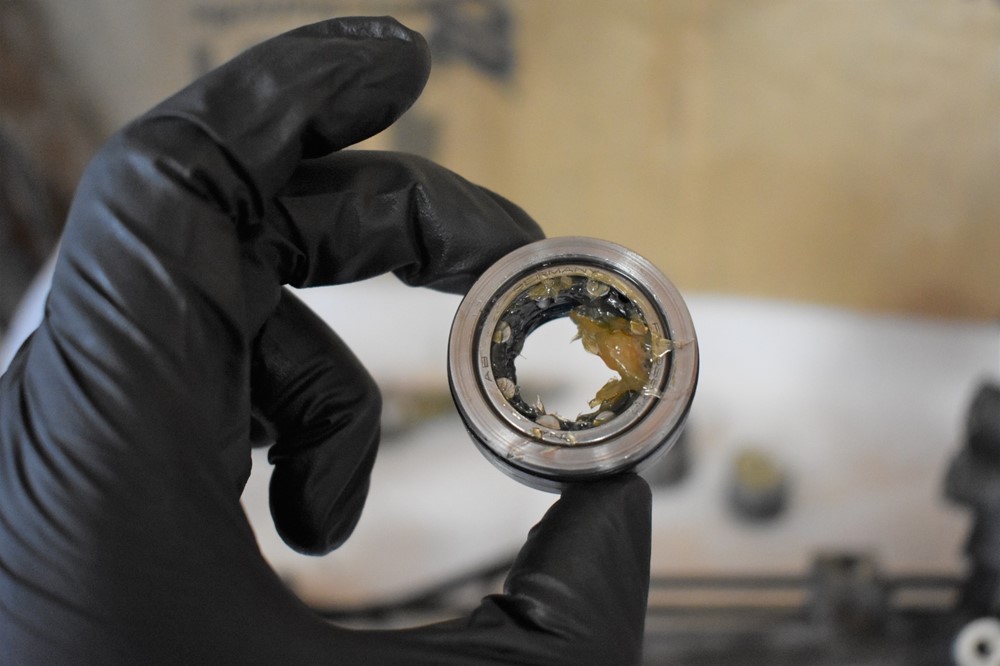
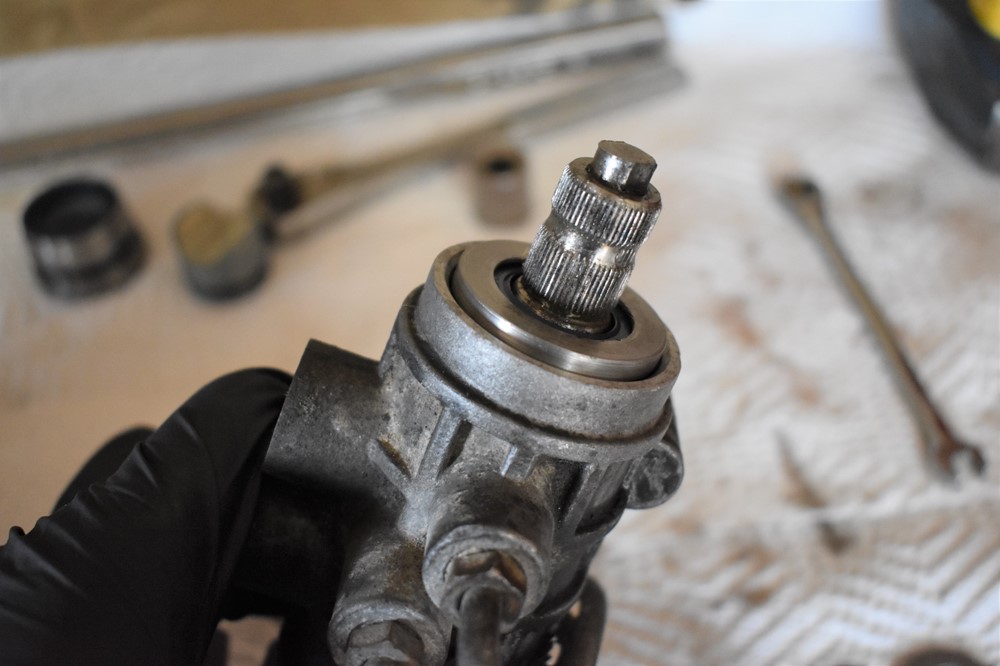
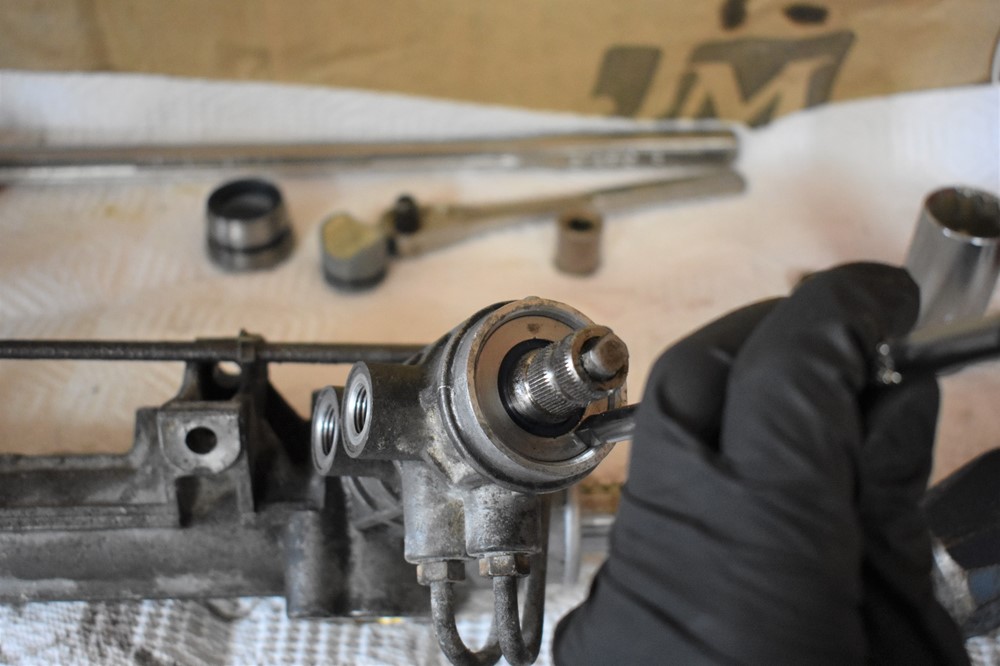
Move to the top of the rack. Wiggle the dust cover off the splined input shaft.
-
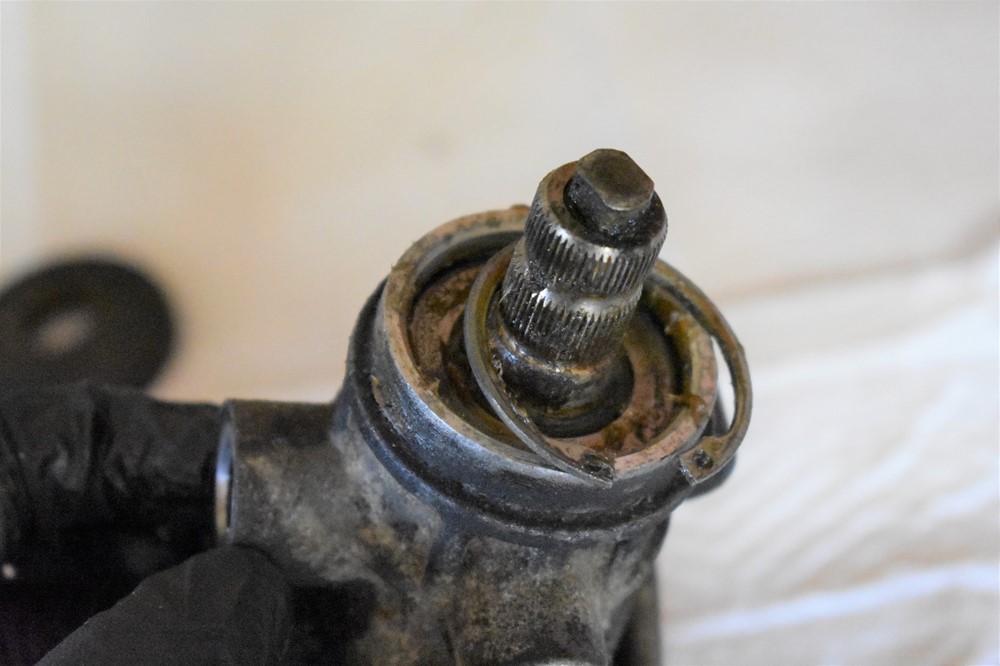
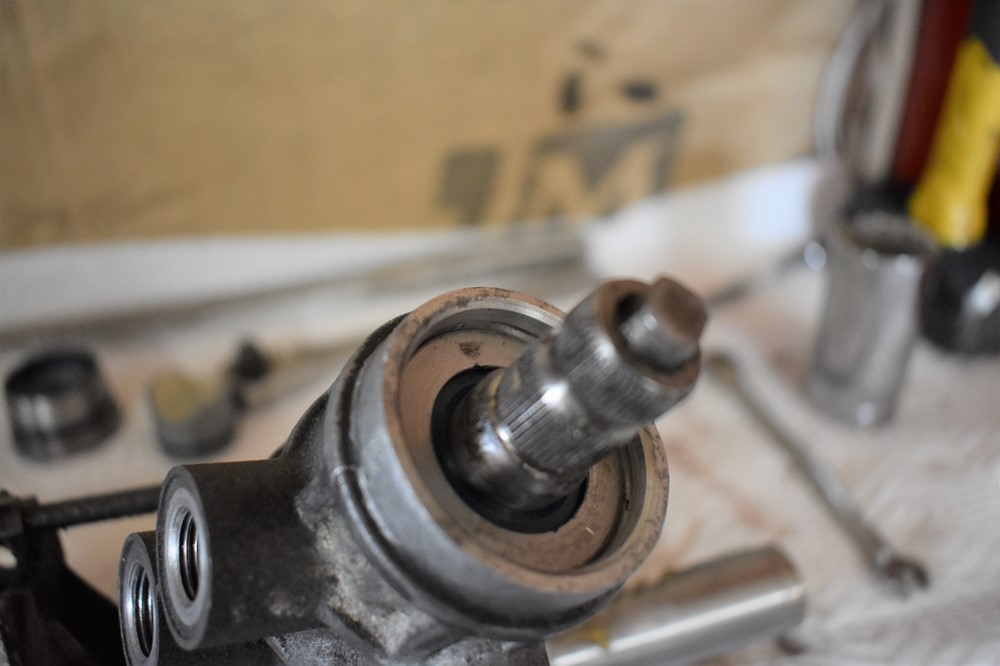
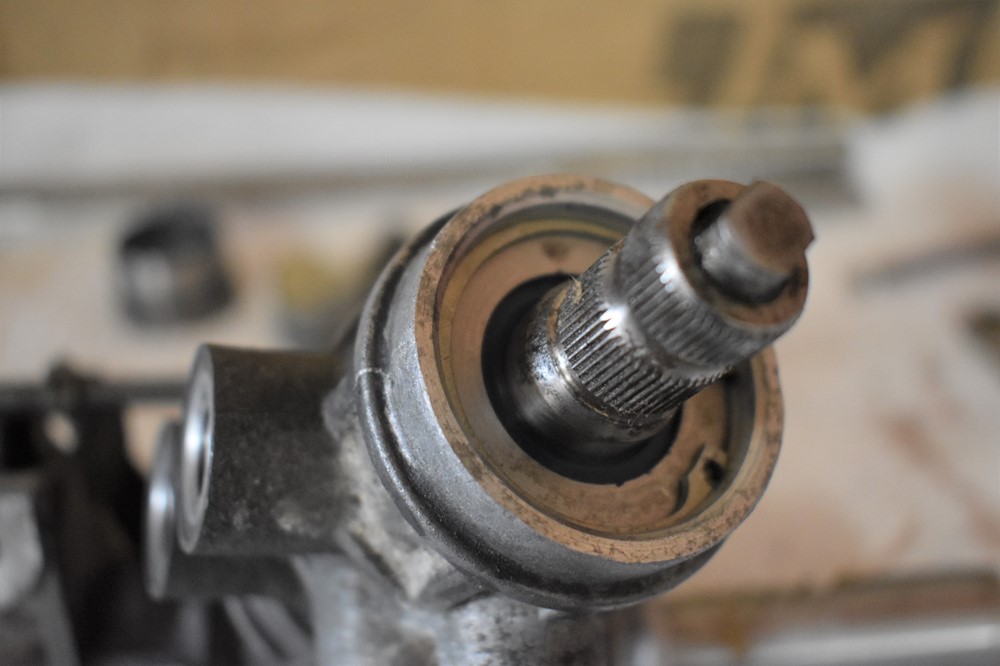
Wipe most of the grease out from around the shaft, to expose the circlip that’s seated inside the rack body.
-
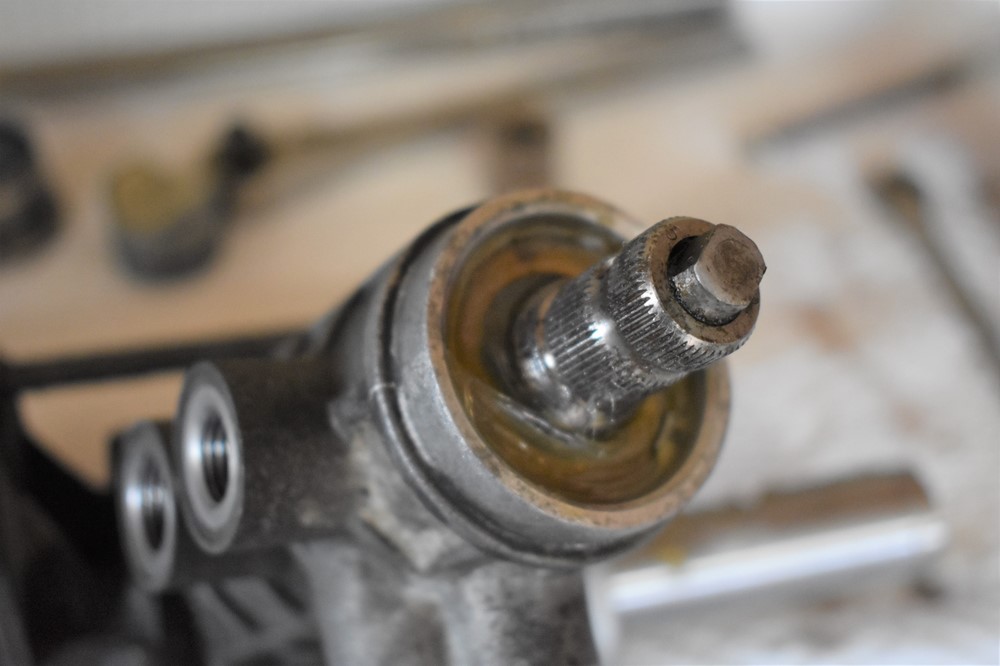
Use a pair of closing circlip pliers to close the circlip and pull it out.
-
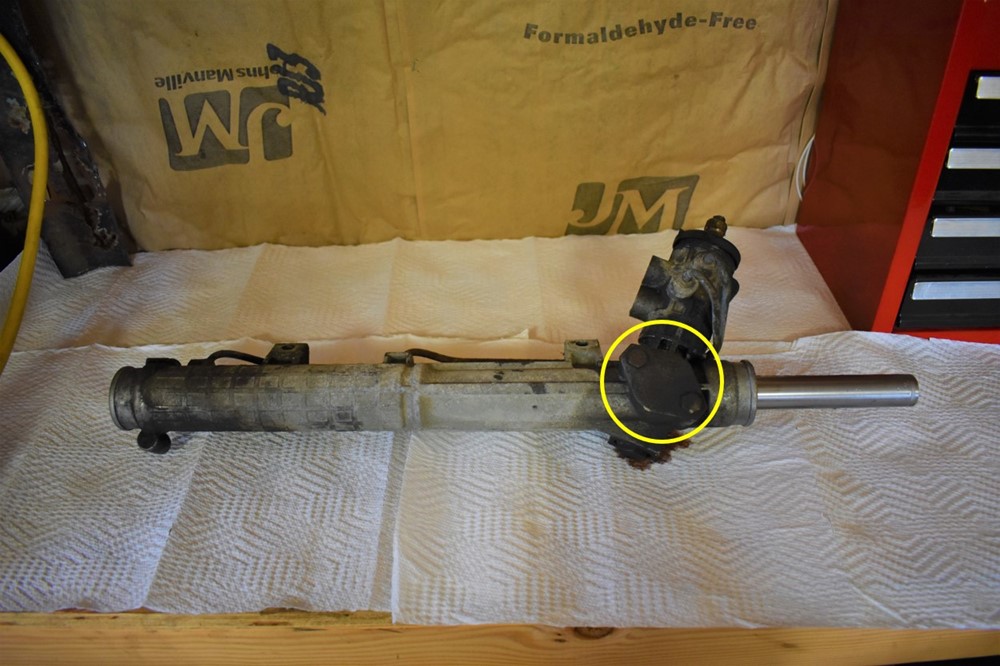
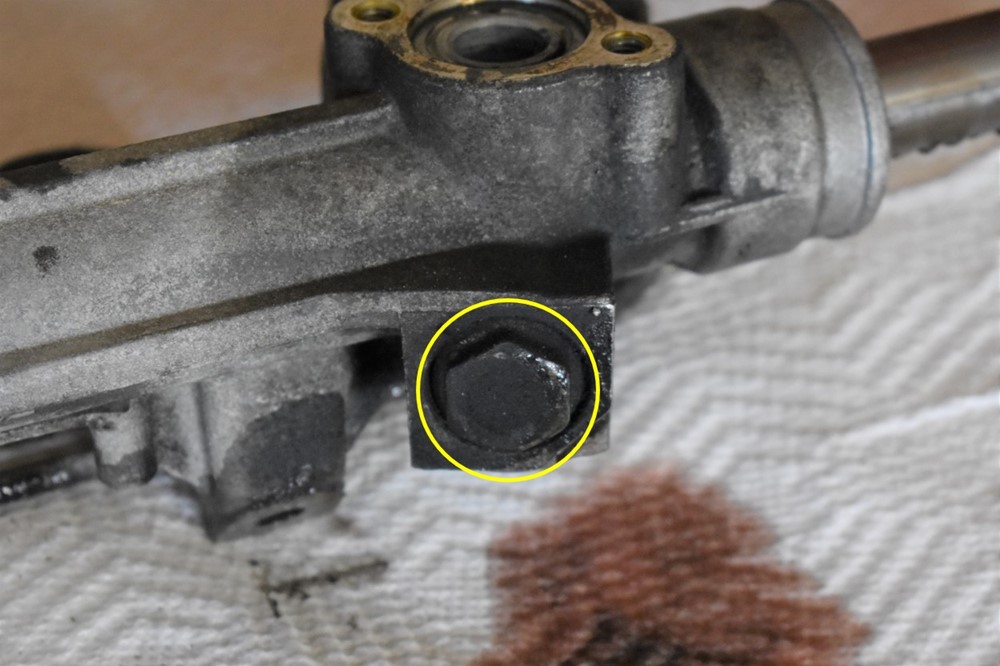
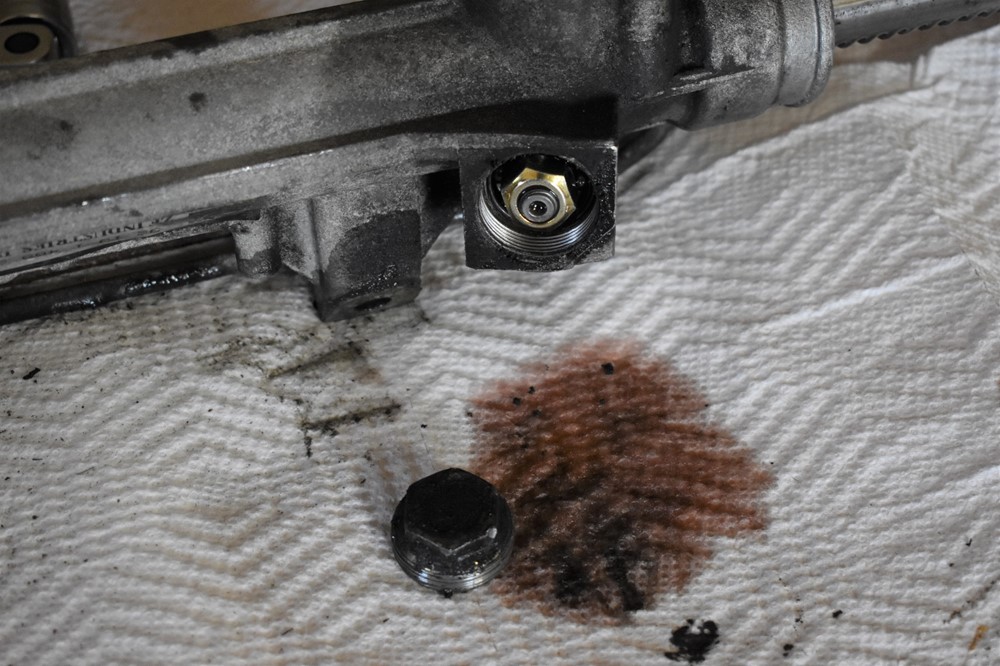
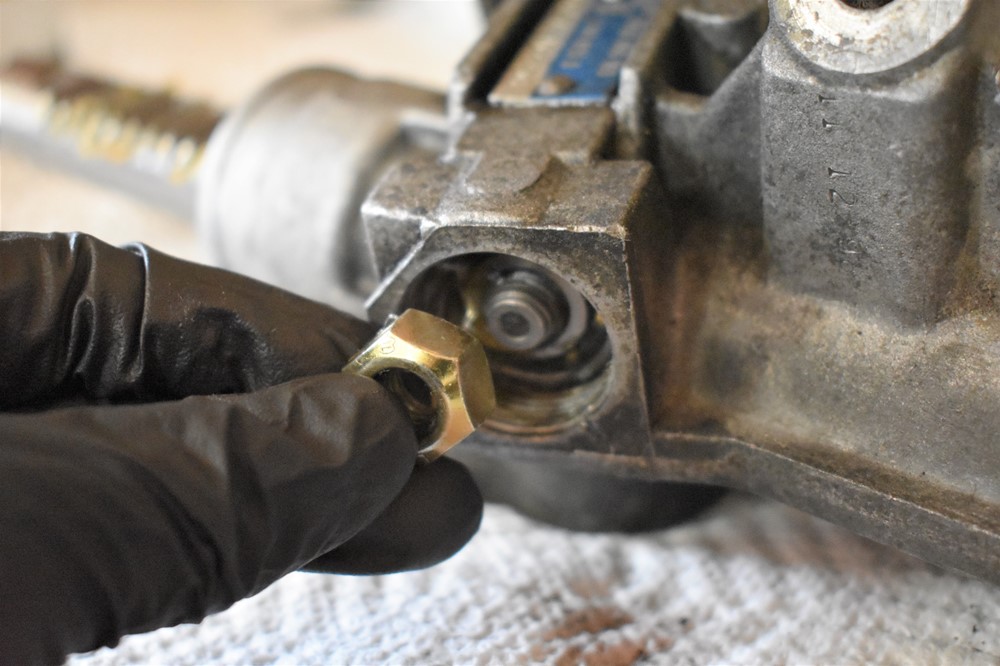
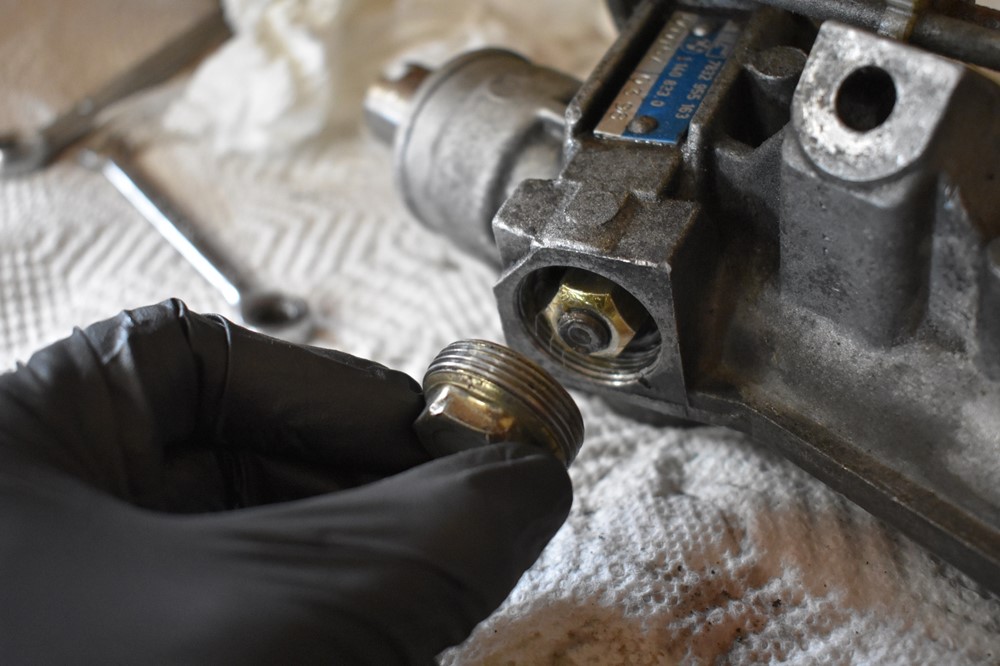
Move the bottom of the input shaft. Use the 22mm wrench to remove the cover.
-
Use a 15mm socket to remove the nut. When you first start to turn it, it will drive the rack instead of loosening. That’s fine, let it move to it’s stop, and then the nut will loosen.
-
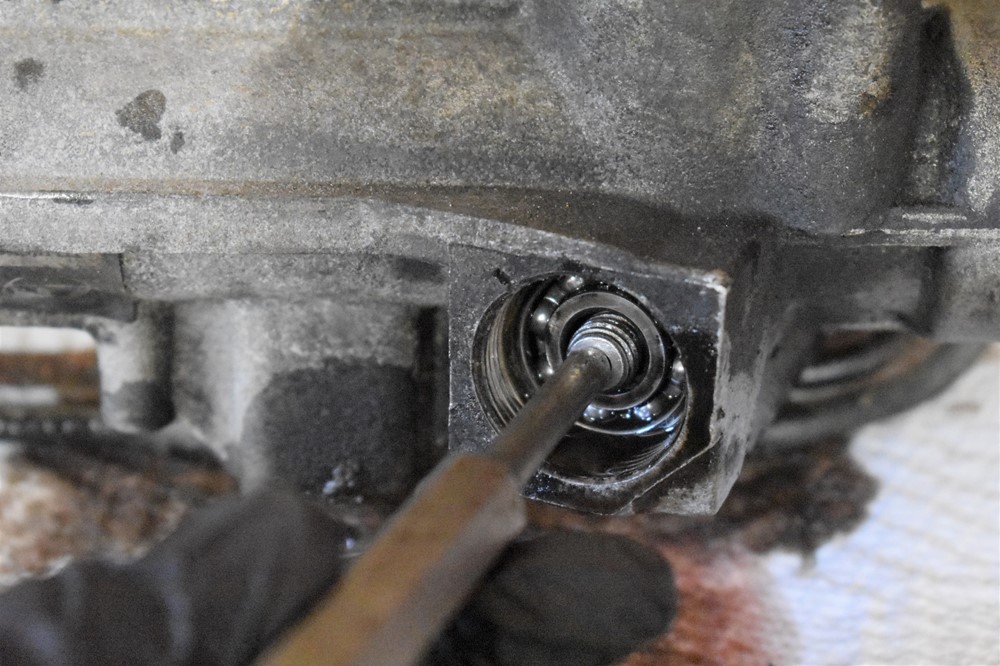
Set the punch against the end of the input shaft, and use a mallet to gently tap it out of the bearing. You don’t need to tap it all the way out, just until it’s free of the bearing.
-
Move back to the top of the rack. The input shaft is now pushed out of the body, you can grab it and gently wiggle and pull it out of the rack completely.
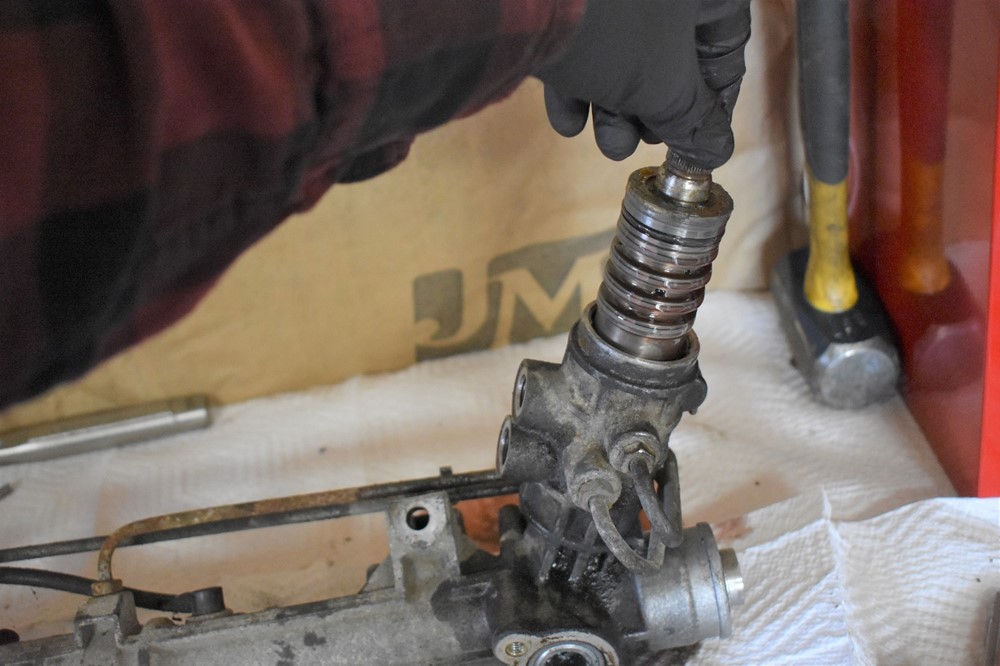
-
Set the input shaft aside for now; we’ll come back to it later.
-
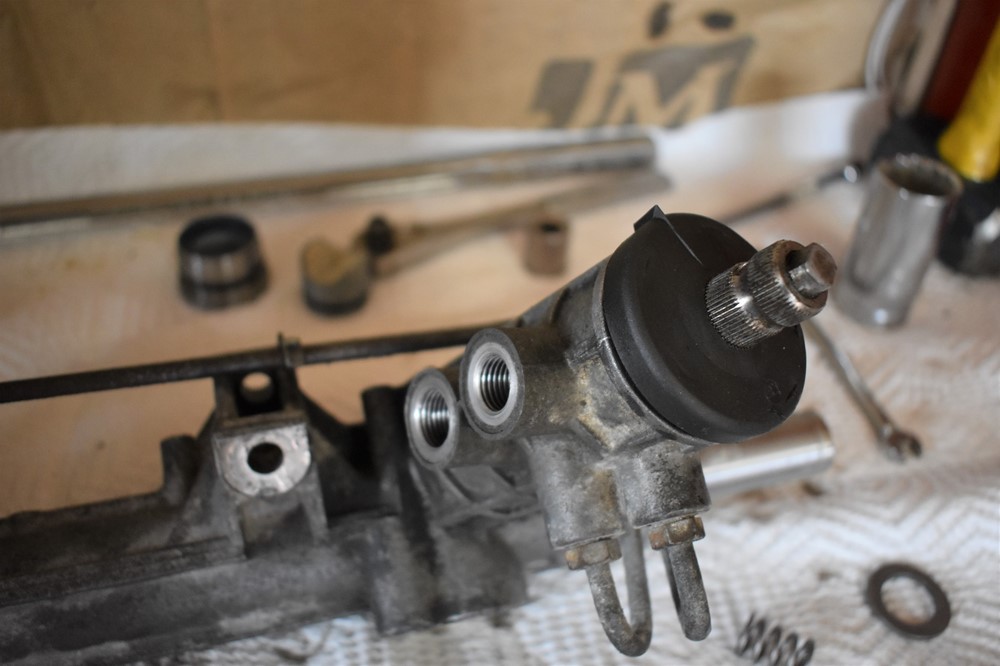
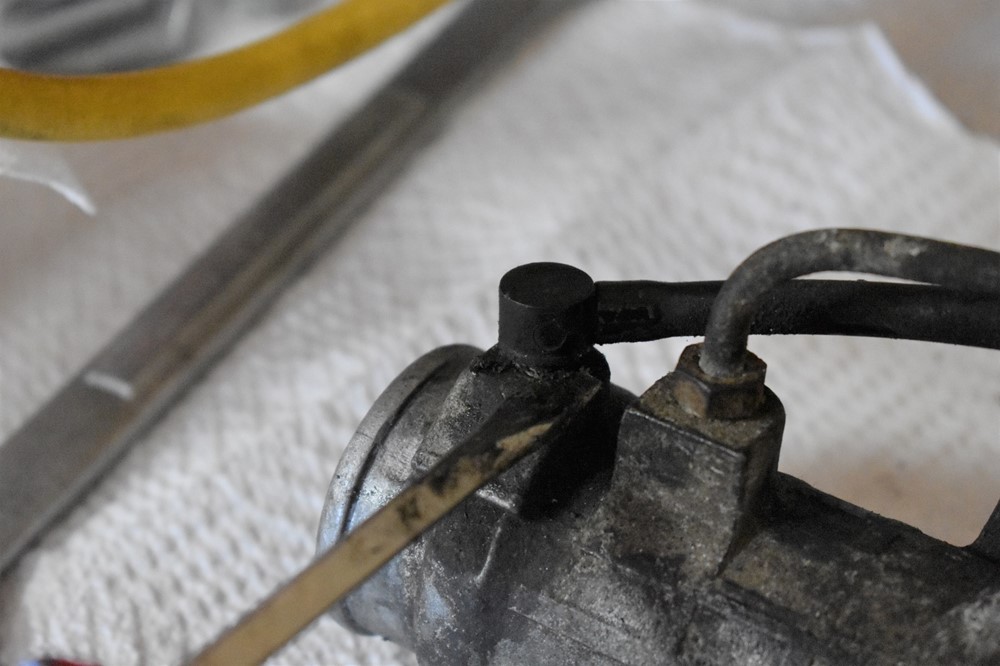
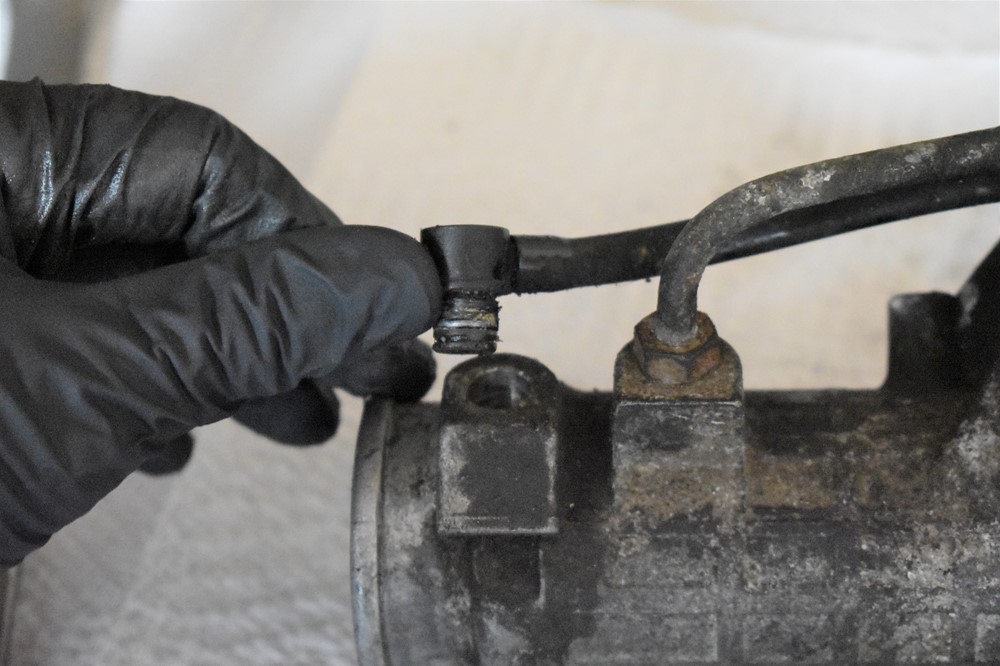
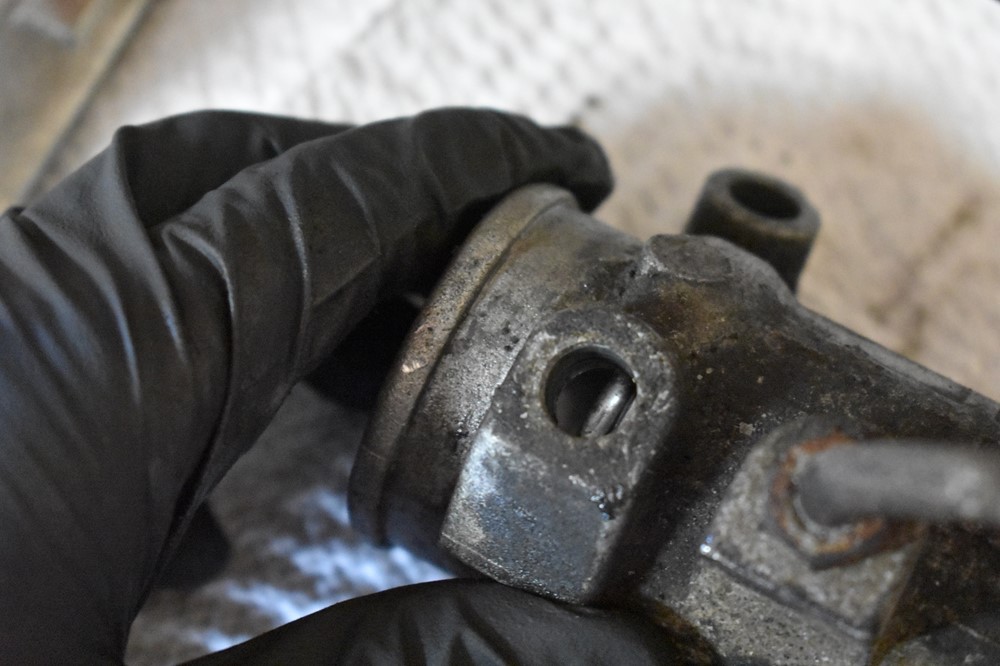
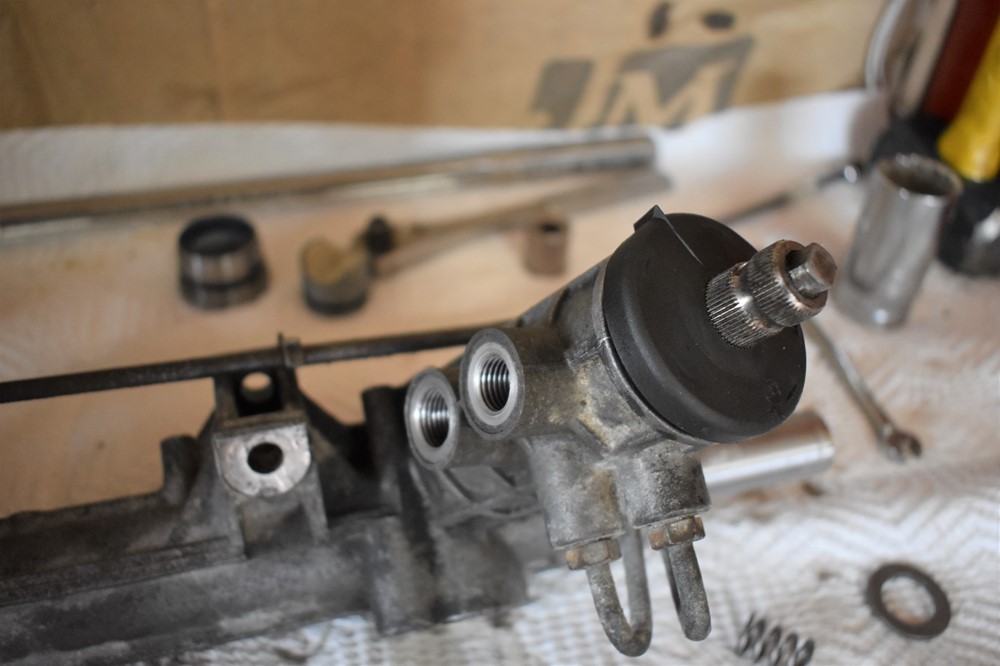
Move to the end of the rack away from the input shaft. There’s a vent hose that runs between two ports in the body of the rack. Use a flathead screwdriver to gently pry the near port of the rack body.

-
Remove the other end of the vent the same way.
- Use a seal pick to remove the old o-rings from the vent hose fittings, and wipe the grooves clean. Blow some air through the vent hose to make sure it’s clear and not clogged.
-
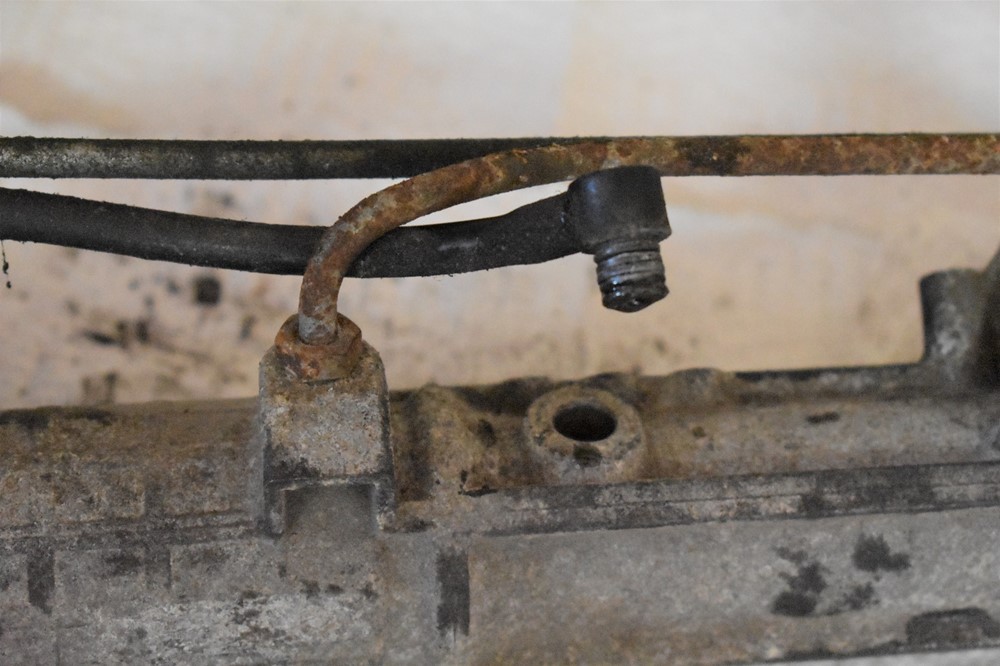
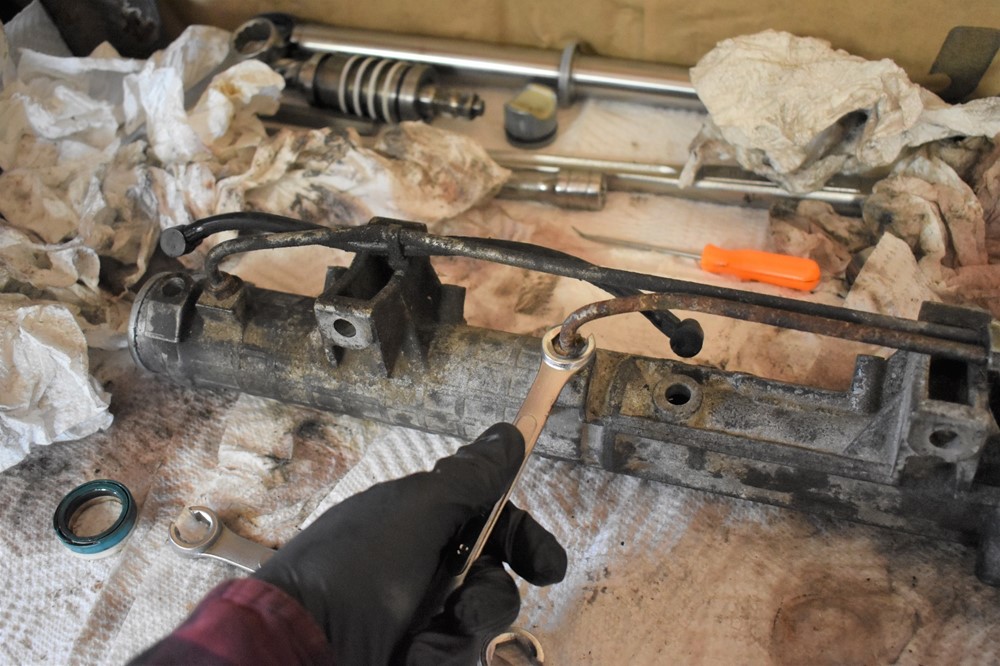
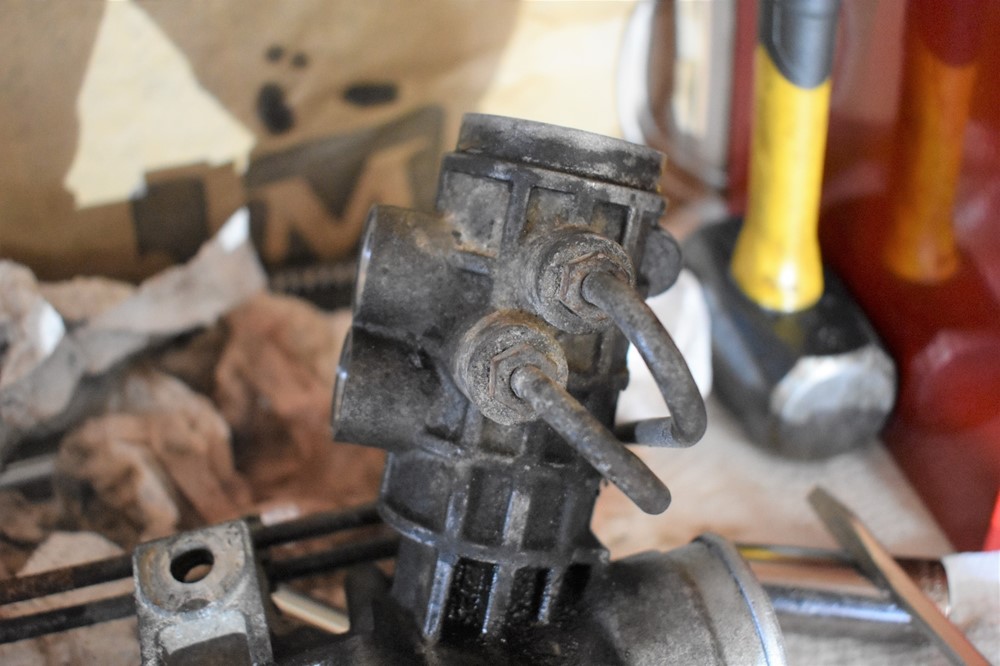
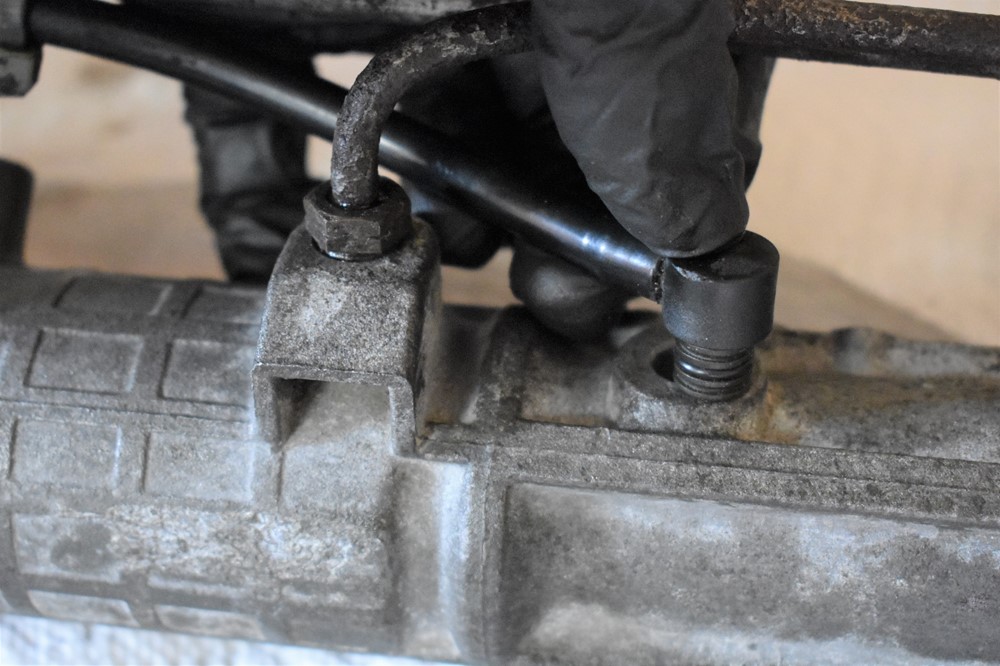
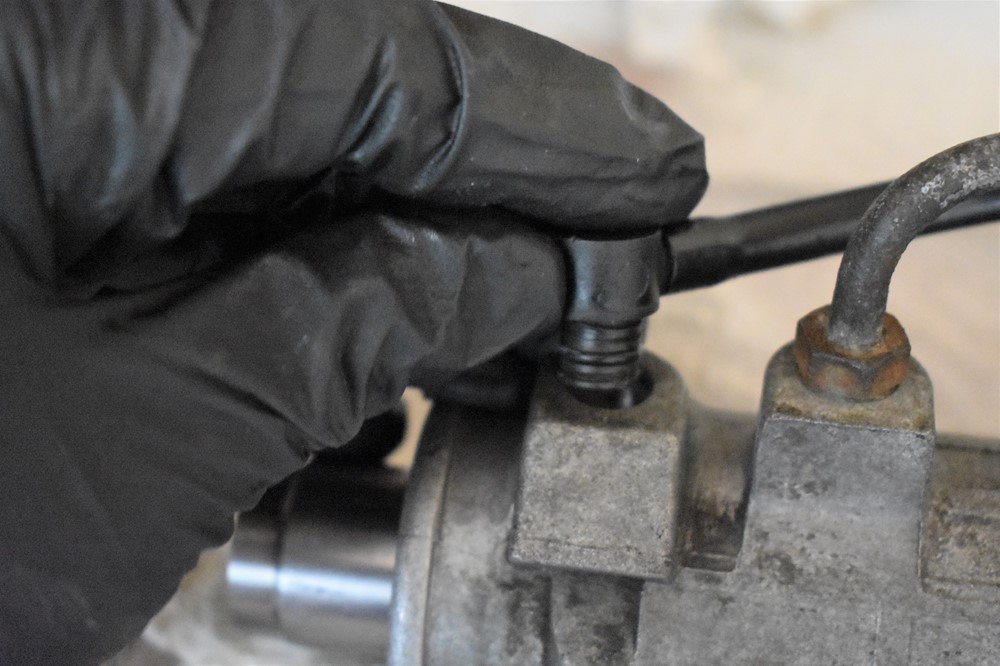
Next, you need to remove the oil lines. Use a 12mm flare nut wrench to loosen and remove the fittings on each end of the 2 tubes. Be very careful with this step. If the oil lines are rusty or corroded, it’s very easy to twist the hardline with the fitting and crack it. In our case, the lines had enough surface rust that we didn’t want to risk cracking them, and no signs of every having leaked, so we sprayed rust convert on them and left them alone. Use your best judgment here; it’s a chance to clean or replace the lines, and replace the small o-ring under each fitting, but it’s also a chance to break something that, if it isn’t leaking already, is unlikely to in the life of your car.
-
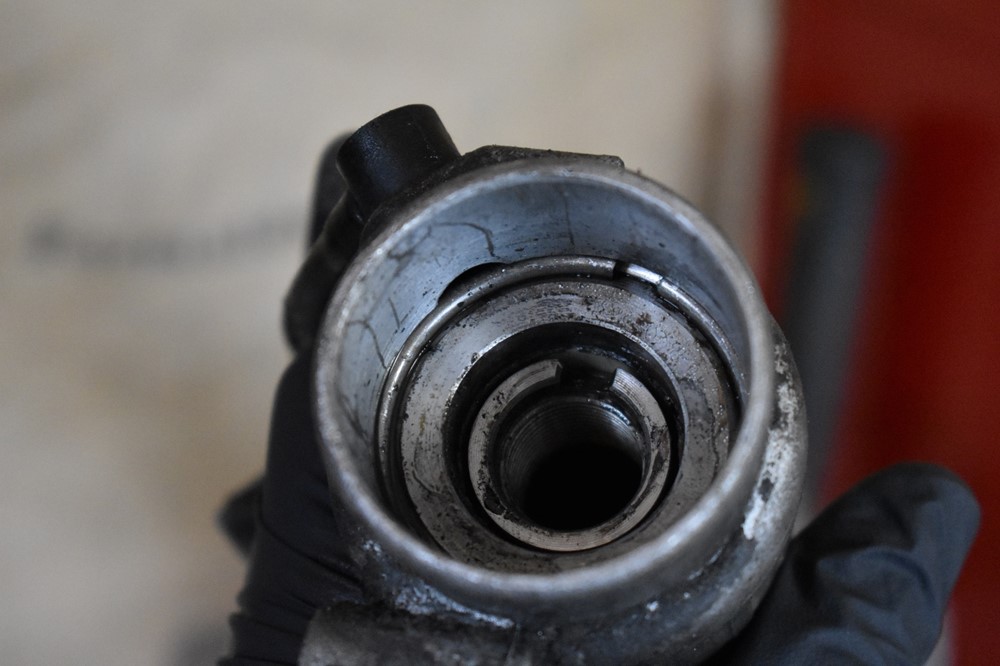
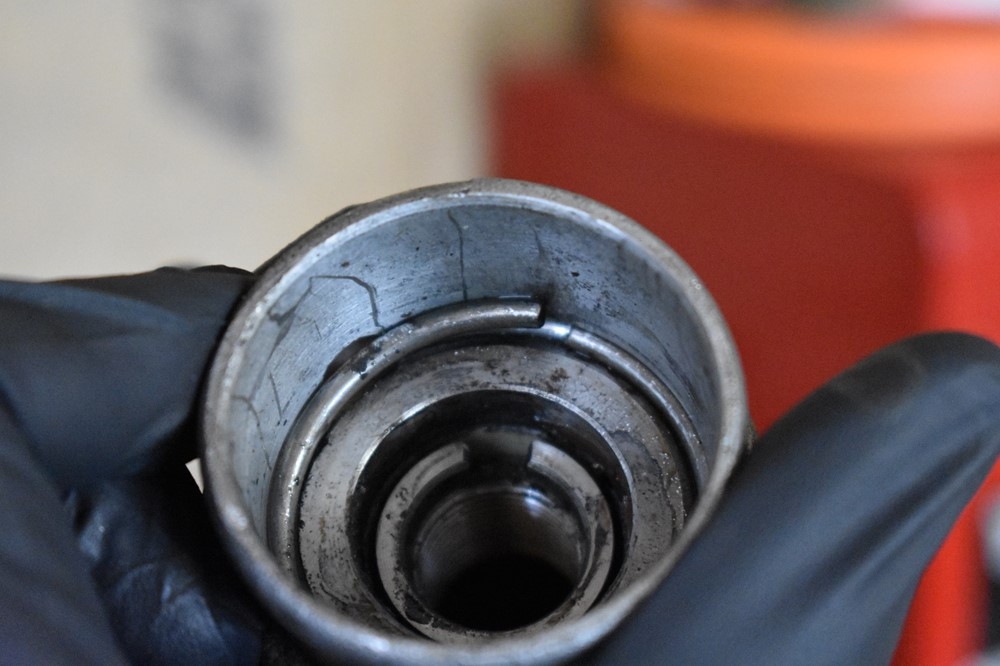
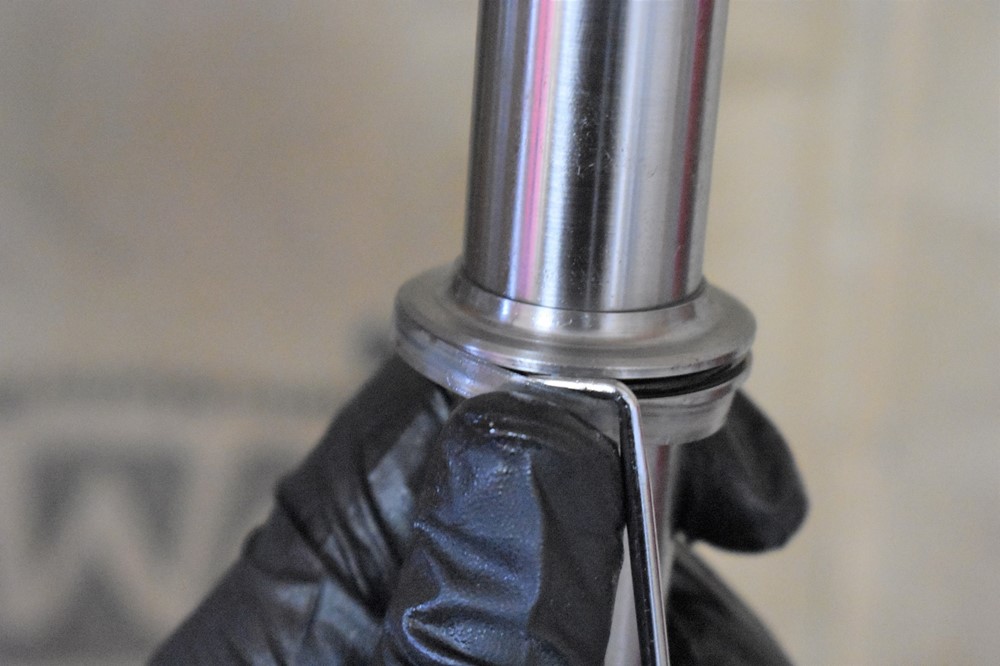
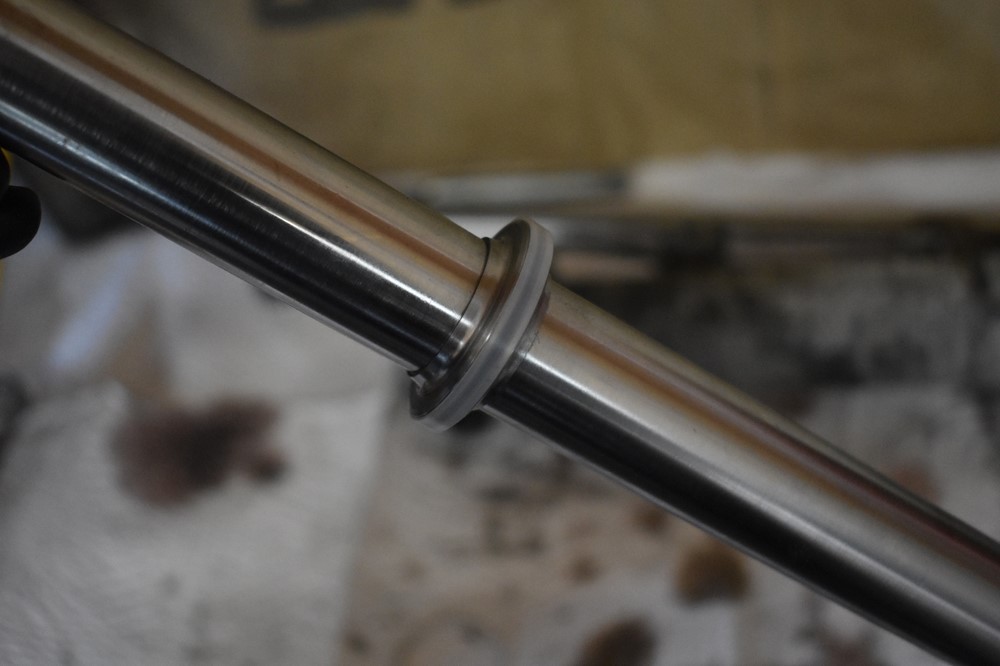
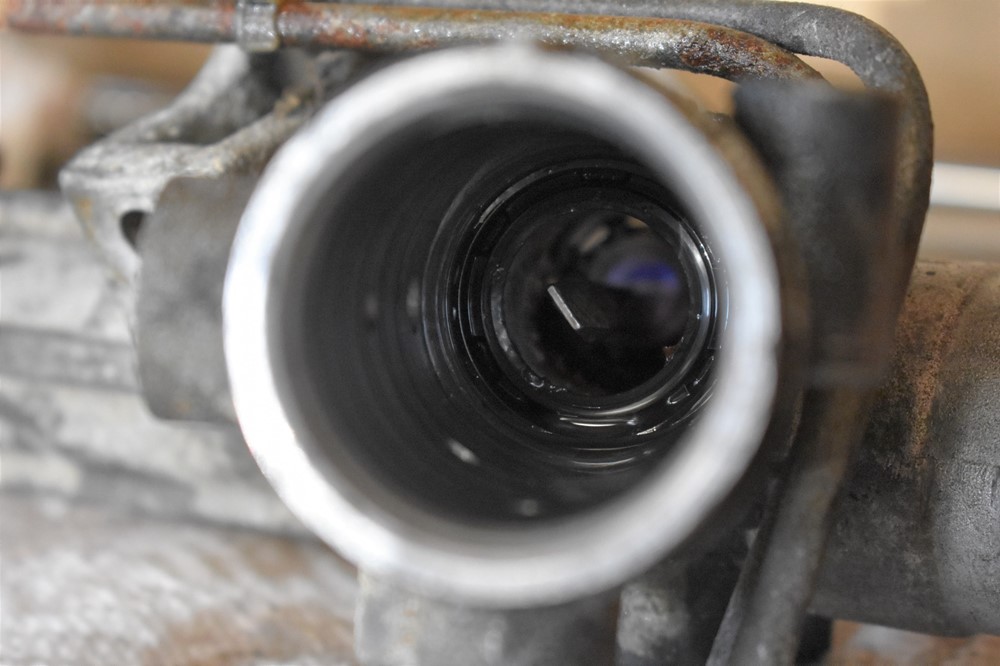
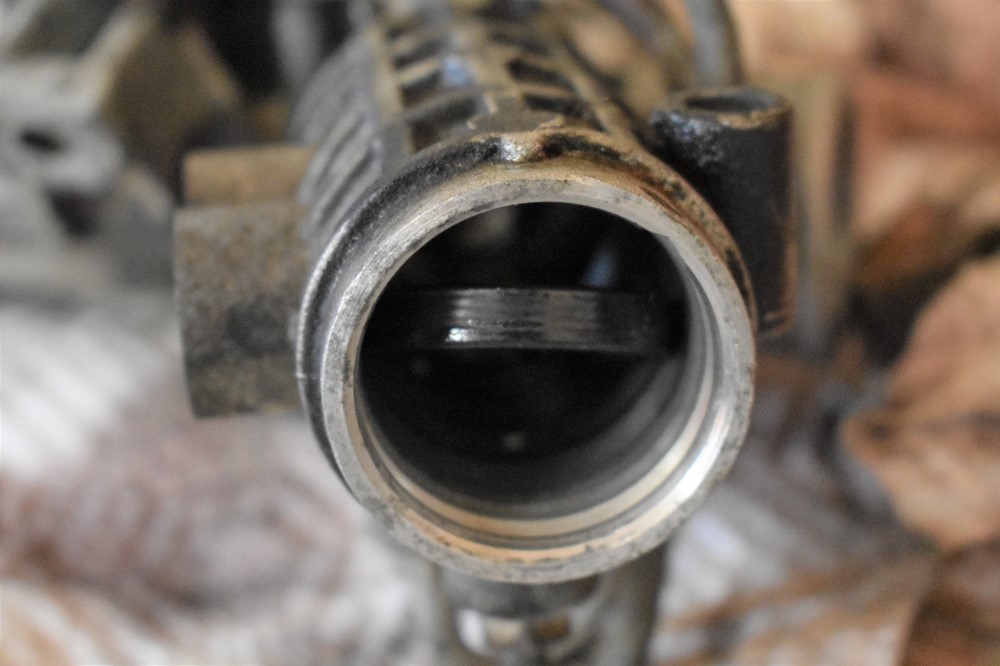
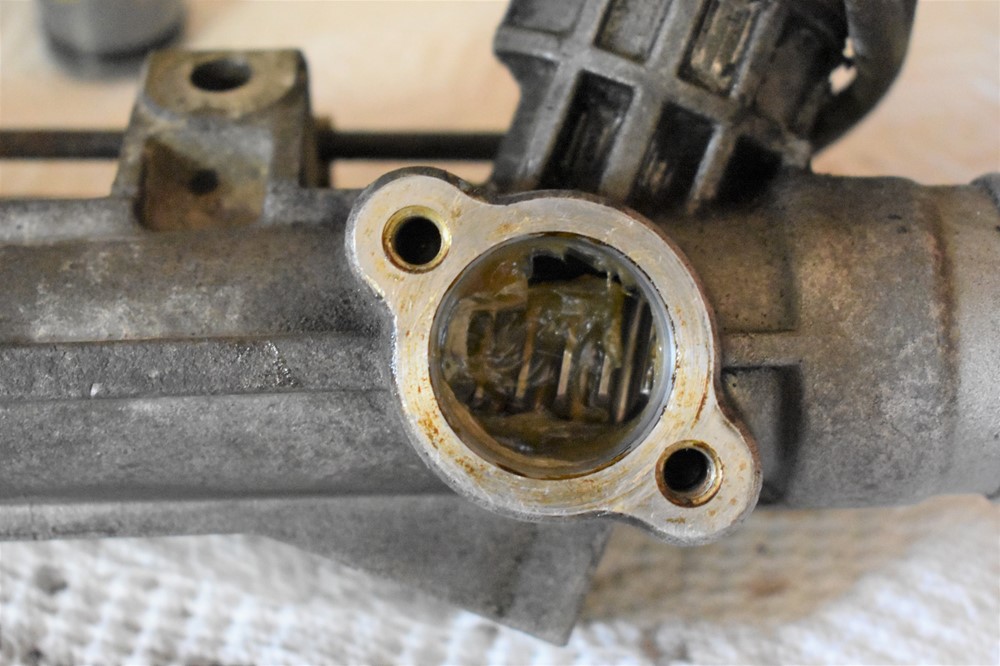
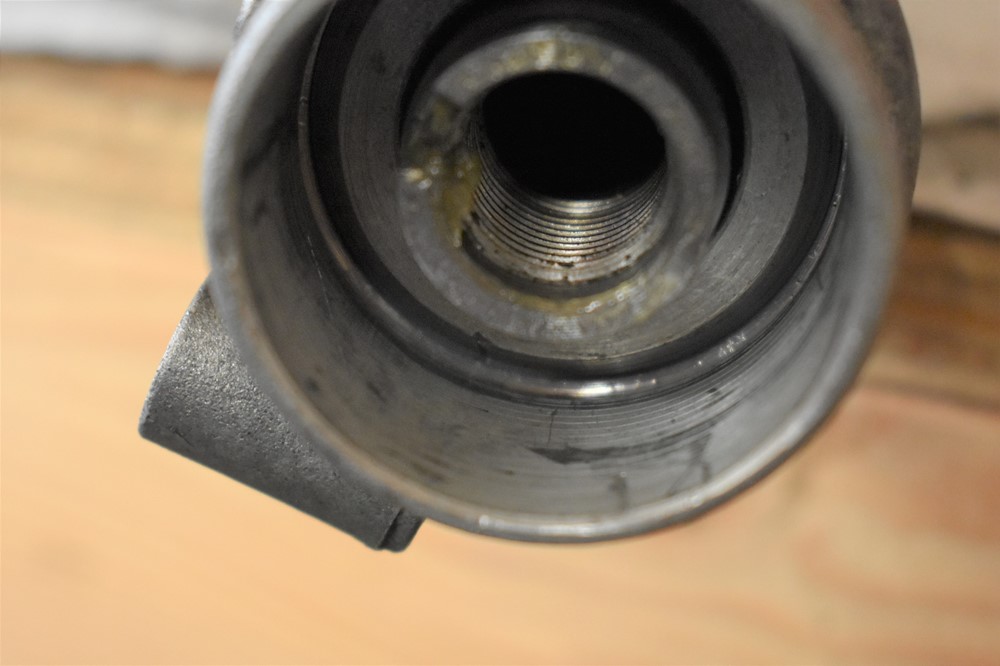
Now look at the end of the rack where you just removed the vent hose. There’s a locking ring in a groove in the end of the rack. You can see it through the vent port. Notice that the rack can now slide freely from side to side, you can push it all the way to the far side here to get better access to the locking ring.
-
Stick a flathead screwdriver through the vent port and pry the locking ring towards the end of the rack. It should pop out of the groove so that you can now get a screwdriver or o-ring pick underneath it from the end of the rack.
-
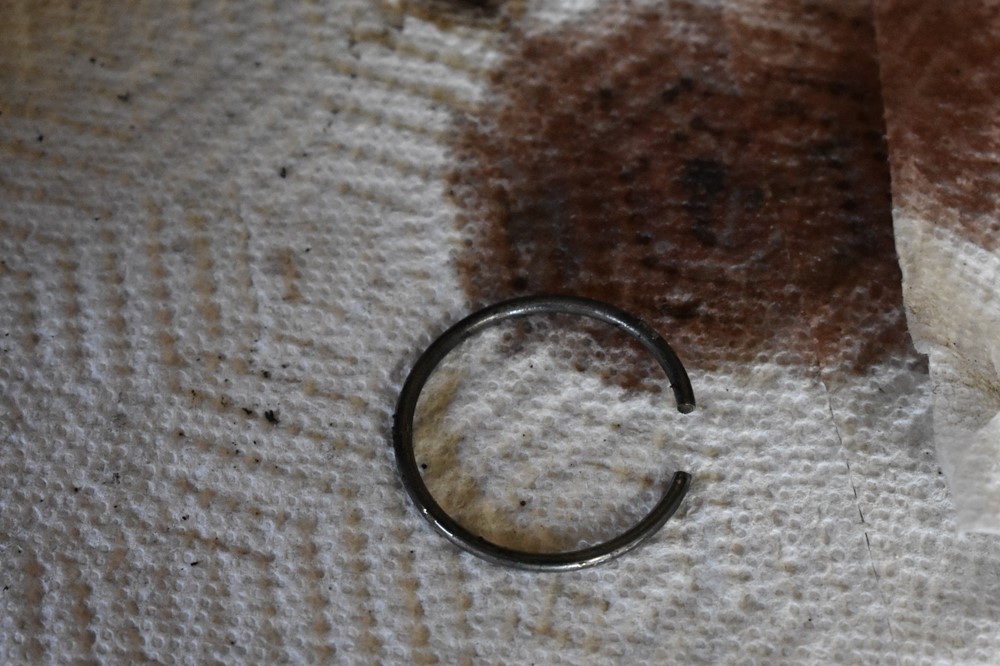
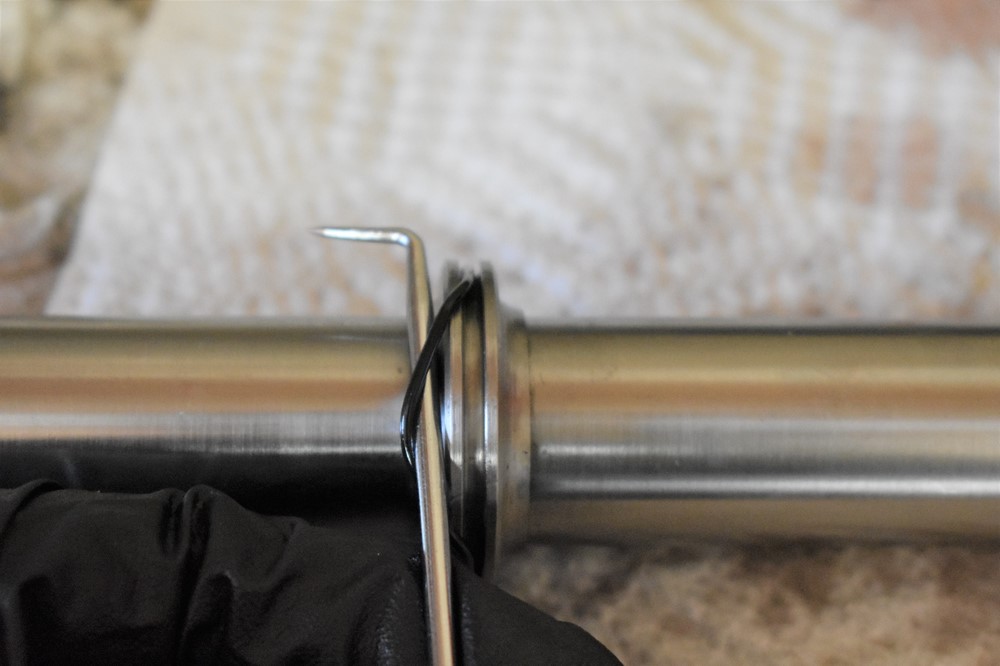
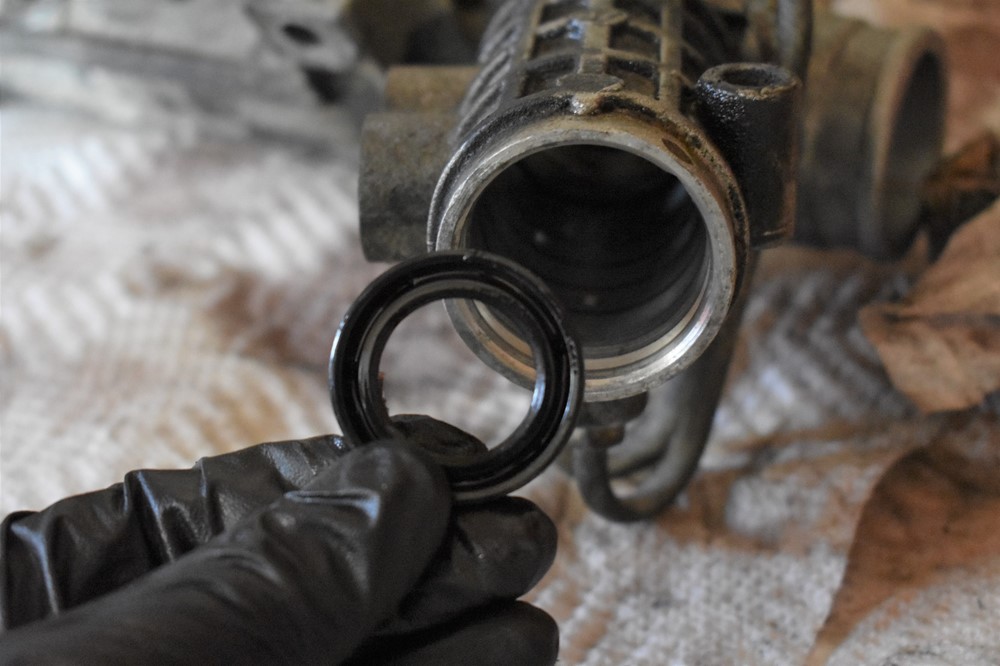
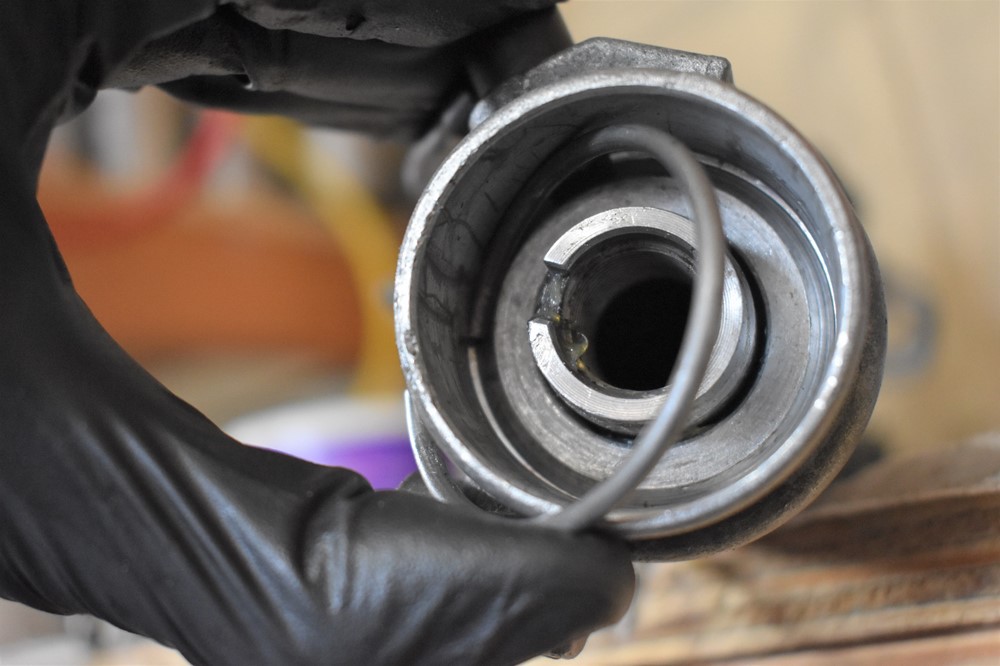
Use a screwdriver or o-ring pick to pull the ring out the rest of the way. You’ll likely need to start with the end that’s popped out of the groove, and carefully work your way around the ring, working it up and out of the end of the rack.
-
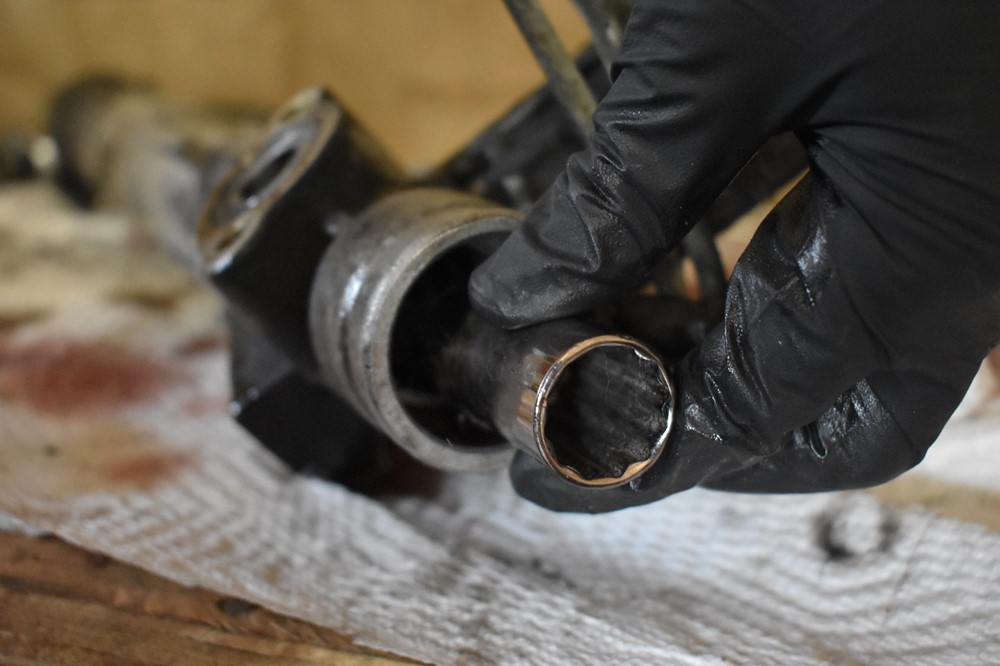
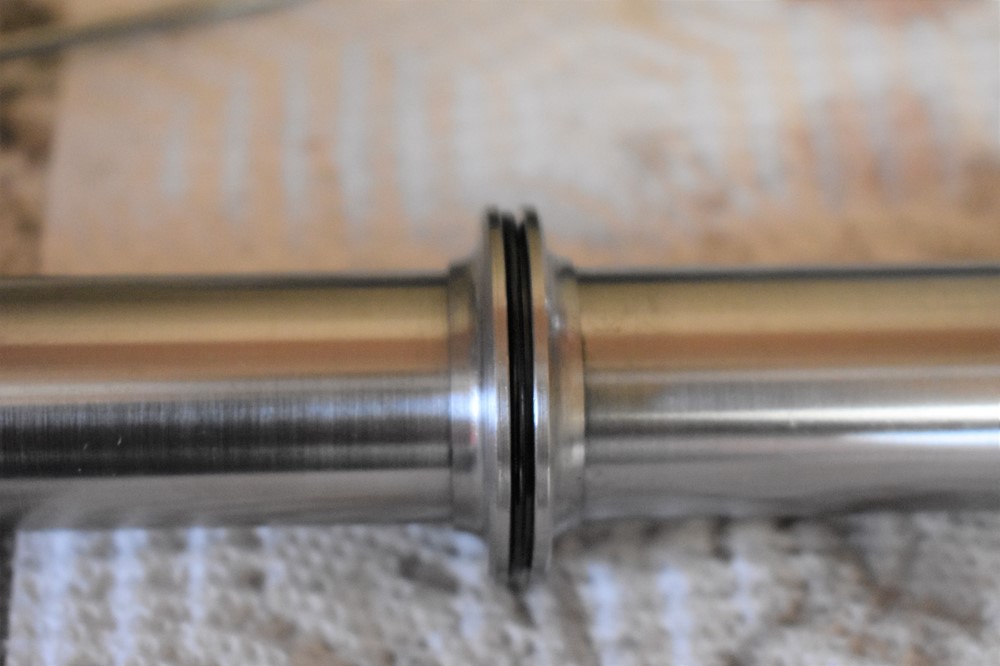
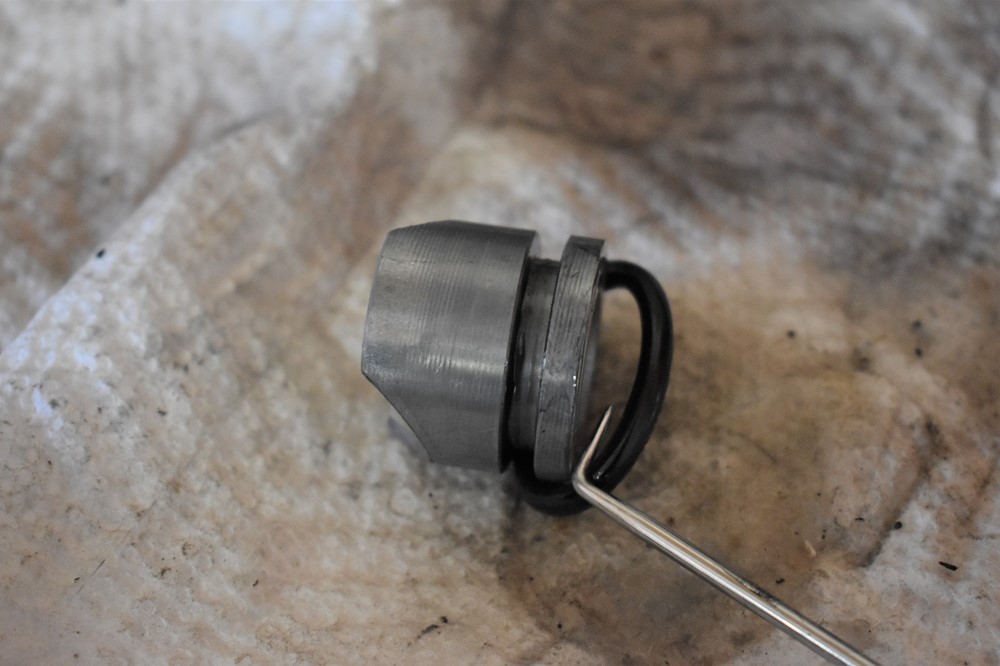
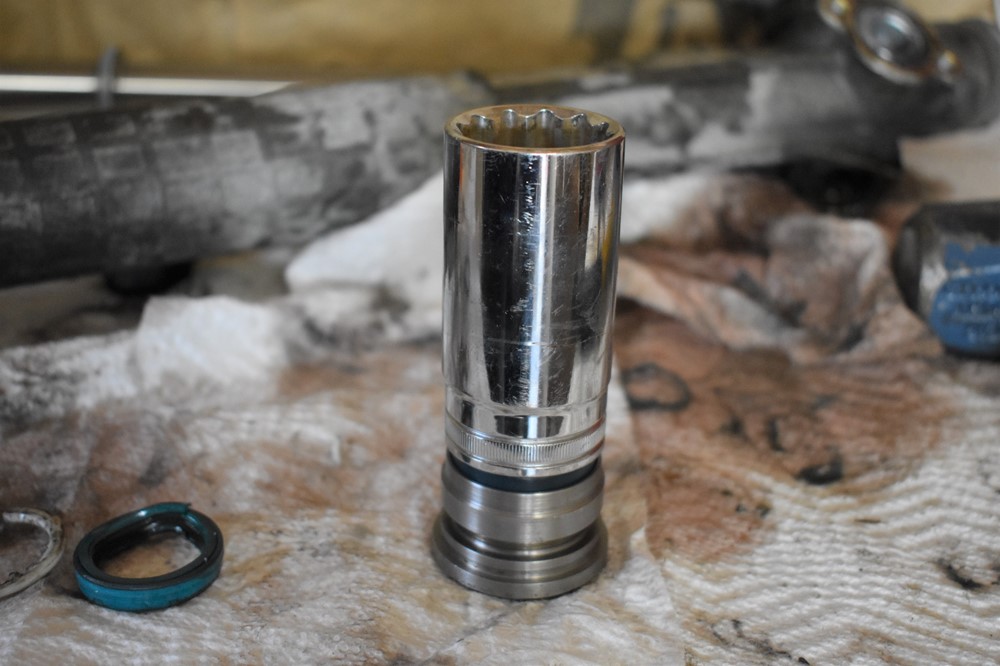
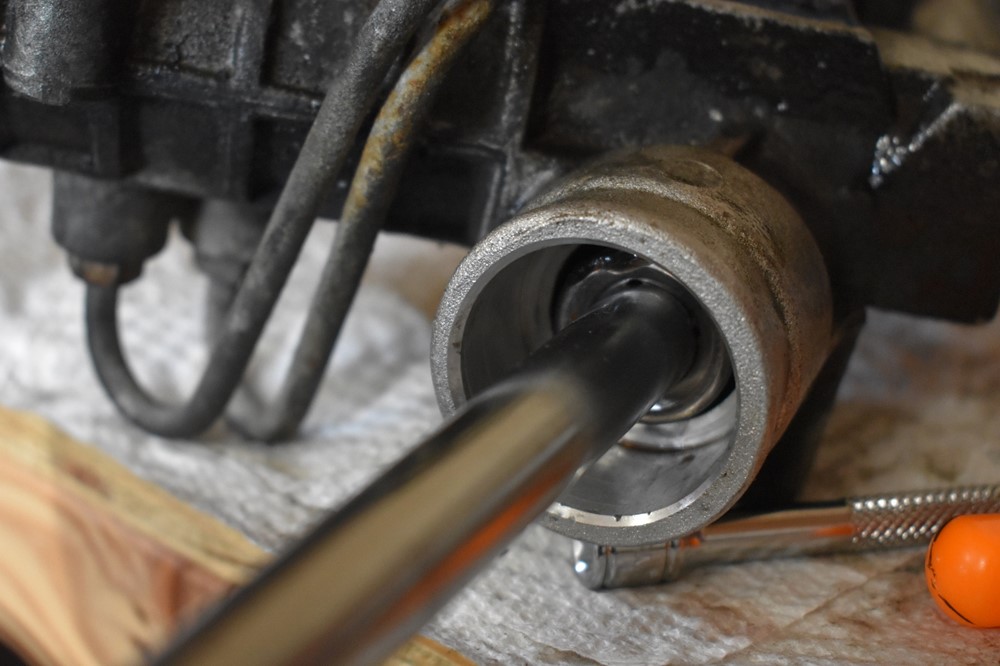
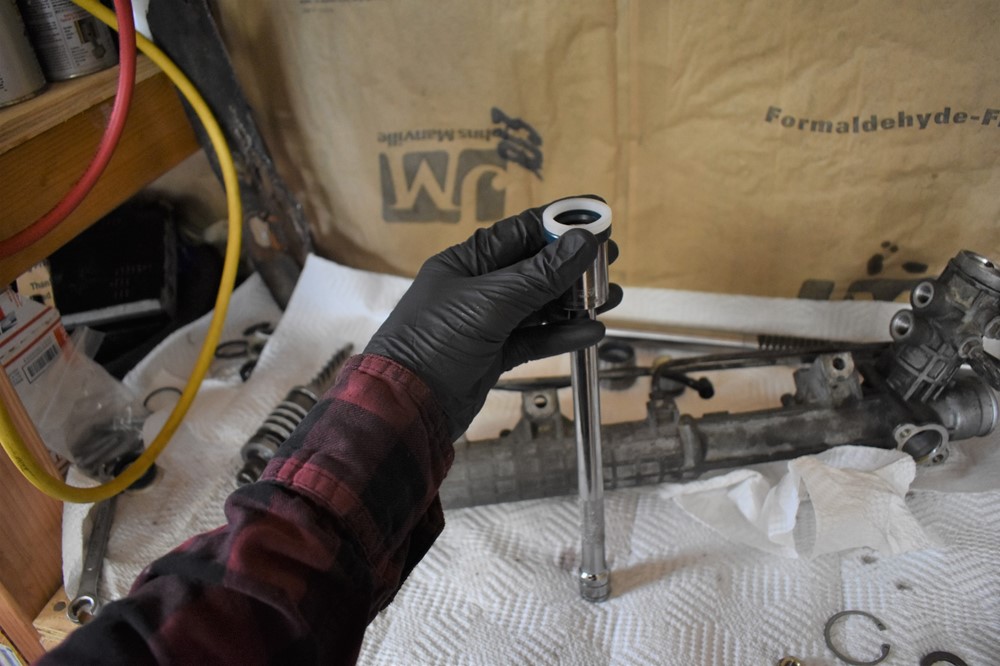
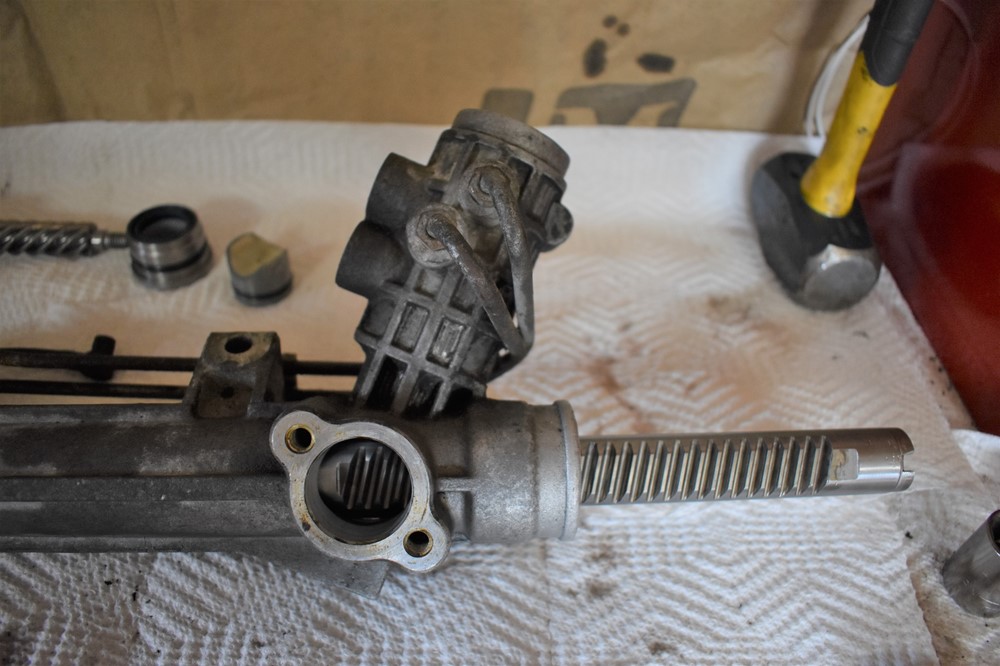
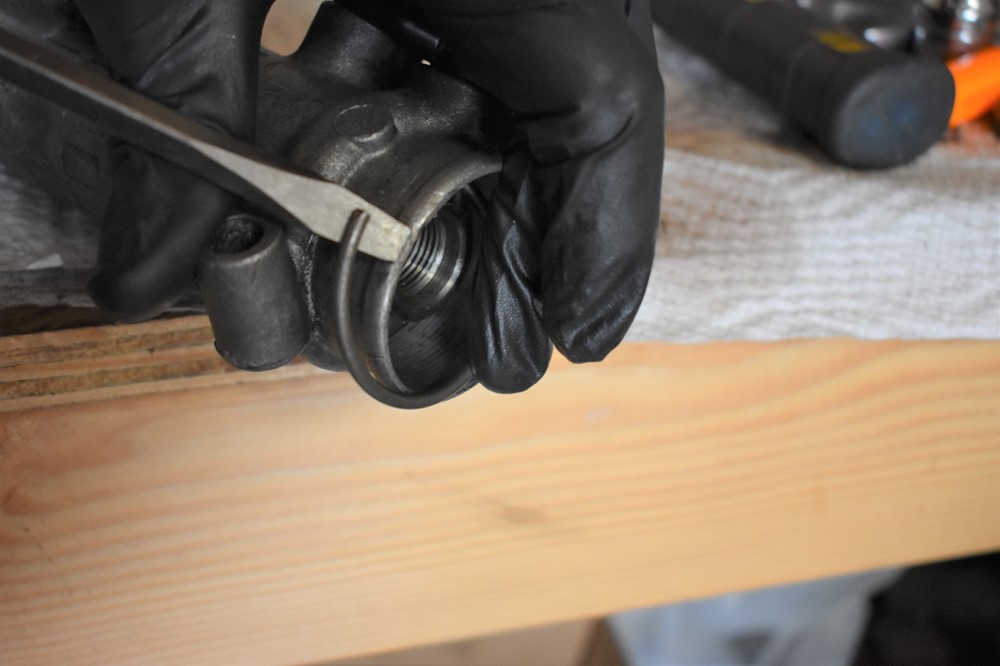
You’re now ready to remove the rack from the body. Slide it all the way towards the end you just remove the ring from, then find a socket that’s a similar diameter to the rack rod itself (this 19mm long socket worked well for us). Place it on the end of the rod, and give it a good tap.
-
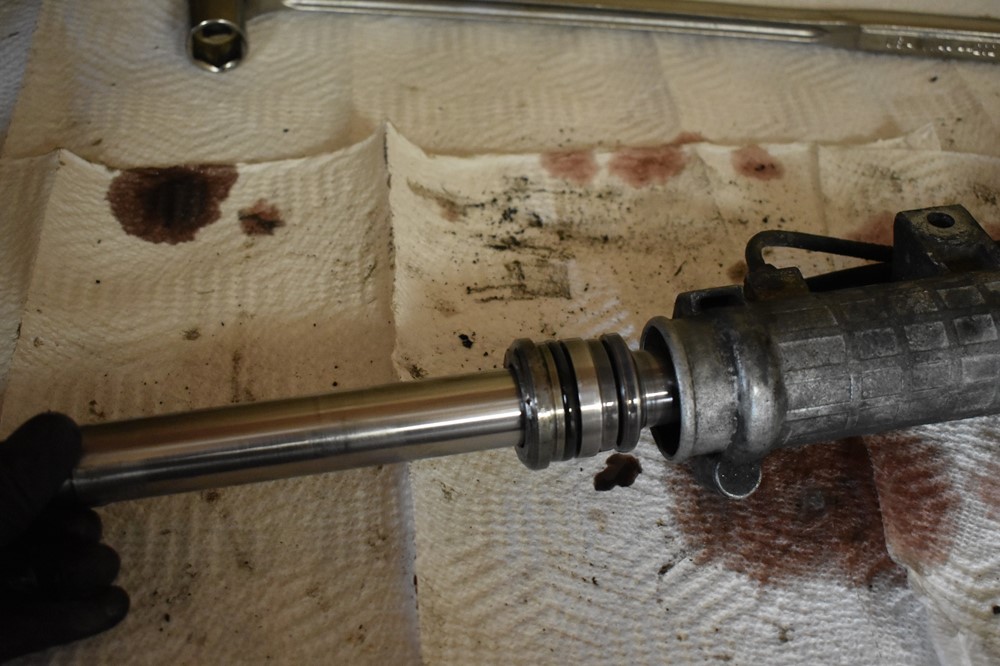
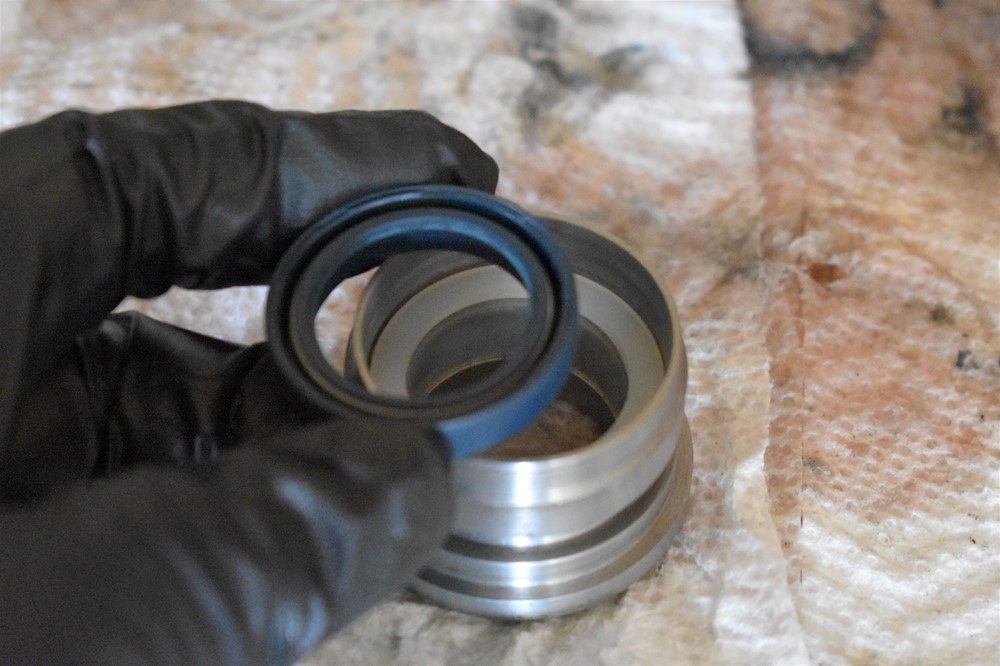
With a couple of taps, the cap on the far end of the rack should push out, as shown here.
-
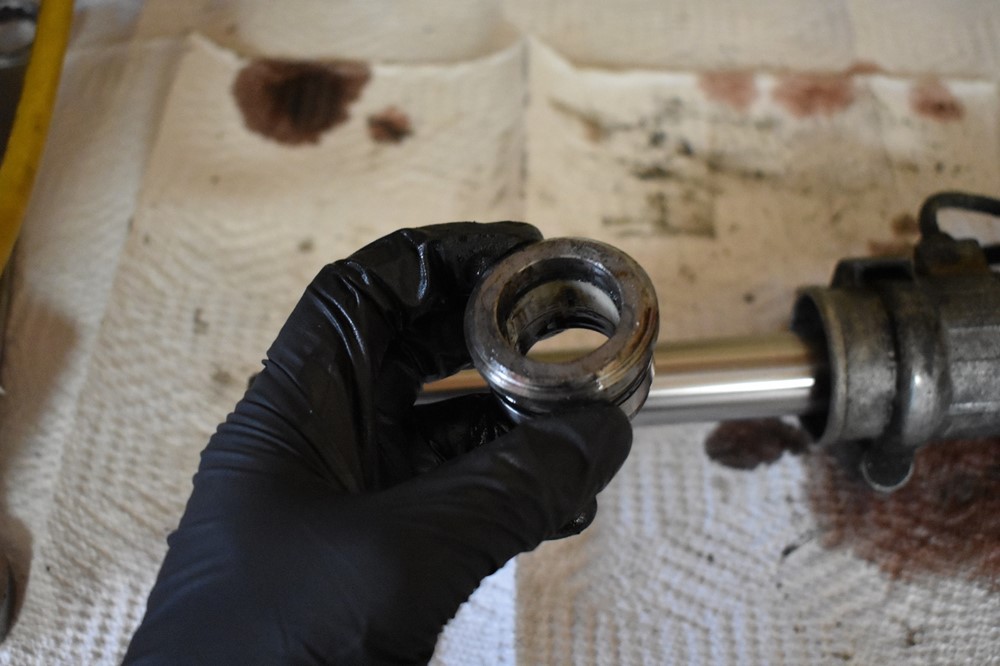
Slide the cap off the end of the rod and set it aside for later.
-
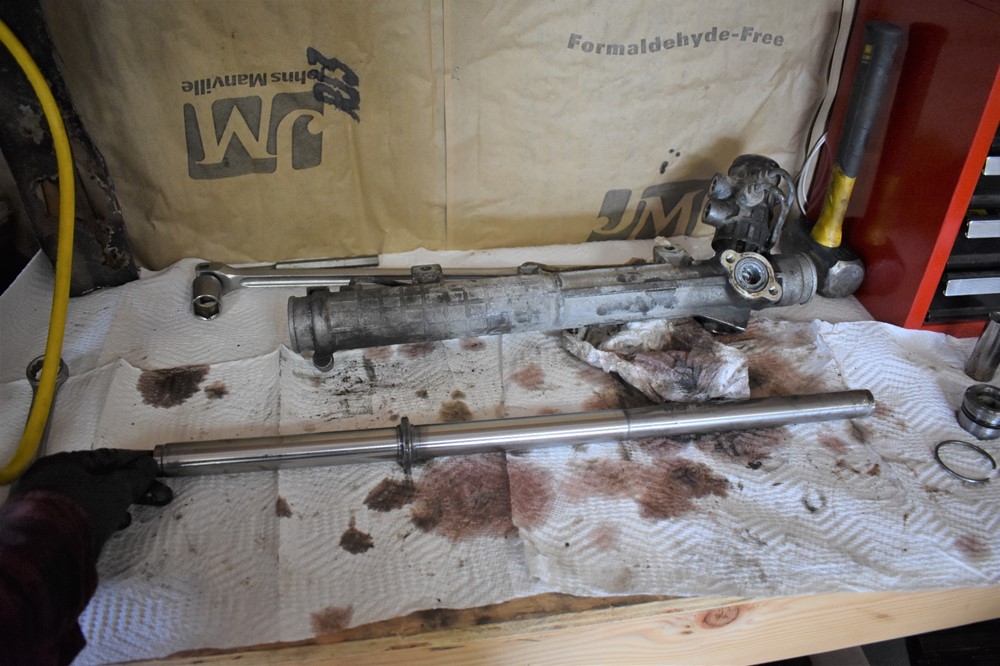
Pull the rod the rest of the way out of the rack and set it aside for later.
-
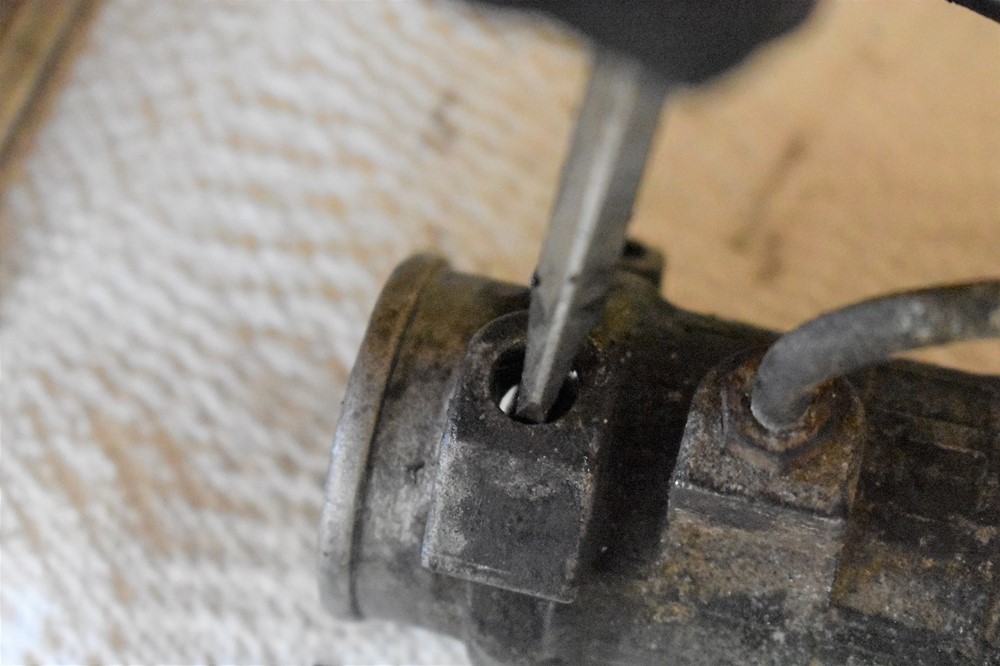
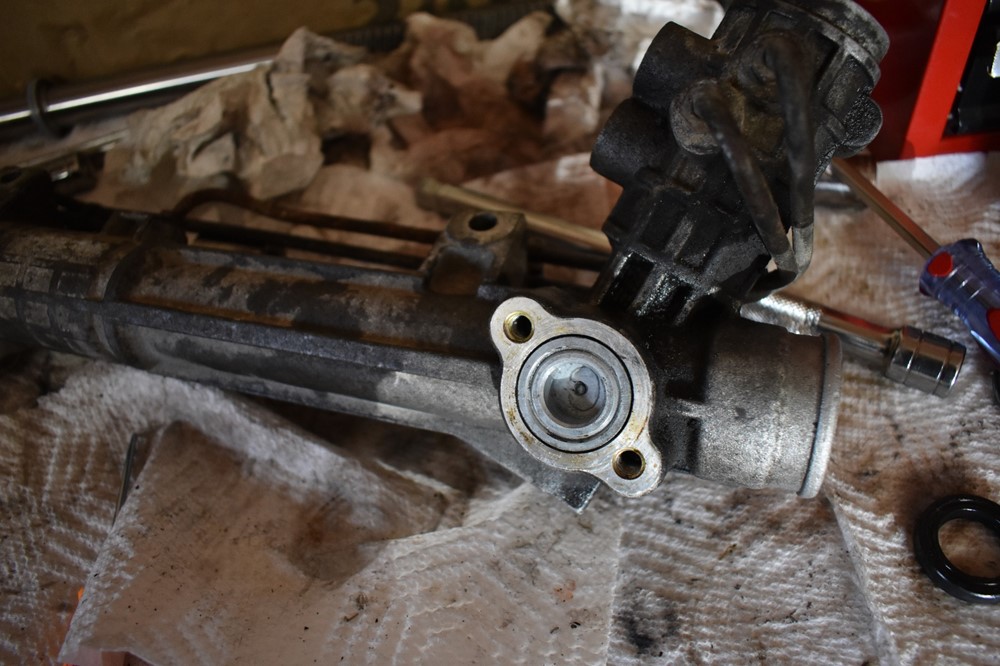
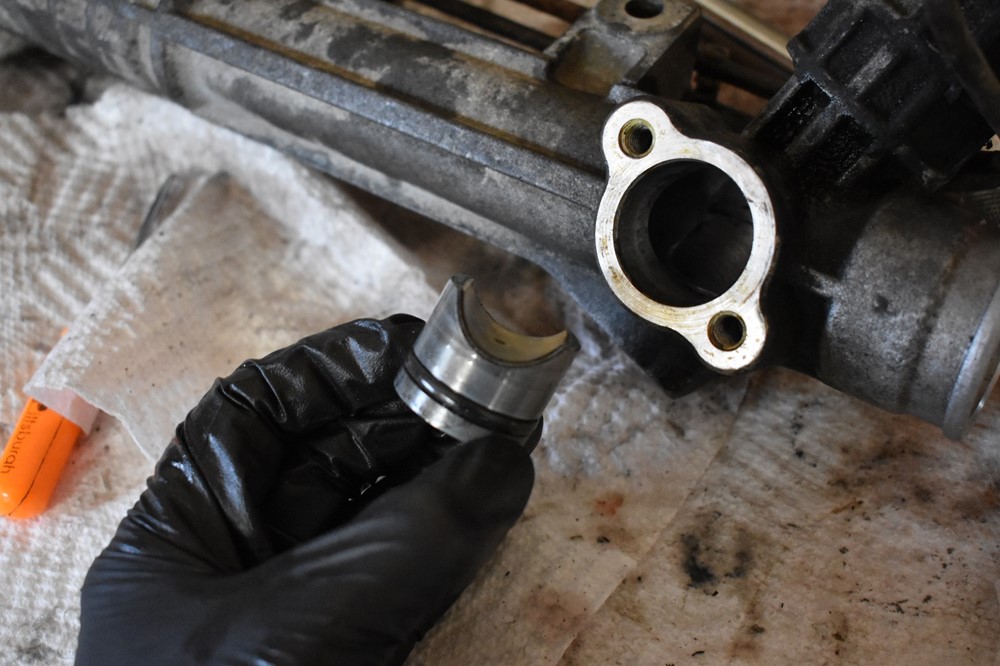
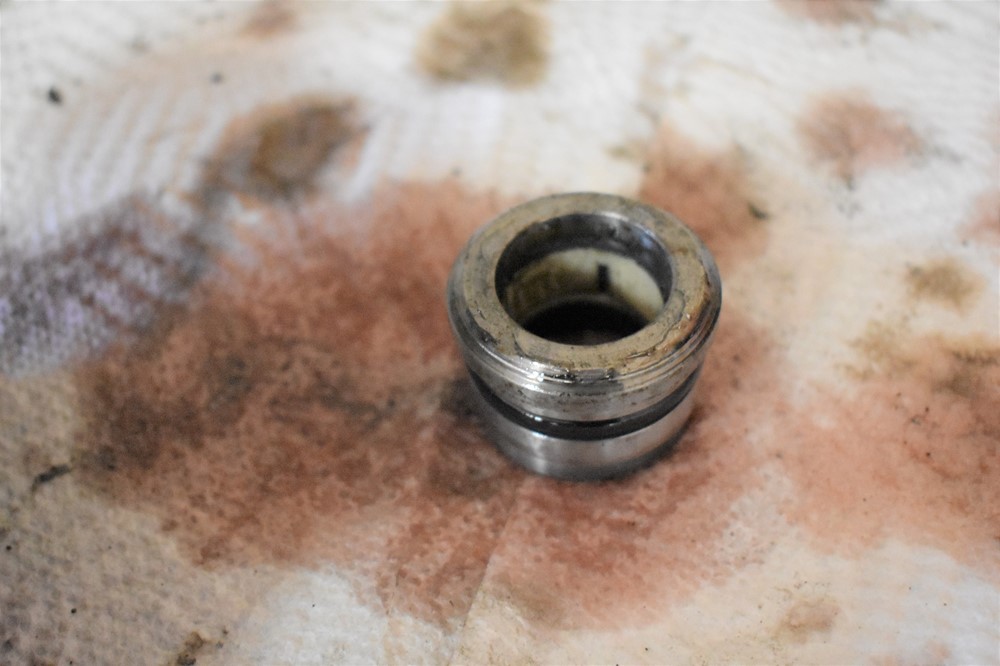
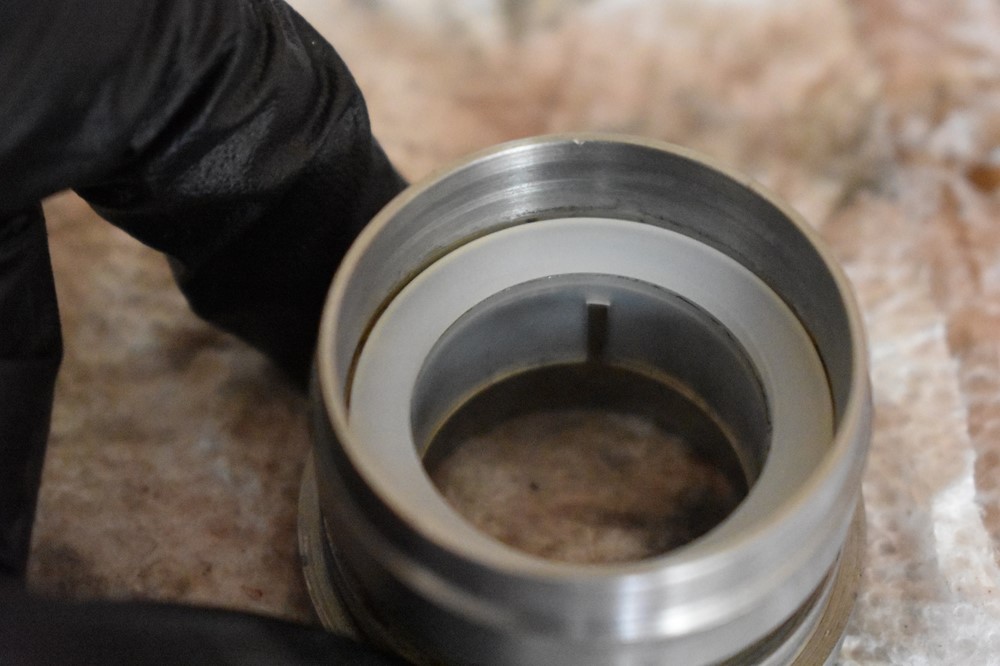
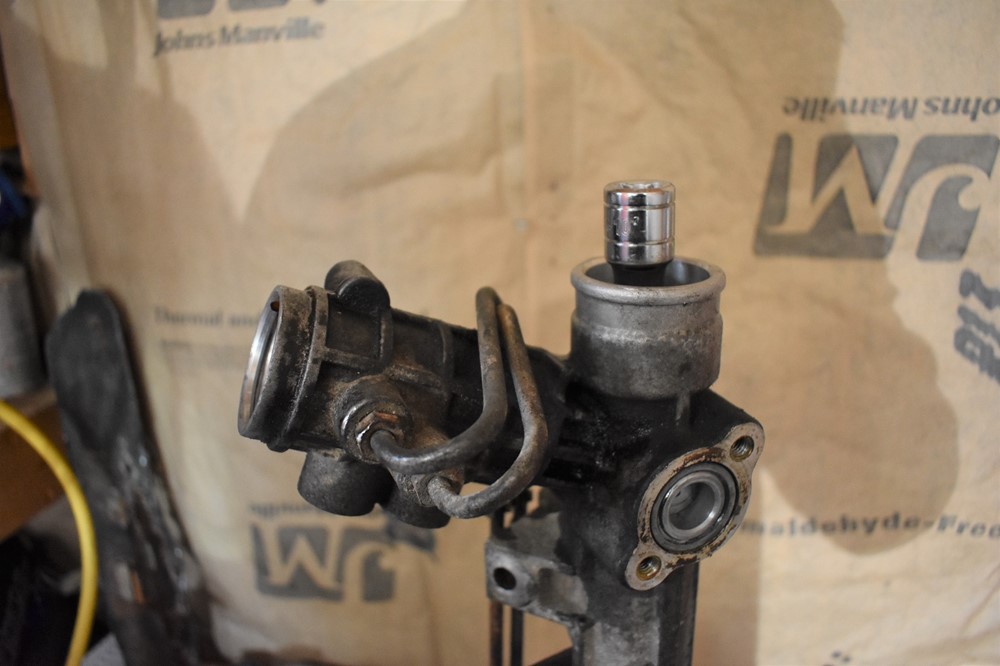
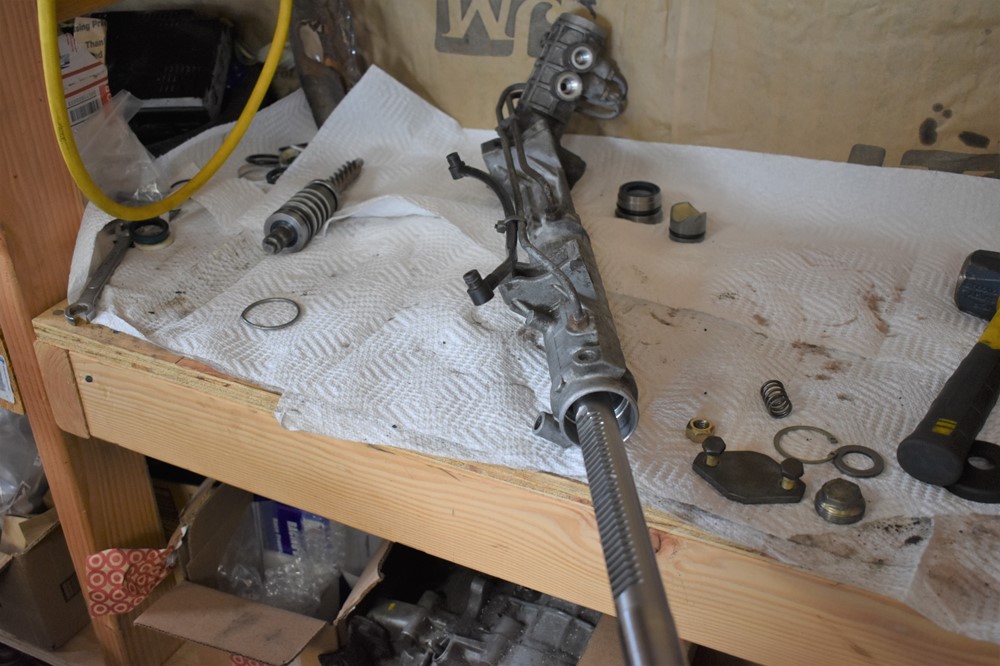
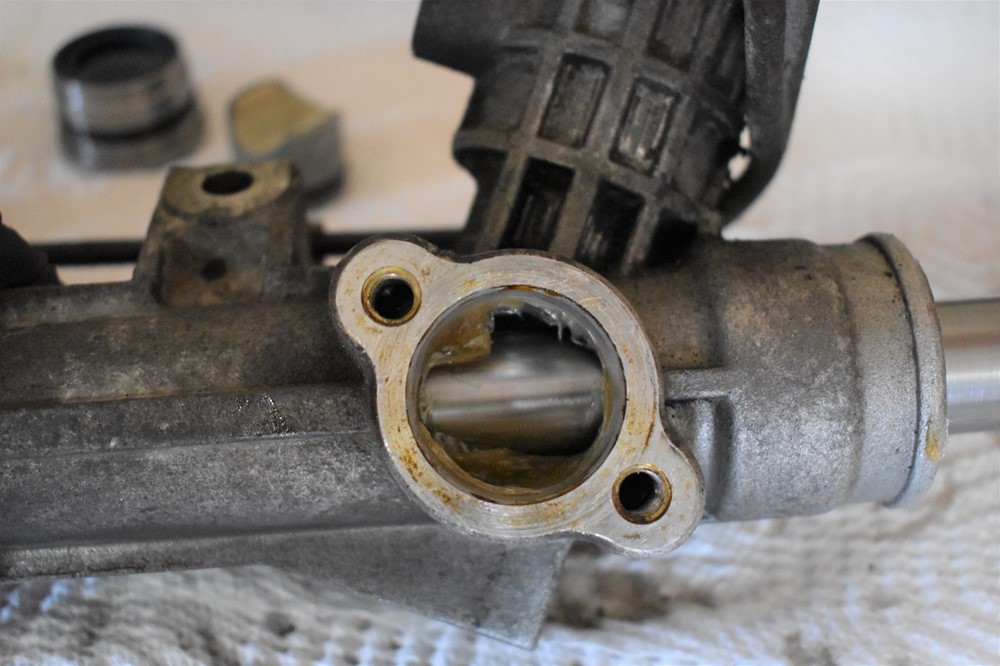
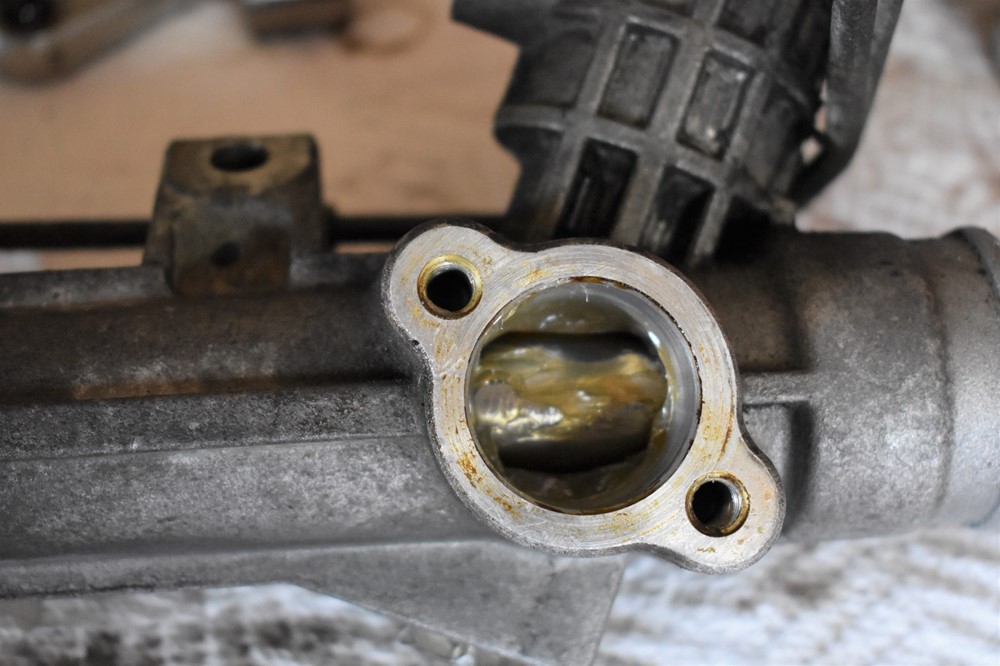
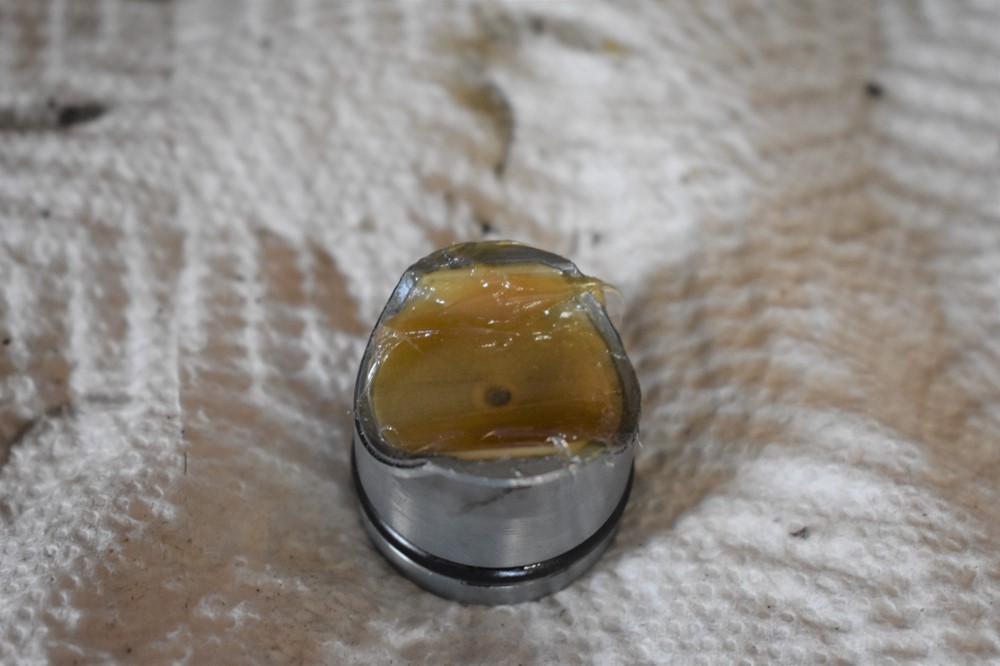
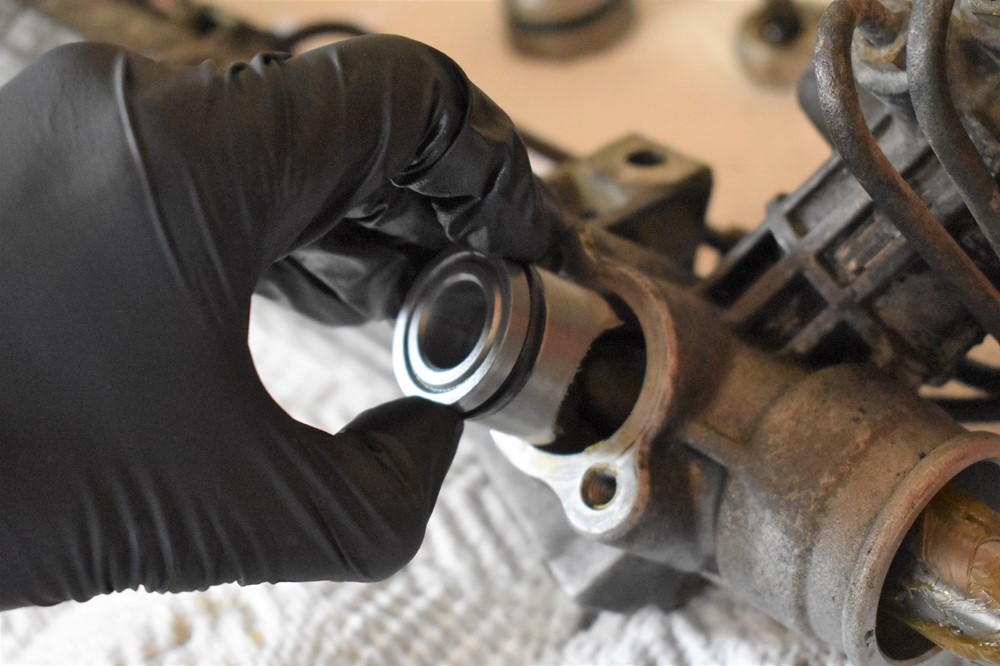
Move back to this end of the rack. Reach into the inside of the rack and press this round plug out from the back. Keep your other hand in front of it, as it’s likely to pop out quickly. Set it aside for later.
Rod Rebuild
-
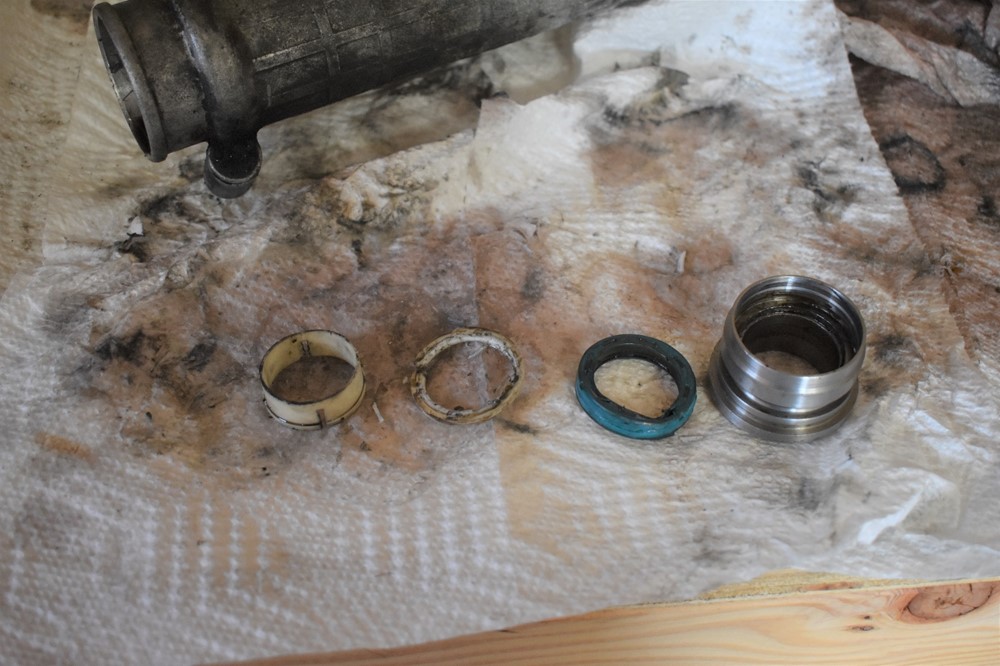
You’ve now removed all of the subcomponents from the rack; it’s time to start removing and replacing seals. We’ll start with the rack rod as it’s the simplest. Use a seal pick to get under the plastic scraper ring and remove it from the rod.

-
Underneath the plastic scraper is an o-ring. Use a seal pick to remove it.
- Clean the rod thoroughly. Pay particular attention to the o-ring groove, and the teeth on the rack; clean out any old grease and gunk to prep it for installation.
-
Of the 5 pieces of #7 in the rebuild kit, it looks to us like 2 are a slightly larger diameter than the rest. After thorough examination, we can’t determine rhyme or reason for more than one to be larger than the rest. We’ve used the 2 larger o-rings for the top of the pinion shaft and the rod o-rings.
-
Take one of the larger o-rings and gently install it into the groove on the rod. Make sure it’s not twisted or spiraled in the groove.
-
All 5 of the plastic scrapers are identical. Take one of them and slide it over the rod. You’re going to have to be very careful at this step. The scraper is a very tight fit, and you don’t want to break it. Instead of trying to seat the scraper completely on one side first, try to get the edge of the ring completely seated, then use your thumbs to press it down and seat it into the groove. It’s not overly difficult, it just requires some care.
- Set the rod aside somewhere clean until it’s time to re-install it into the rack.
Plunger Rebuild
-
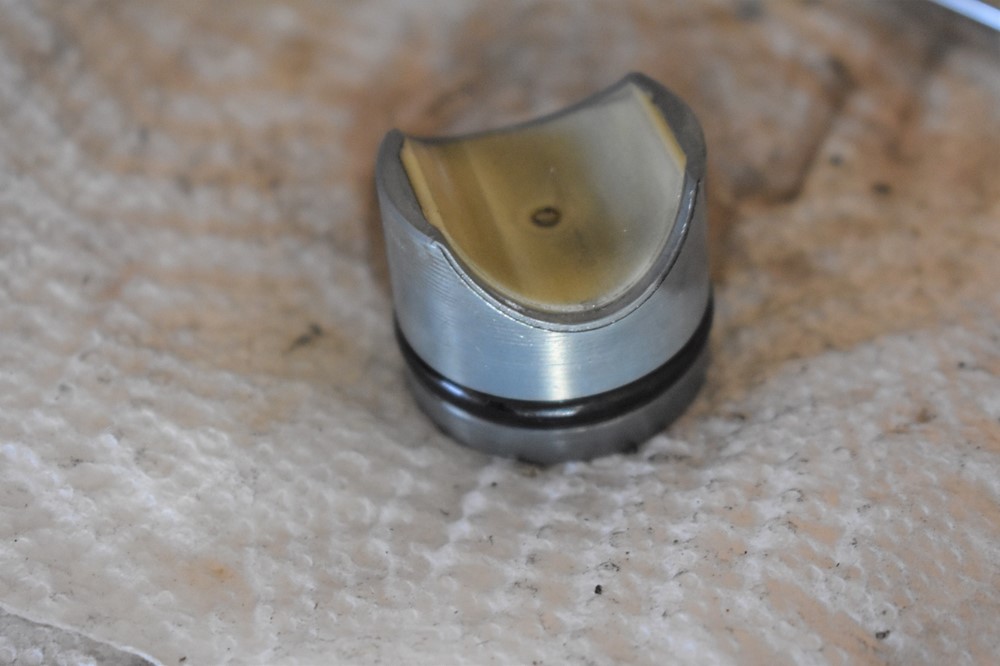
Move to the slider that presses against the rod. Use an o-ring pick to remove the o-ring from the groove.
-
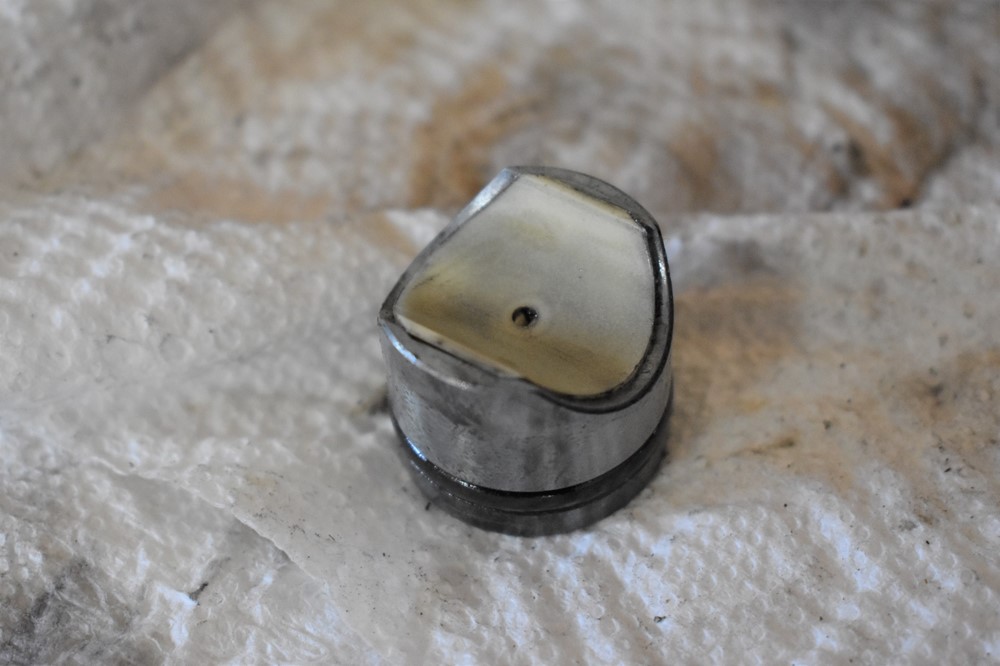
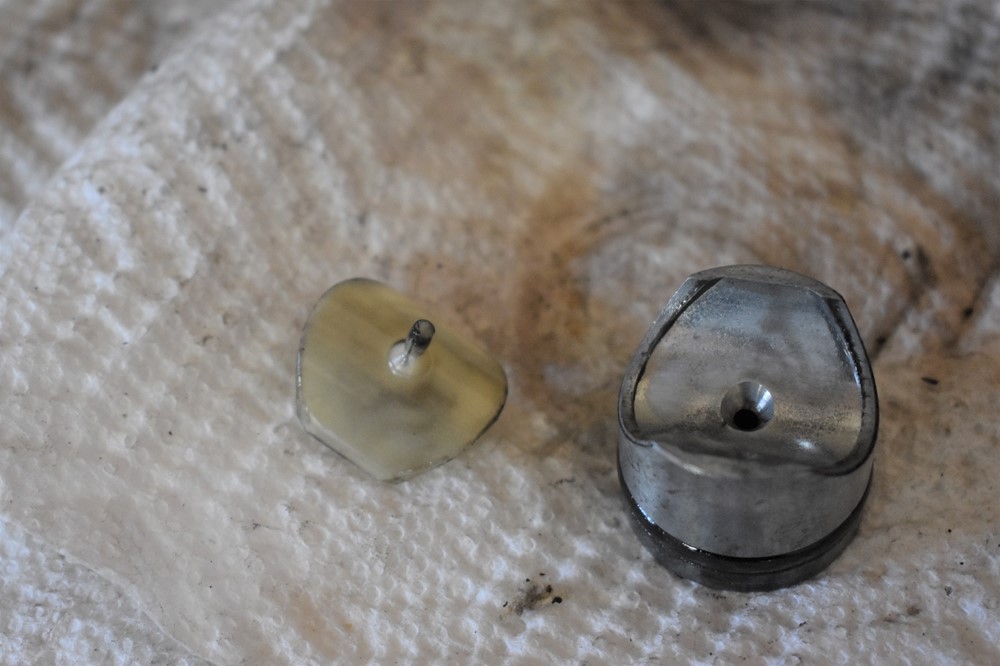
Press the plastic pin on the backside of the plunger to push out the plastic bearing surface on the plunger, and remove it. Clean it and the plunger well, make sure it’s in good shape, then re-install in.
-
Install the new o-ring (#9 from the kit) onto the plunger. This o-ring is a tight fit, make sure that it’s not twisted or spiraled in the groove. Set the plunger aside until you’re ready to install it.
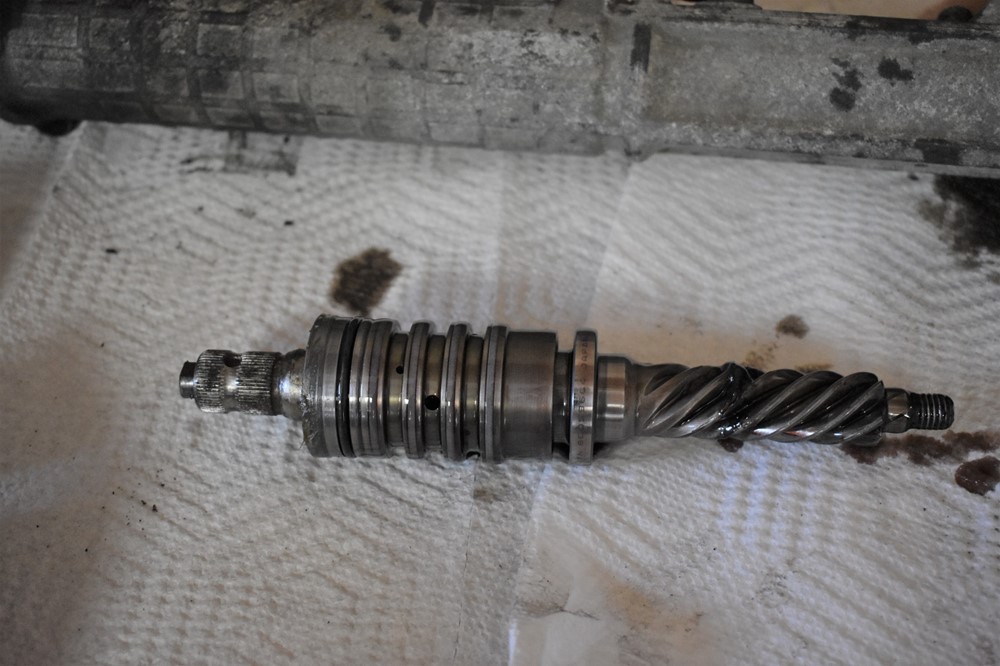
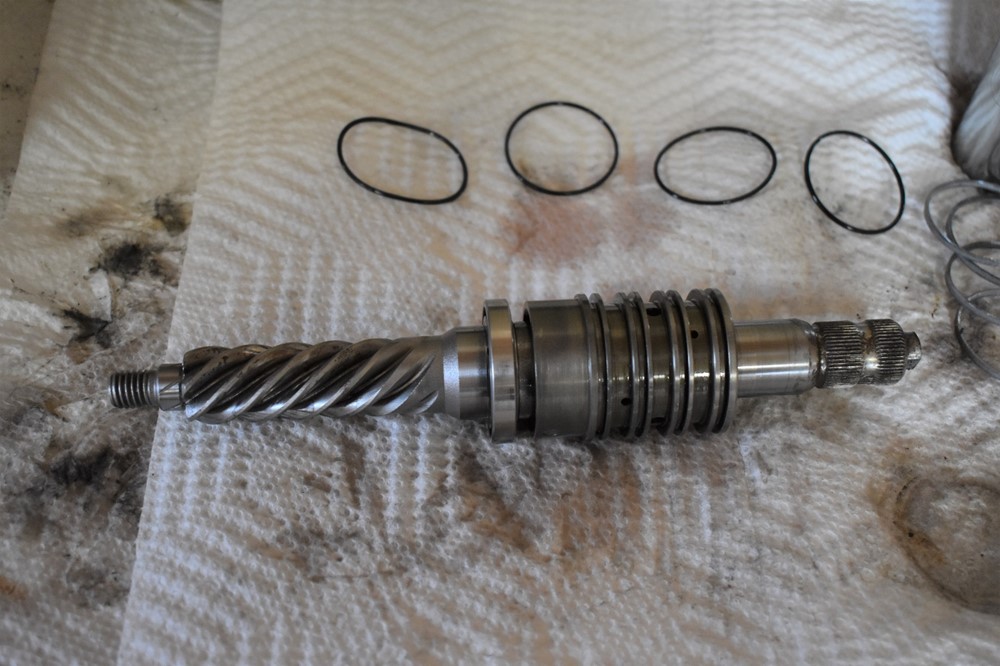
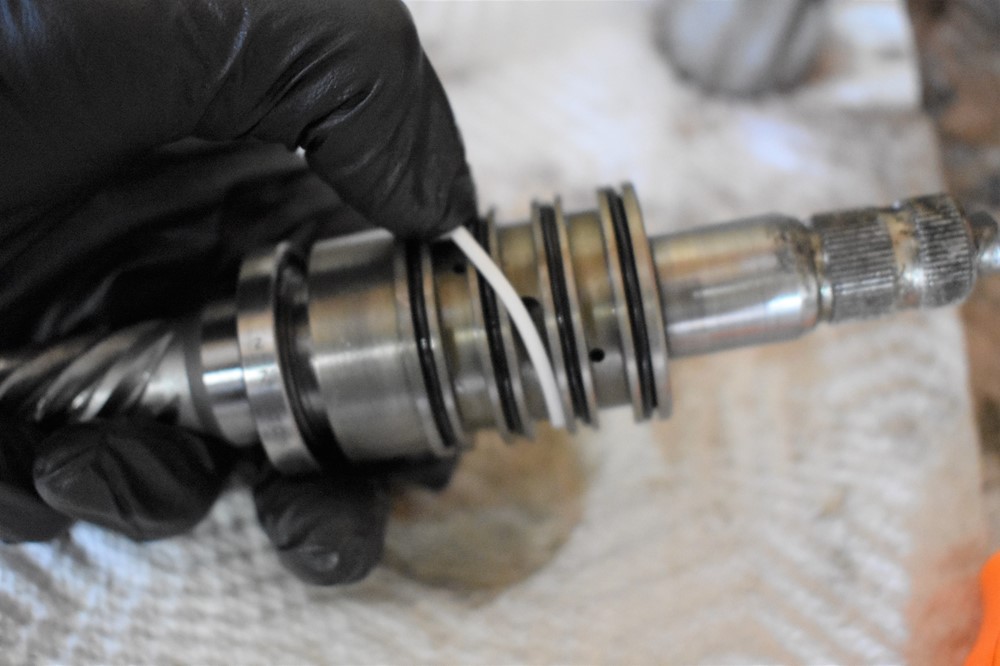
Pinion Shaft Rebuild
-
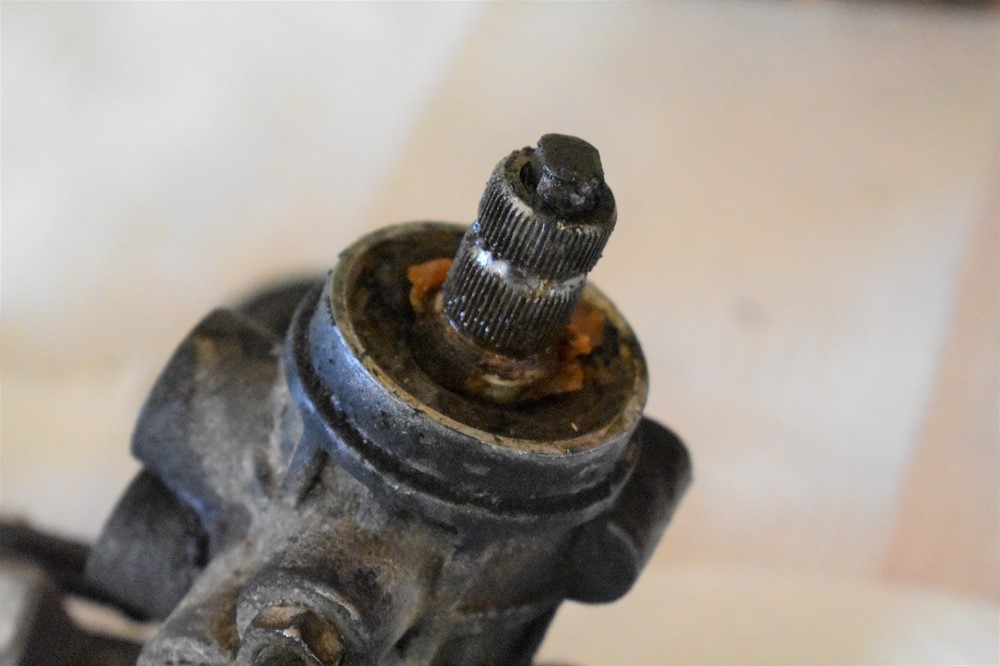
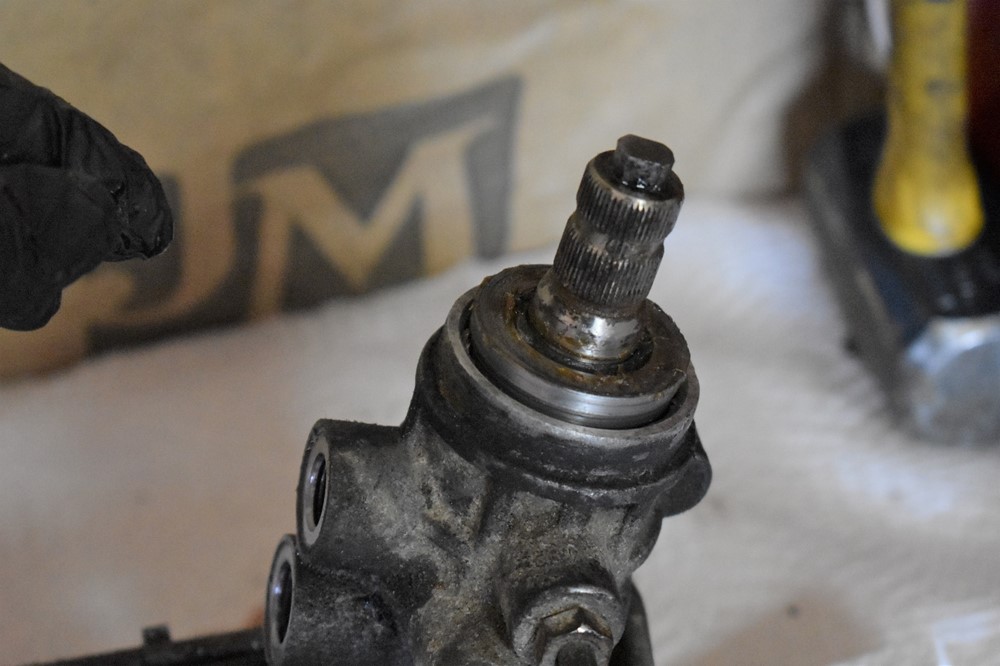
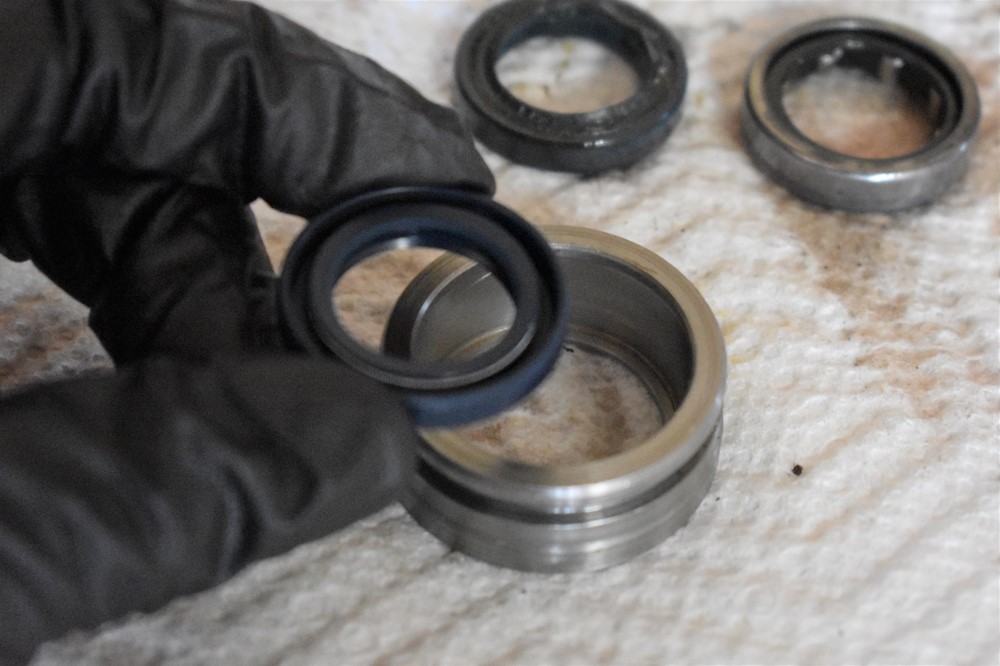
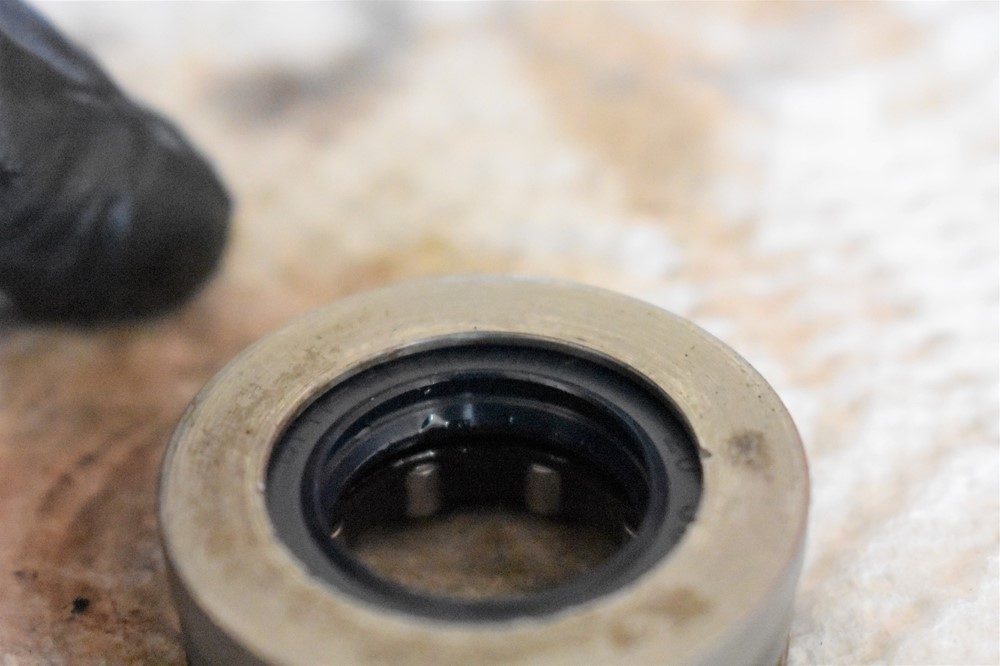
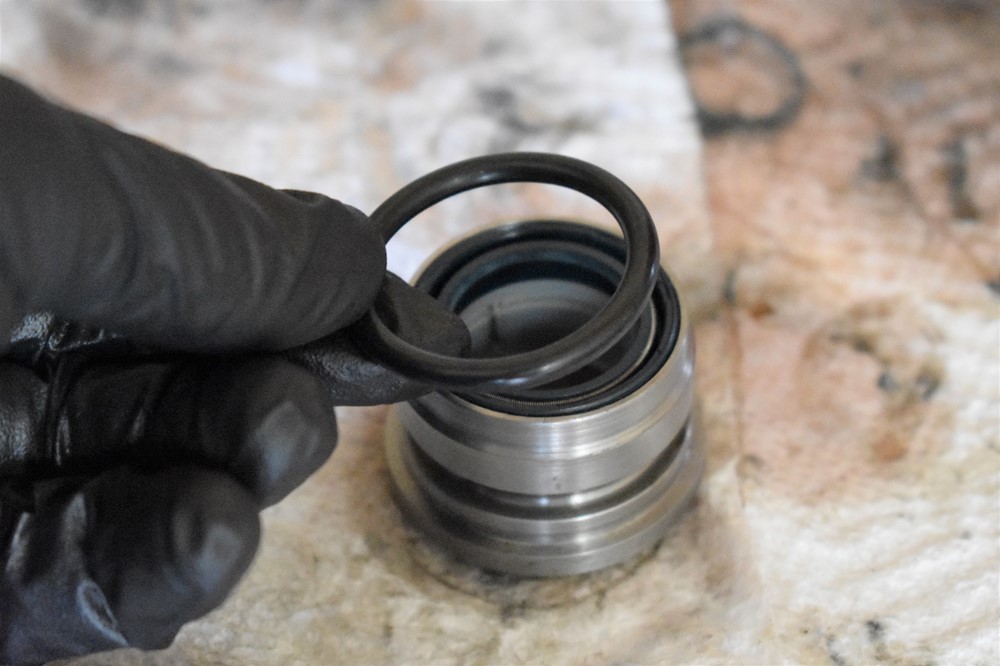
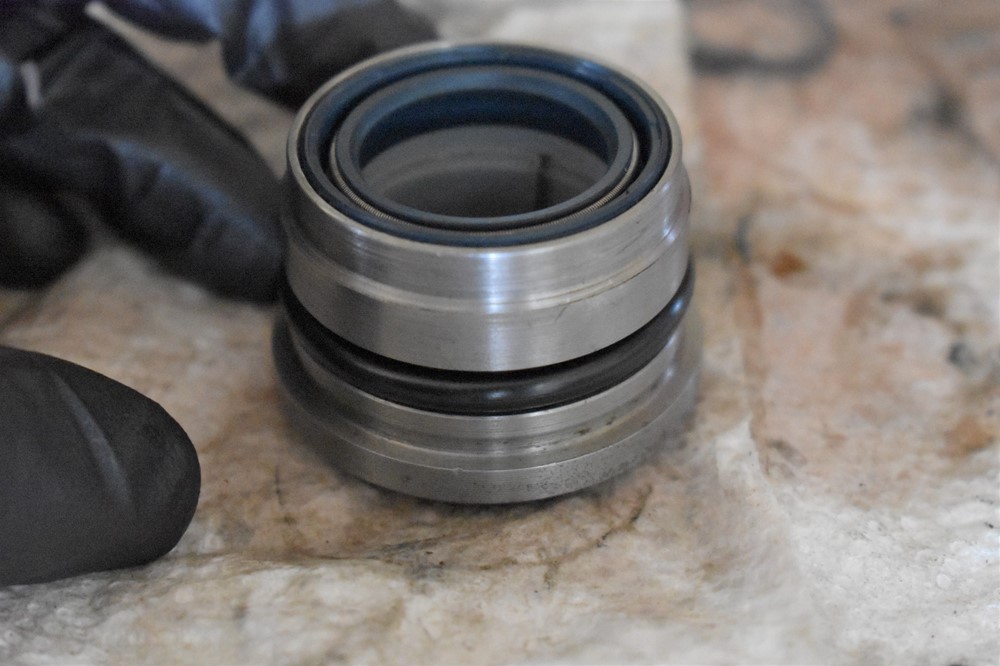
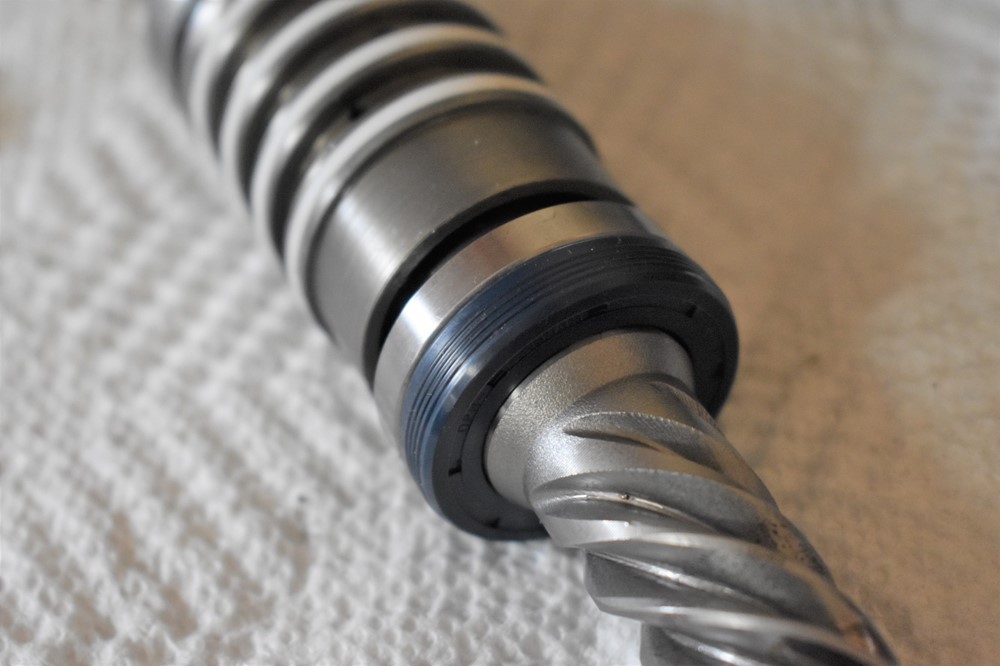
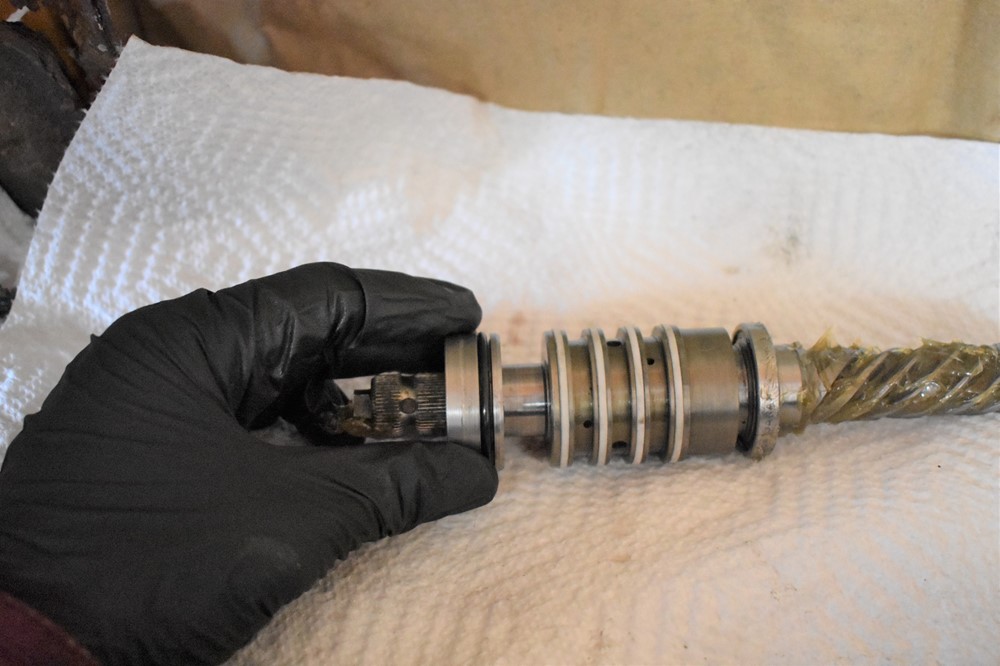
Take a close look at the pinion shaft. At the top there’s actually a cap that’s not an integral part of the shaft. Pull it off of the shaft, it shouldn’t be too difficult.
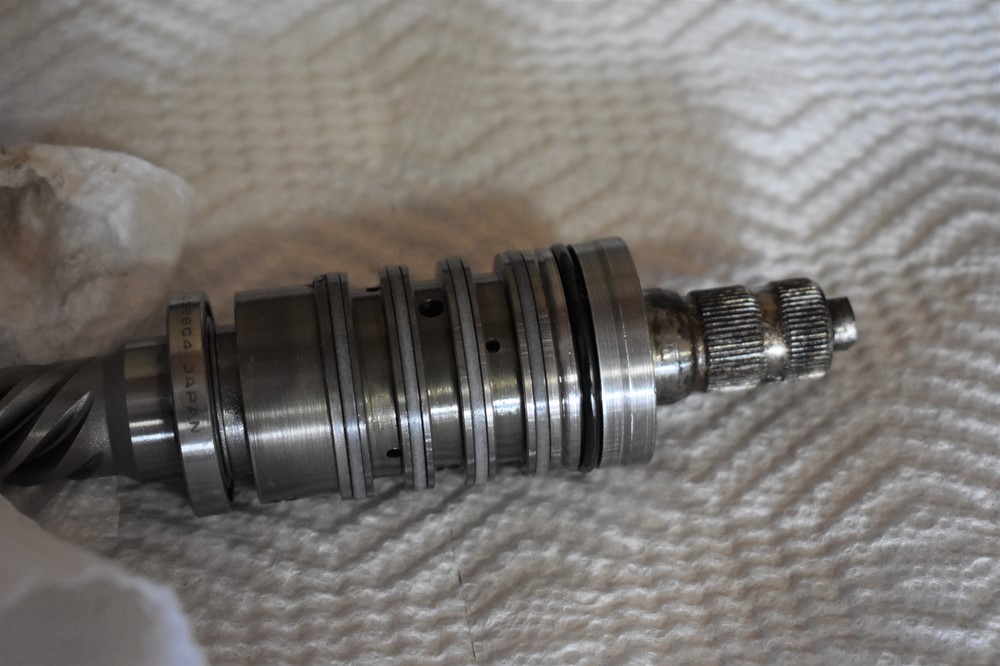

-
Use a seal pick to remove the o-ring from the outside diameter of the cap.
-
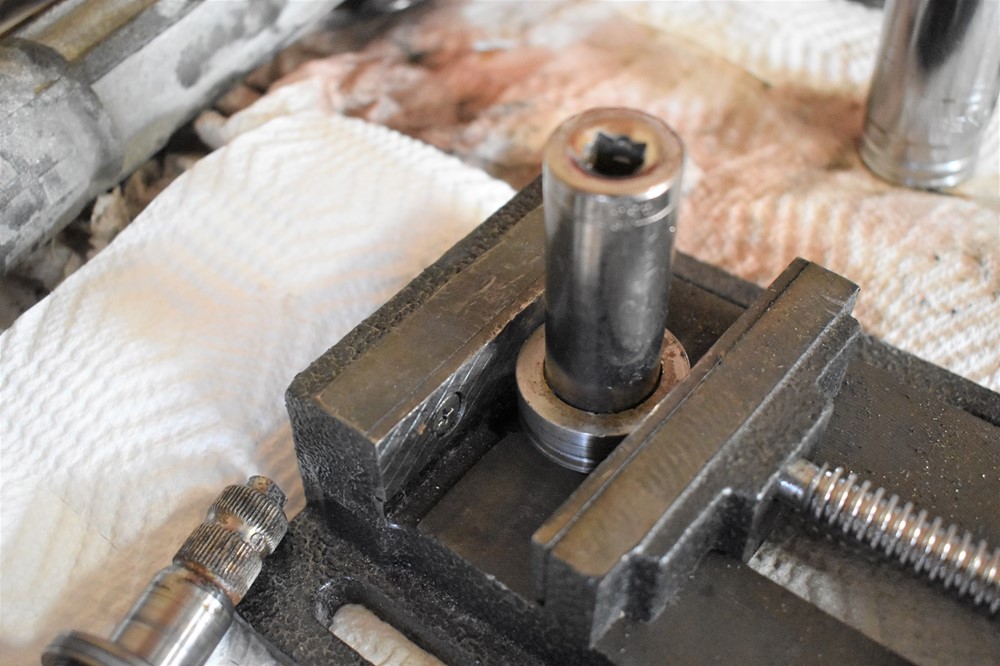
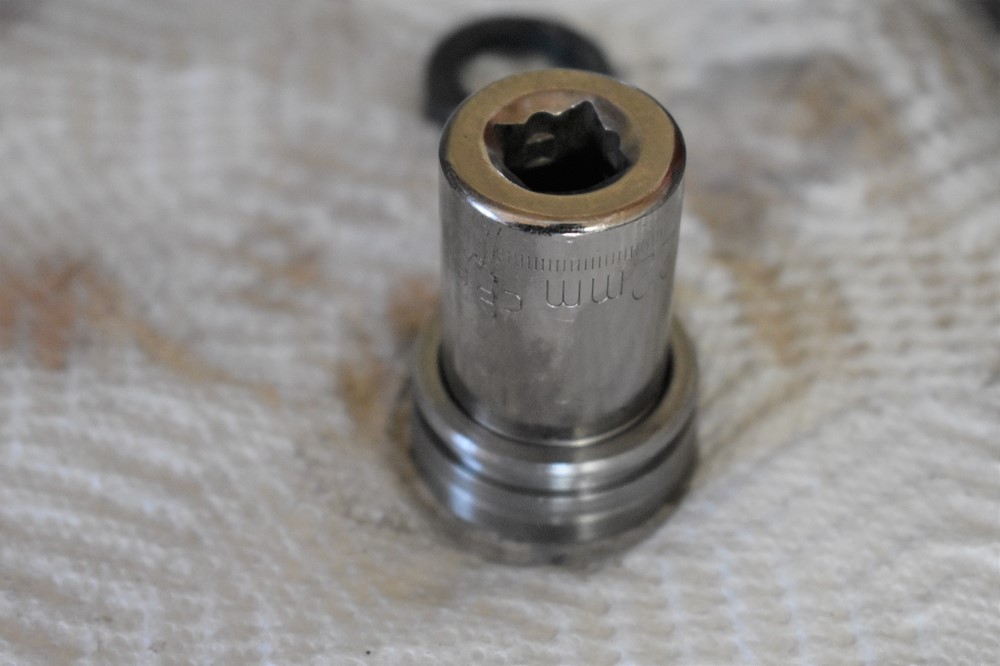
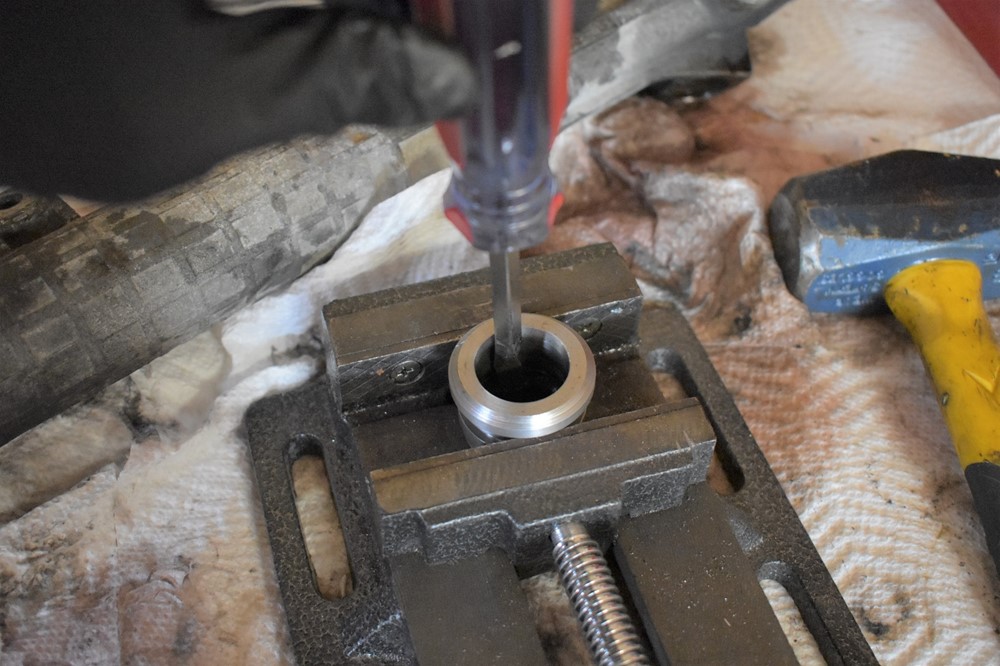
Flip the cap over so that the seal side is facing upwards. Place the cap on a vise (or two blocks, etc), so that the cap is sitting on it’s outside edge, but not blocking the bearing from coming out of the cap. Find the largest socket that will just fit inside the metal edge of the cap (my memory is fuzzy, I think this is a 3/8″ drive 19mm socket). Use a mallet to gently but firmly drive the seal and bearing out of the bottom of the cap.
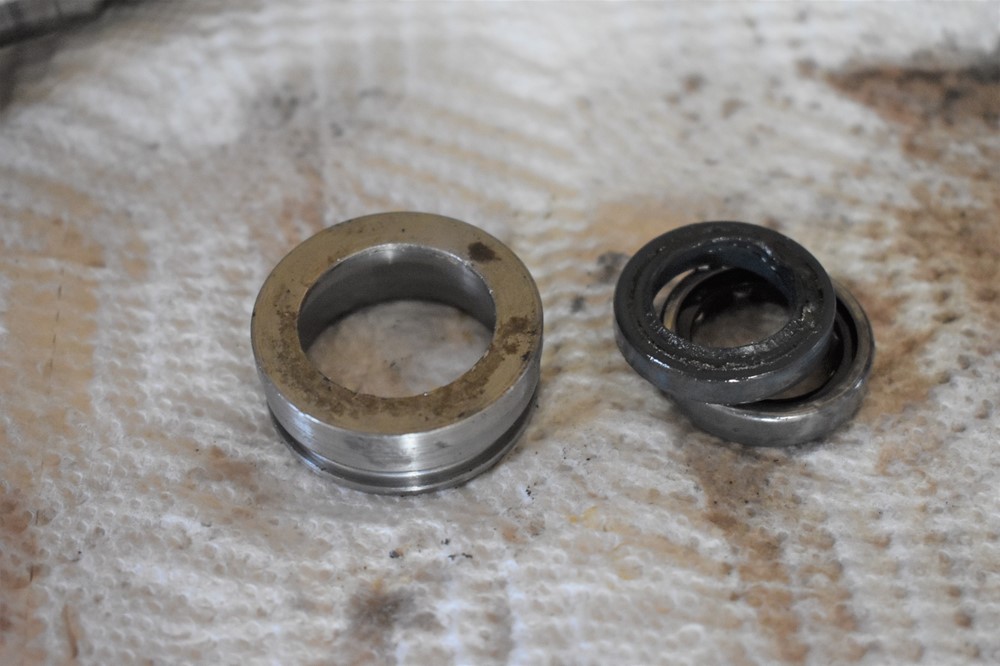
- Clean the cap and bearing thoroughly.
-
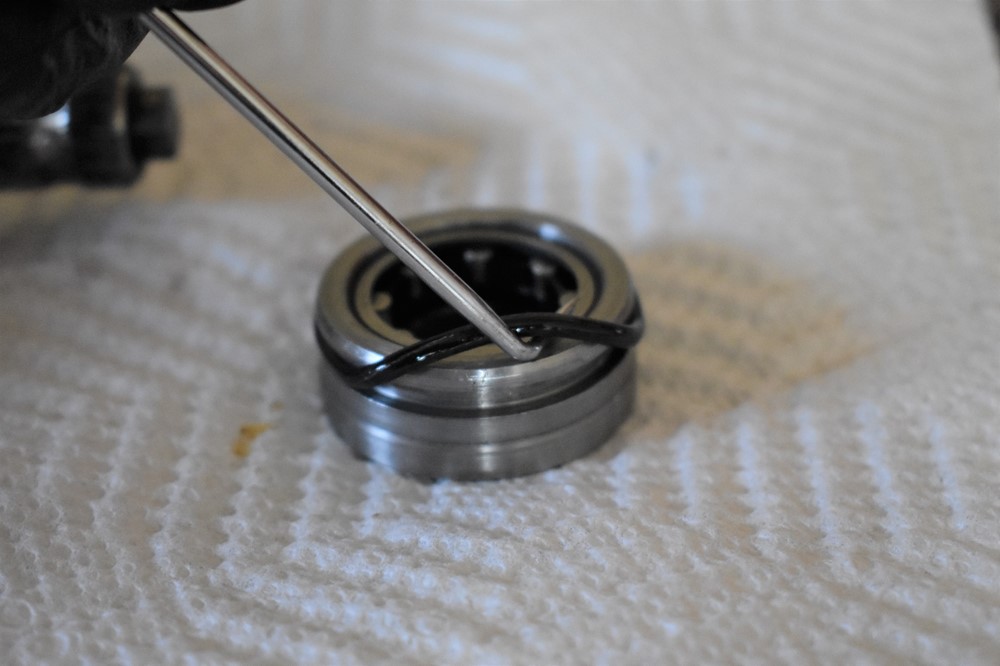
Flip the cap upside down (so that the larger diameter opening is facing upwards). Find the new #12 from your kit (it’s marked “20 30 5/5.5”), and place it into the opening in the cap, with the grooved side up. You should be able to press fairly well into the cap by hand, making sure to keep it even.
-
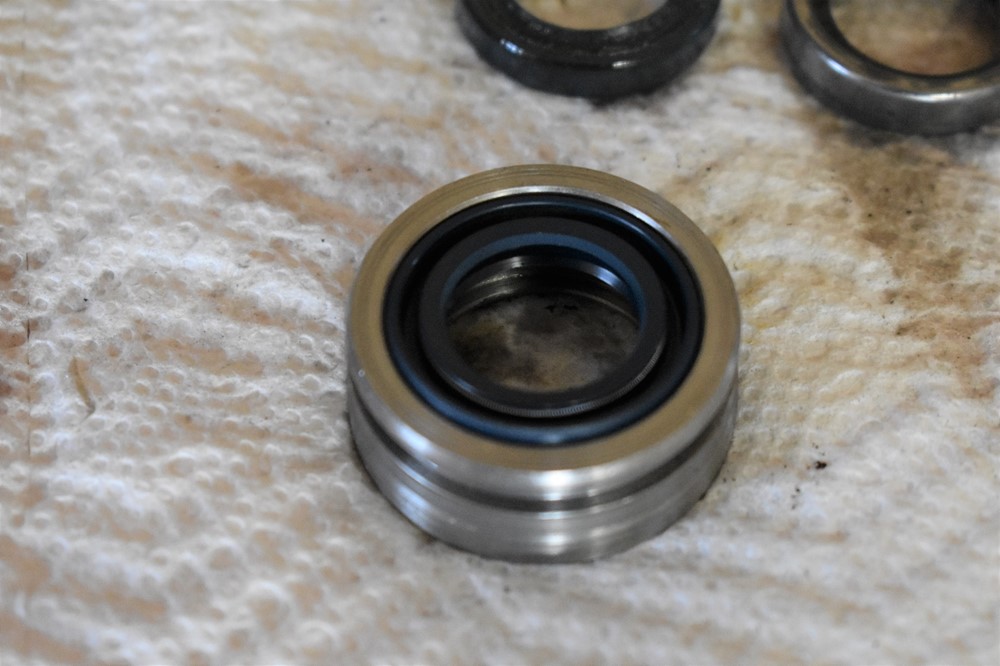
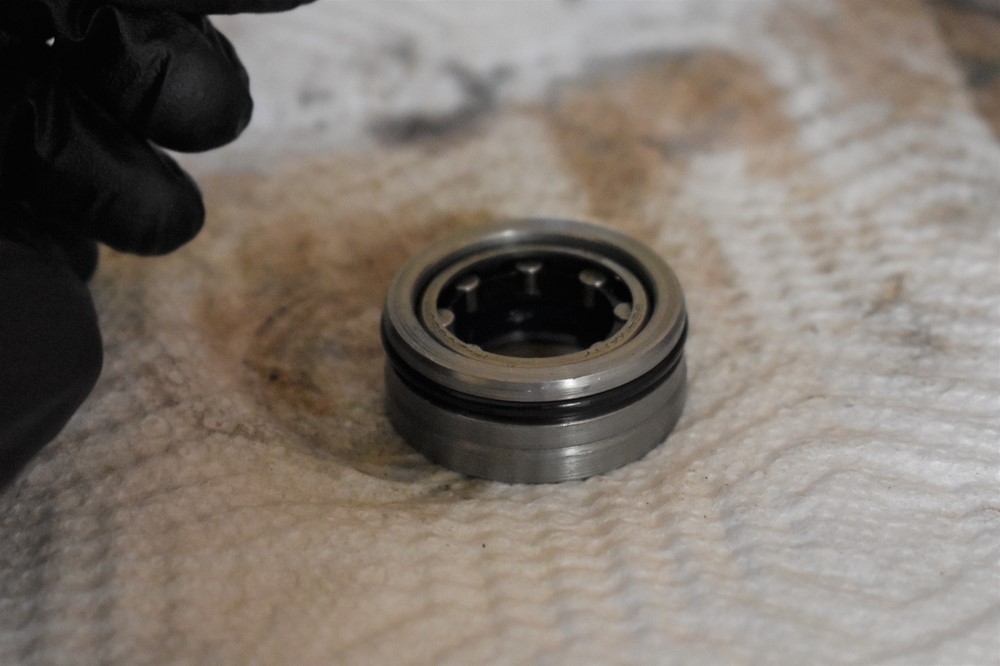
Set the bearing back on top of the seal. We believe this bearing is symmetrical, but just to be safe, make sure the engravings seen here are facing up.
-
Find the biggest socket you have that will sit on the bearing, but fit inside the cap. In our case, a Craftsman ½” drive 22mm socket fit the bill. Use a mallet to gently tap the bearing and seal back into the cap. You should be able to feel the difference when the seal fully seats into the cap, but to be safe, you can keep flipping the cap over after each tap to see if the seal is seated yet. It should be right up against the inside edge of the cap.
-
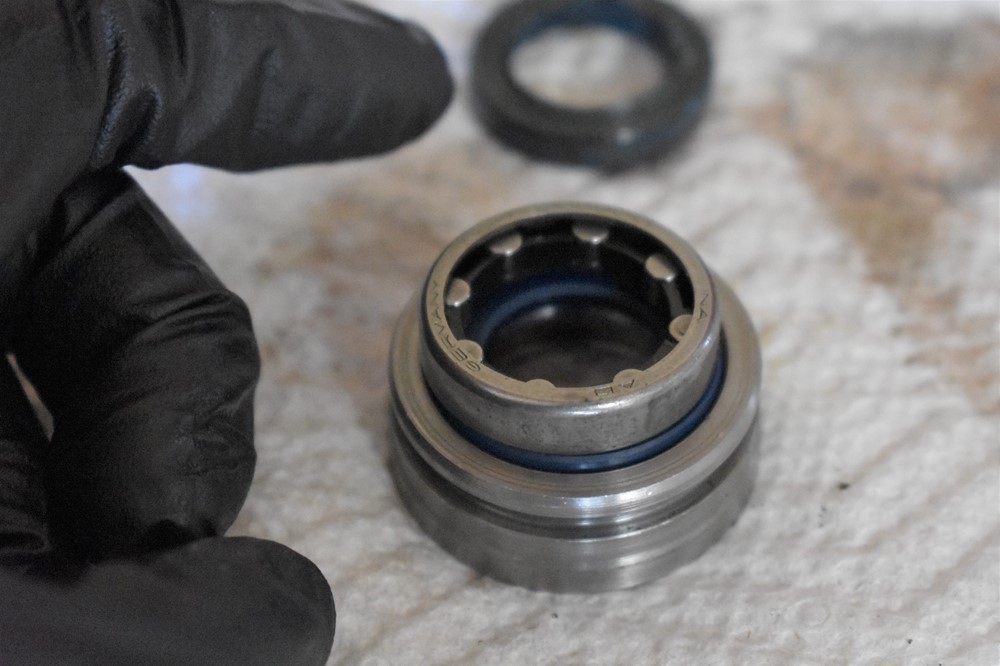
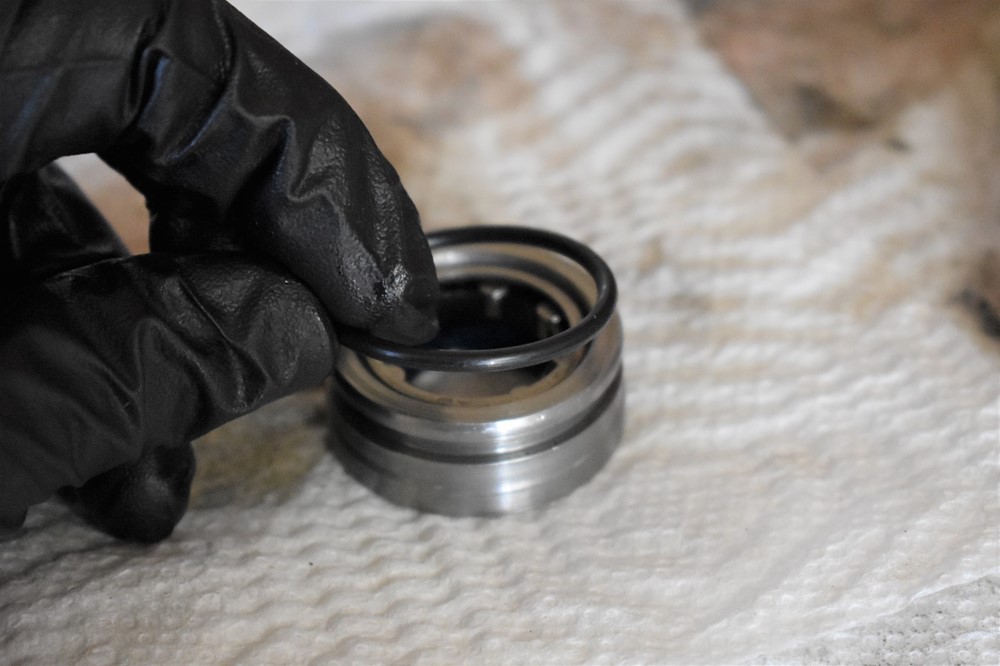
Find #6 in your kit (the large diameter, smaller cross section o-ring), and install it onto the cap. It’s very important with an o-ring of this size to make sure that it’s not twisted.
-
Set the cap aside for now, and move back to pinion shaft.
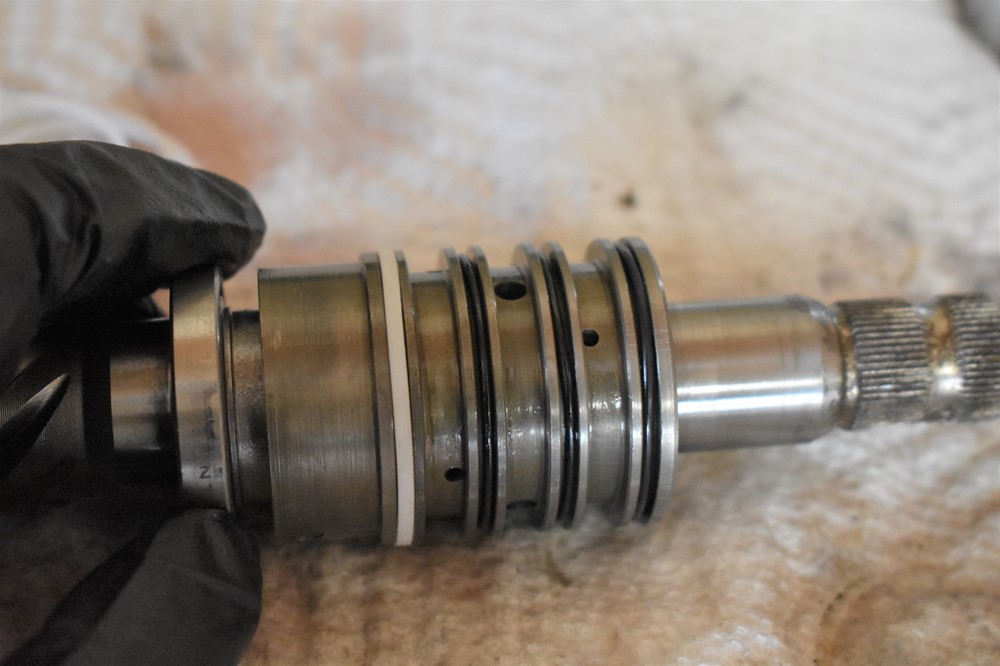
-
Use a seal pick to pry off the four plastic scrapers.
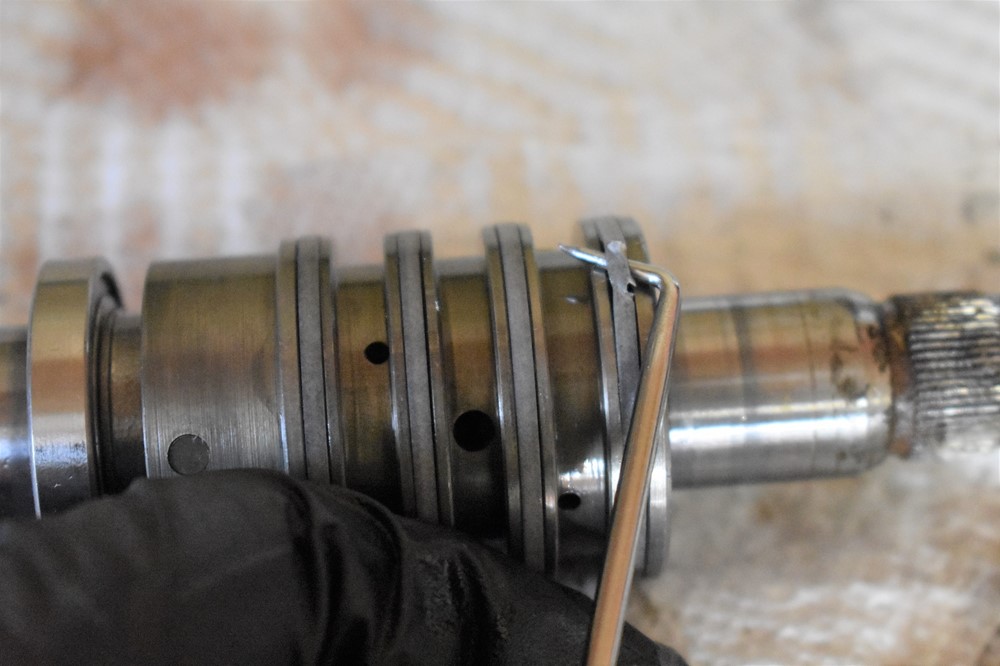
-
Underneath each scraper is an o-ring. Use a seal pick to remove them.
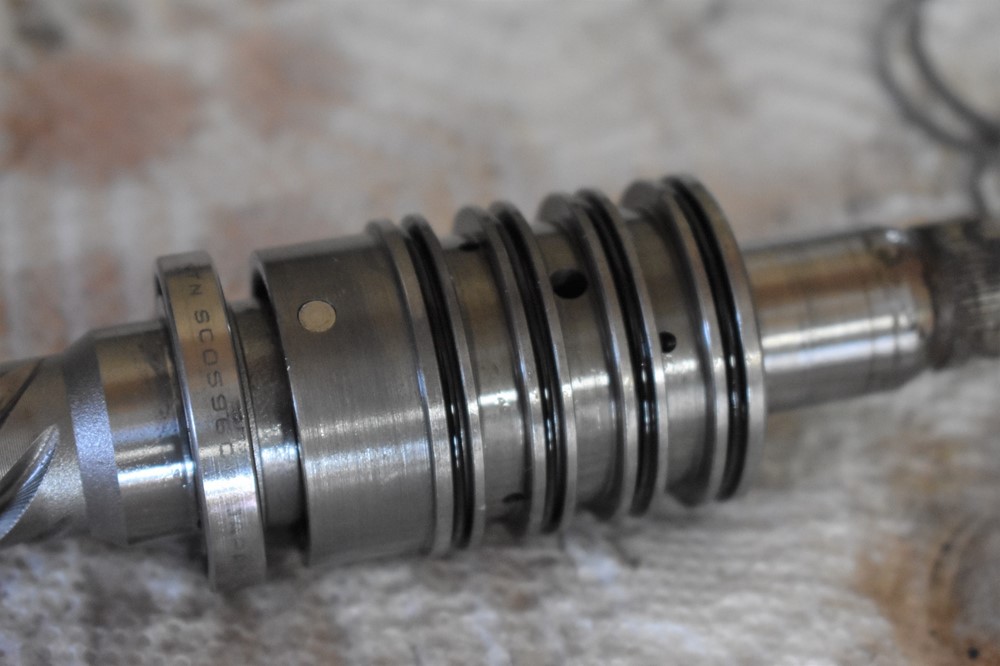
- With all the seals removed, thoroughly clean the pinion shaft. Pay particular attention to cleaning the old grease out of the gear teeth, making sure the bearing just above the teeth is clean, and the ports in between all of the o-ring grooves are clean.
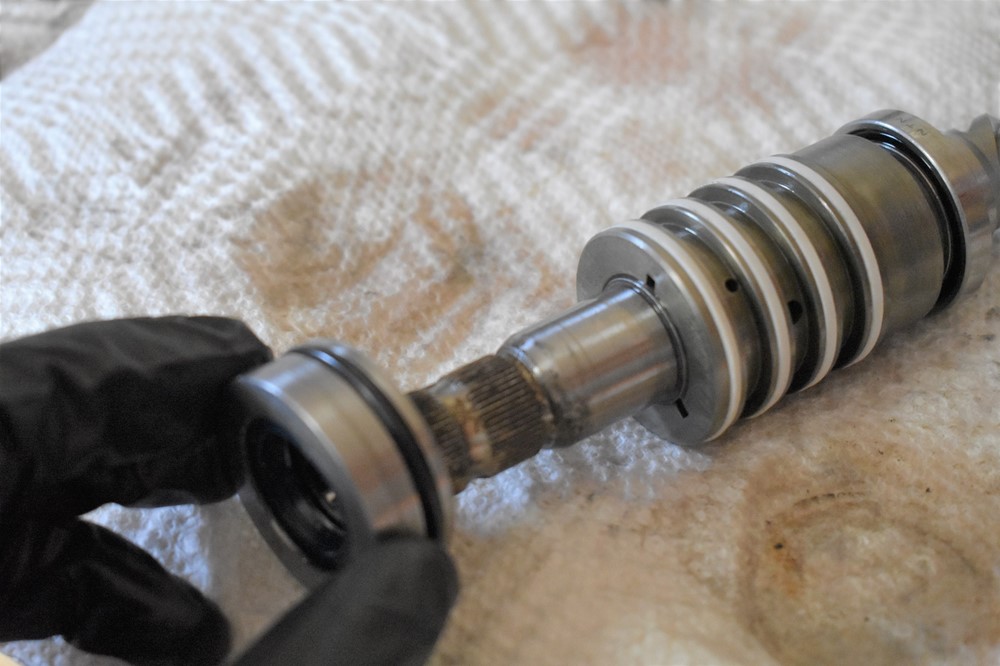
-
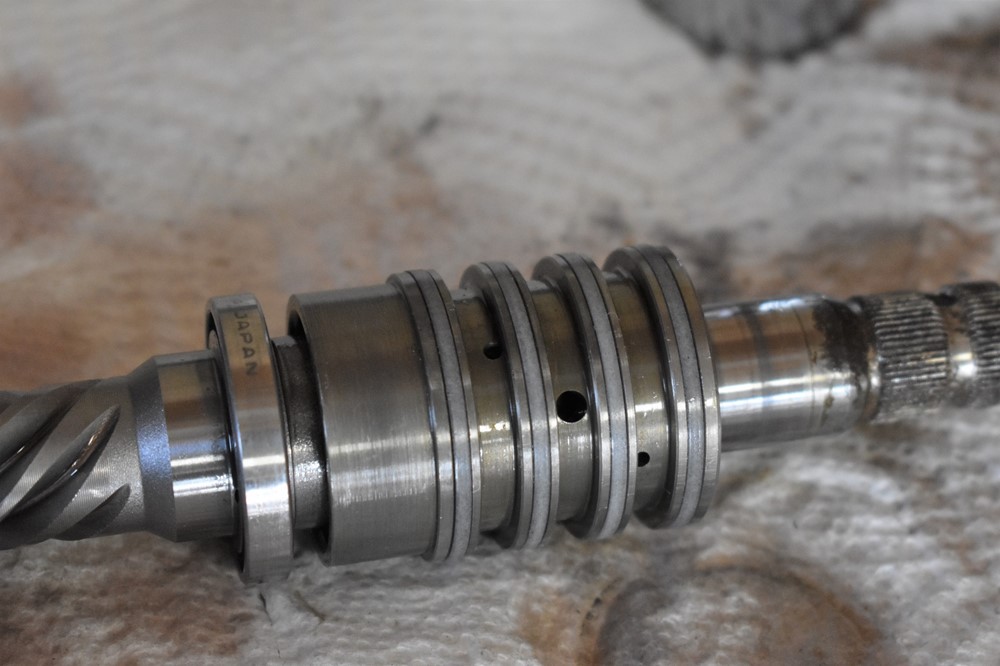
Install the o-rings from left to right in the image below. Slide each o-ring over the top of the pinion shaft, then gently pull it over each of the o-ring grooves until you reach the right one, being careful not to stretch it any more than necessary. As we noted earlier, one of the 4 o-rings in our kit appeared bigger than the others, despite the fact that the grooves and plastic scrapers are all identical. We chose to install the larger o-ring on the farthest right groove.
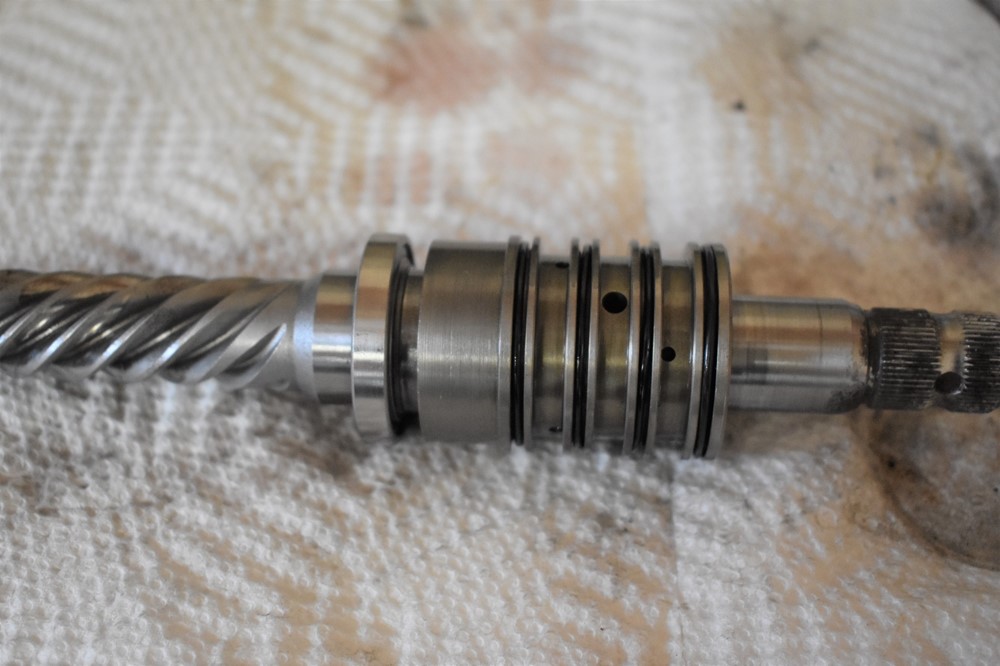
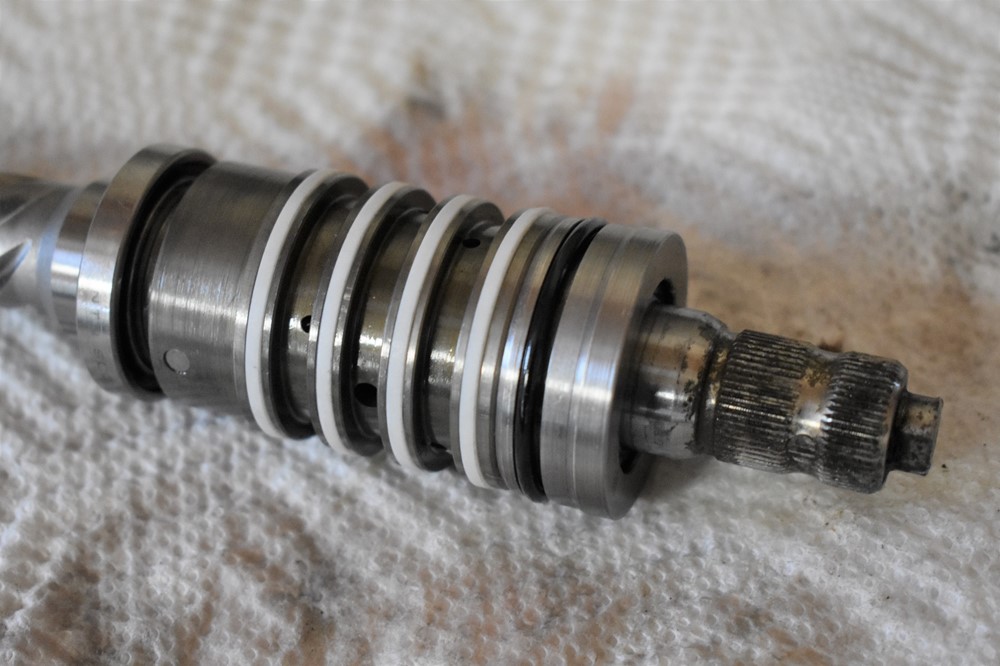
-
Installing the new scrapers is one of the more delicate parts of this how-to. You don’t want to stretch or crack the scrapers, and you’ll need to be very careful. Again, install from left to right. To get the far left scraper over the other grooves, carefully pull one side of the scraper over the groove. Then run your thumbs around the scraper to pull it the rest of the way over the groove.
-
To install the scraper, carefully seat one side of the scraper into the groove. Then run your thumb around it to seat the rest of the scraper into the groove. Make sure it’s entirely in the groove and oriented correctly.

- Repeat for the remaining scrapers.
-
Install the pinion shaft cap back onto the top of the shaft. The end of the cap nearer the o-ring goes on first.
- Set the pinion shaft aside until it’s time to assemble everything.
Passenger End Cap Rebuild
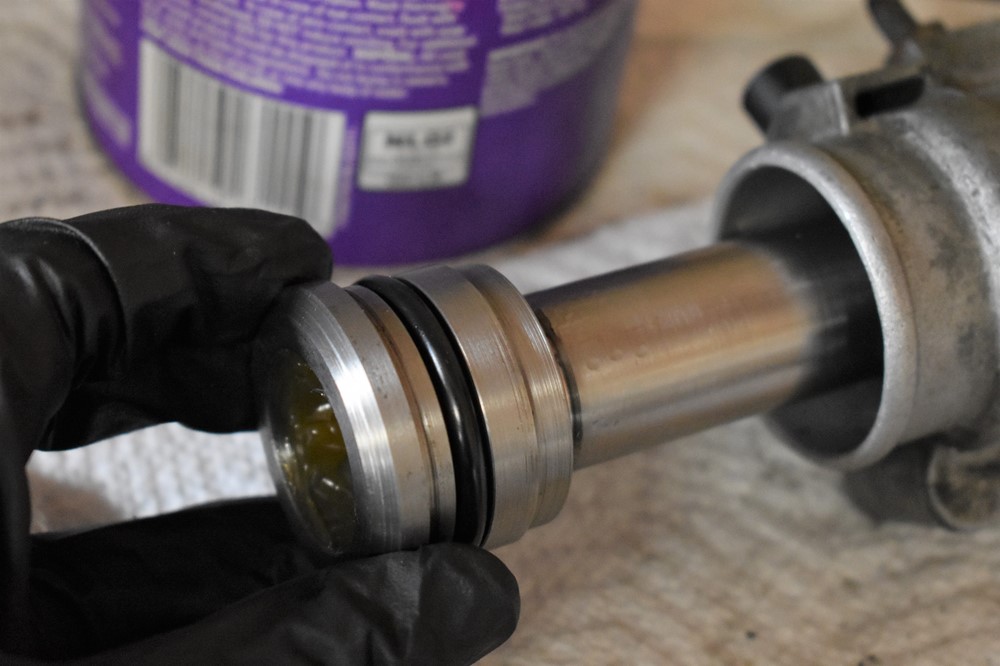
-
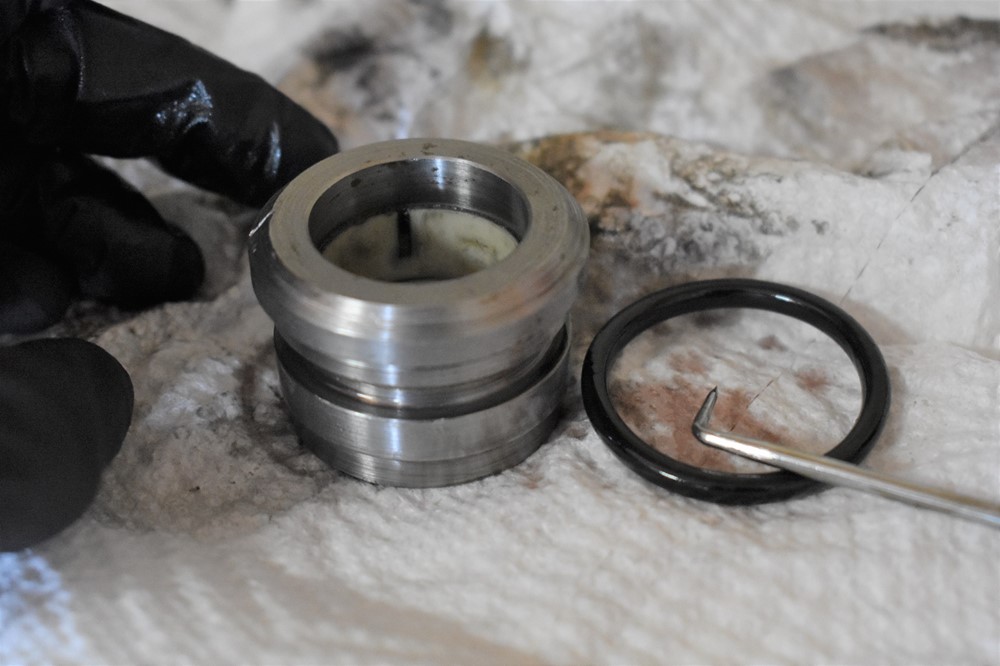
Use a seal pick to remove the o-ring around the outside diameter. It’s a snug fit, you might have to fight it a little bit.
-
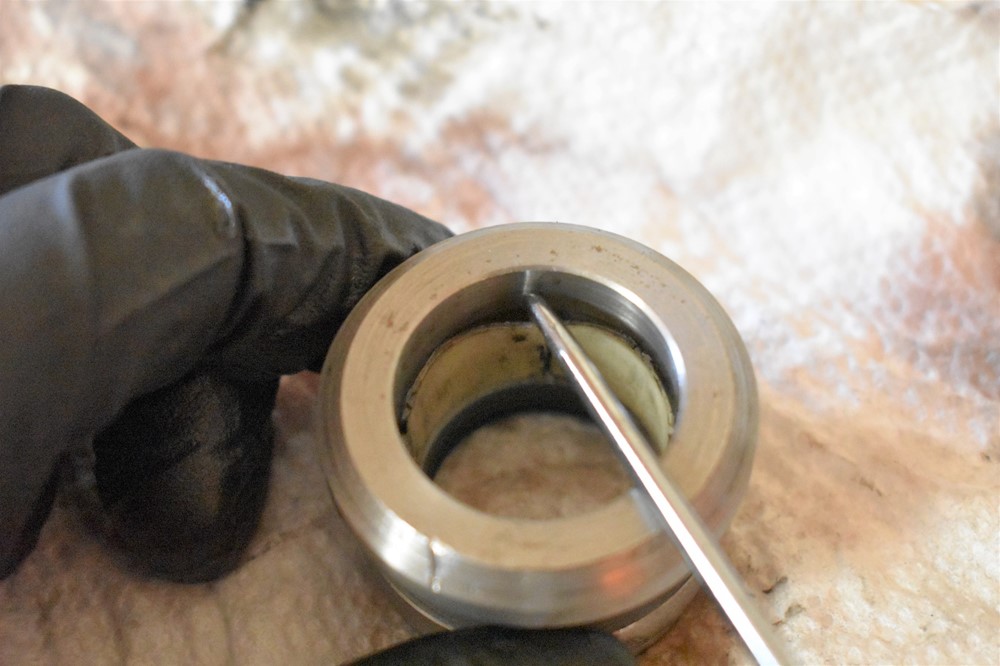
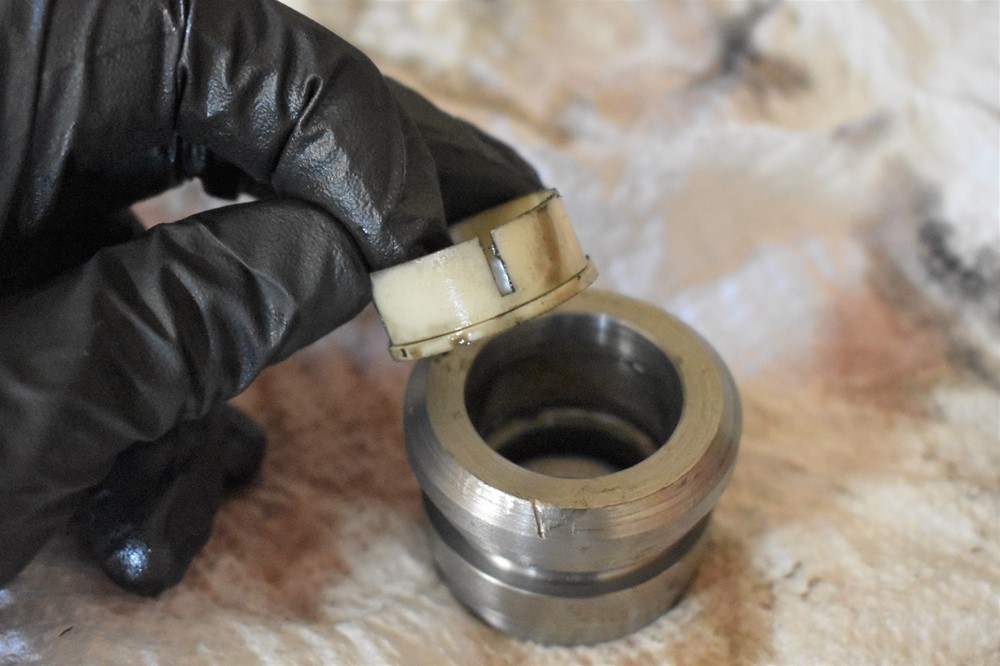
Slide a seal pick behind the outside of the plastic liner, and pry it out of the cap.
-
Place the cap in a vise (or between two blocks, etc), so that the cap is resting on its lip. Place the tip of the flathead screwdriver against top of the plastic guide inside the cap, and use a mallet to tap the guide and seal out of the cap. In our case, these pieces were pretty snug and took a while to smack out.
- Clean the body of the cap thoroughly.
-
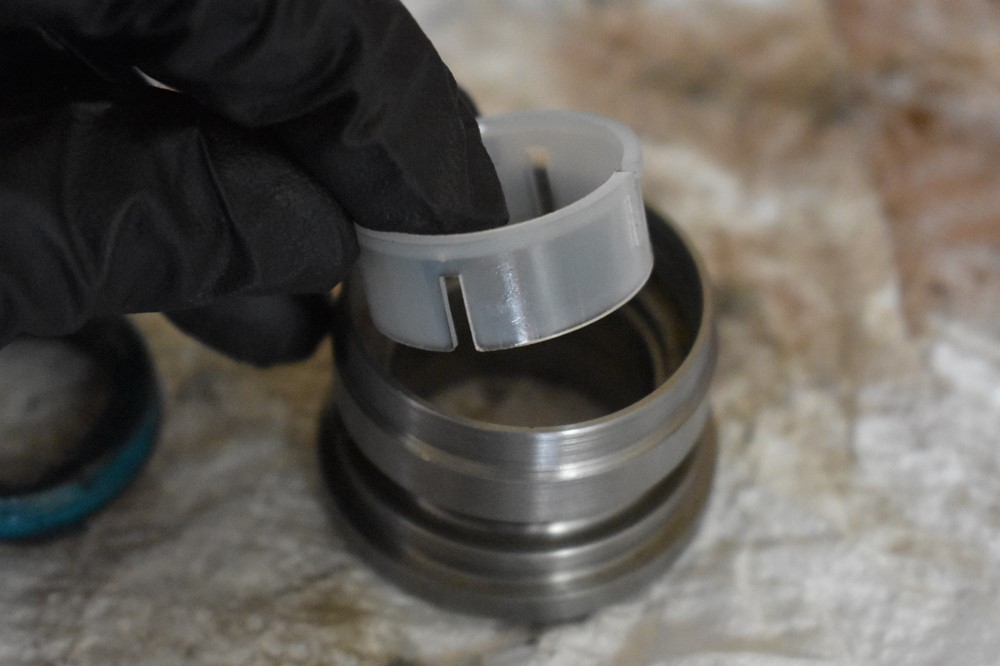
Start by inserting the new liner (# 2) into the body, in the orientation shown. The lip on the liner sits on a step in the cap.
-
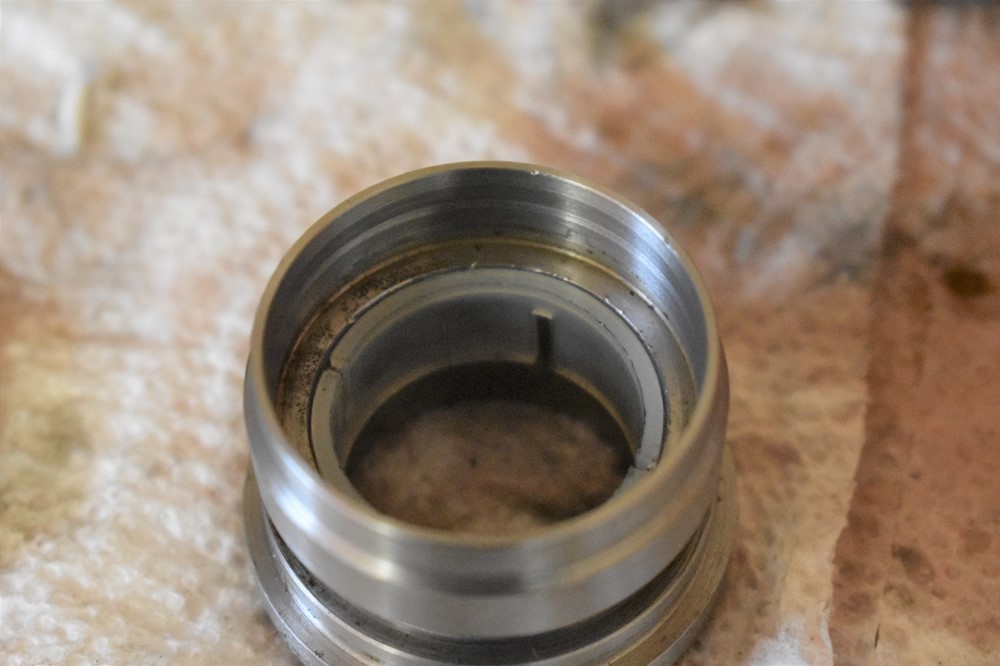
Find the new rod guide (# 5) in your kit, and insert it into the cap.
-
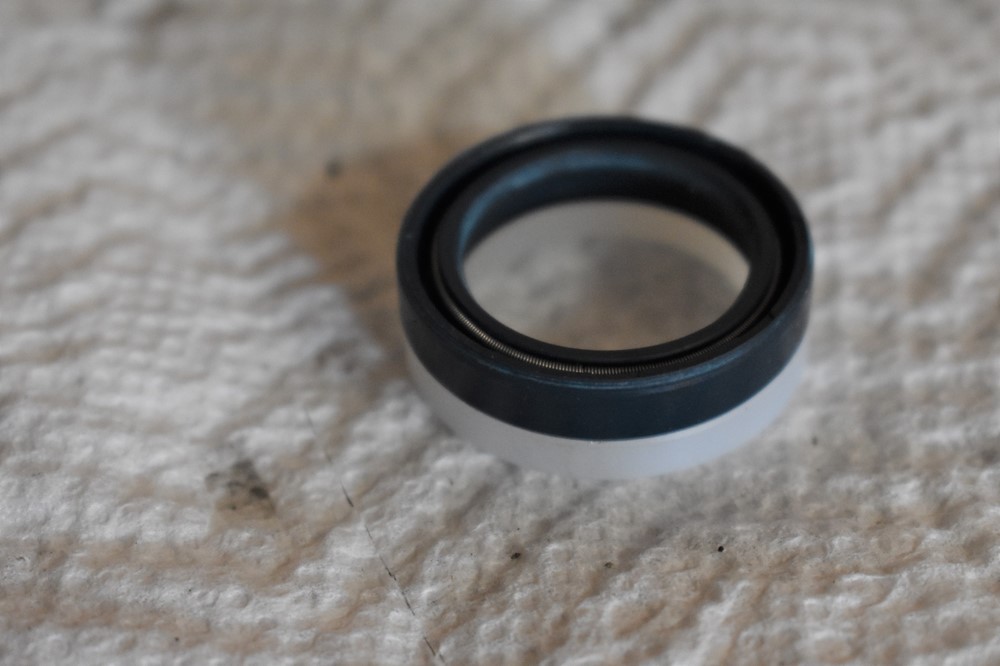
Find the passenger side cap seal (#13) in your kit. It’s marked “26 35 7”. Insert it into the cap with the groove side up.
-
Find the largest socket you have that just fits inside the cap. You want it to be seated on the outside ring of the seal, not the inside. In our case, we started with this 32mm socket that was too big, but it got us started. Use a mallet to carefully tap the seal down into place. You want it fully seated on the plastic guide beneath it.
-
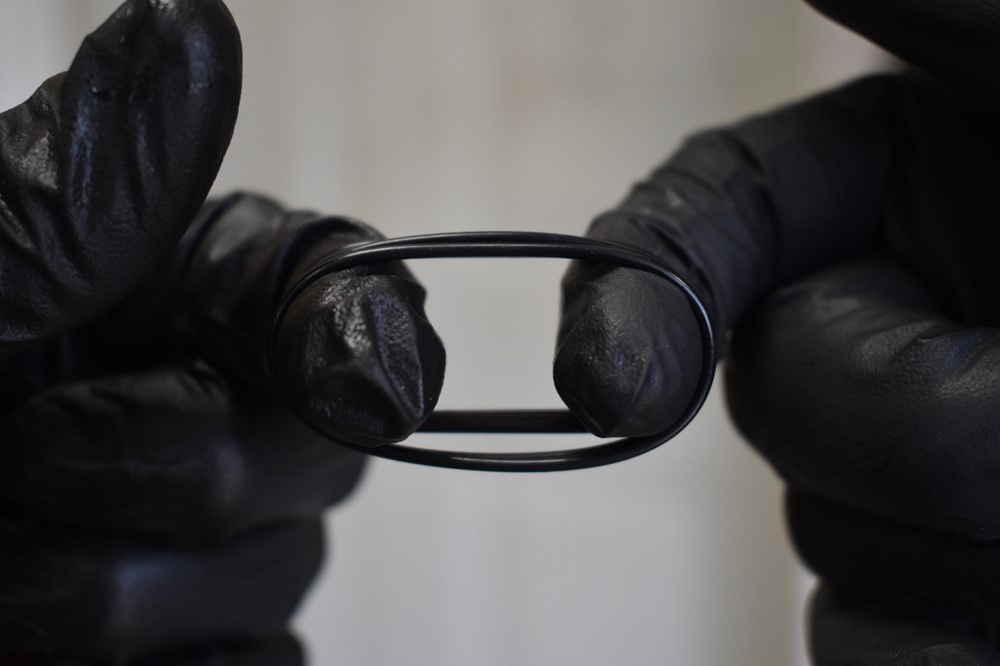
Find #3 in your kit, it’s both the largest diameter and cross-section o-ring. Install it into the groove in the cap. This one is remarkably tight, it’ll take some work.
-
Double check that the o-ring isn’t twisted, by looking for the parting line running around the outside.
- Set the cap aside until you need it for assembly.
Rack Body Rebuild
-
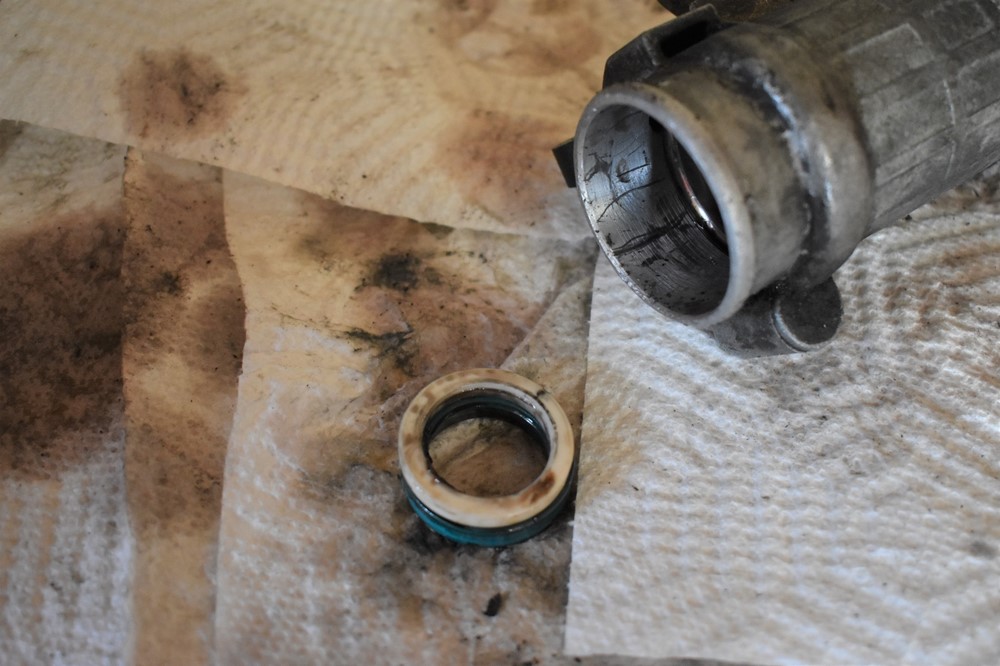
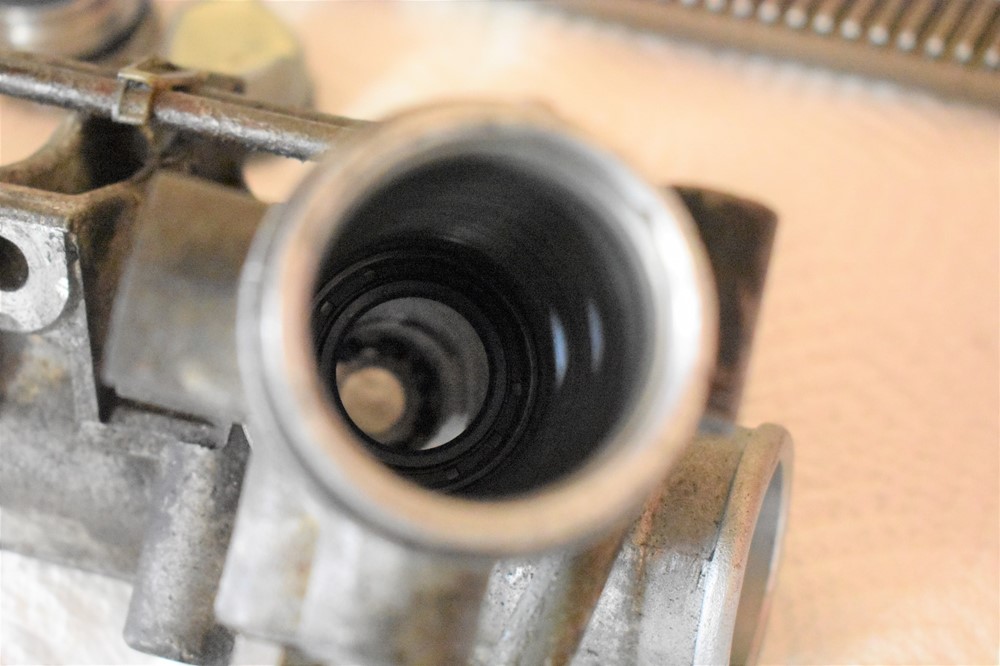
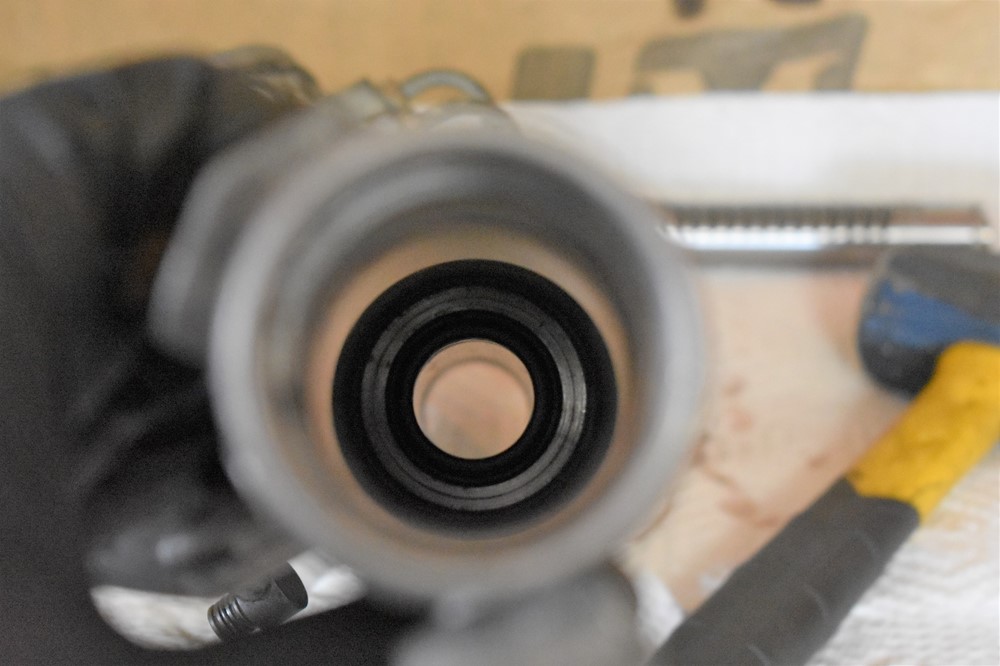
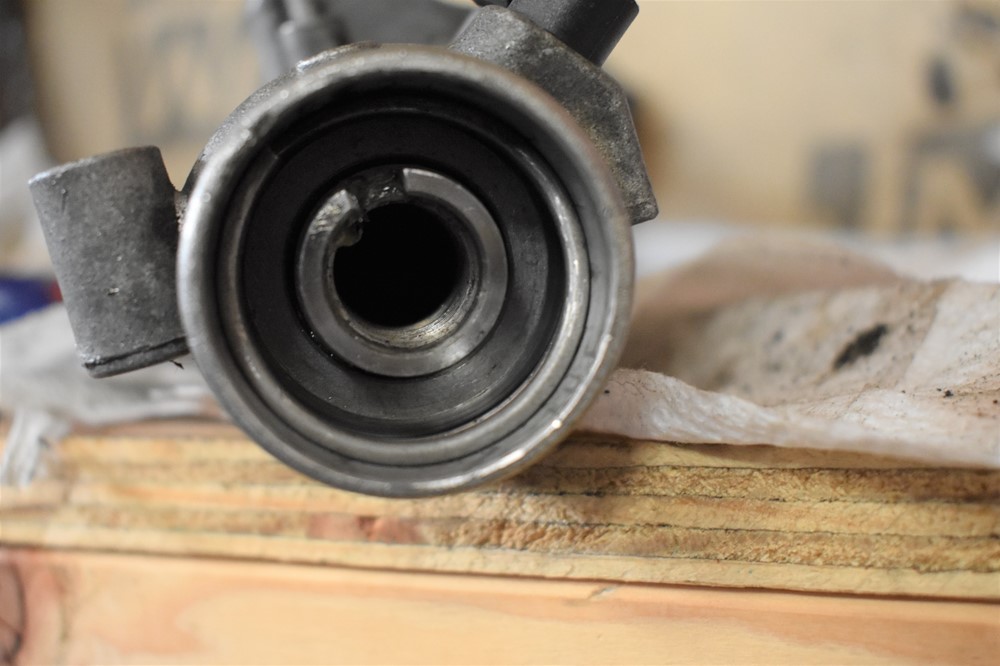
The steering rack body is the hardest to do. We’ll start with the seal on the input shaft. Insert a flathead screwdriver into the top of the steering rack and place the end against shaft seal. The 2nd picture below shows the seal from the bottom end of the rack.
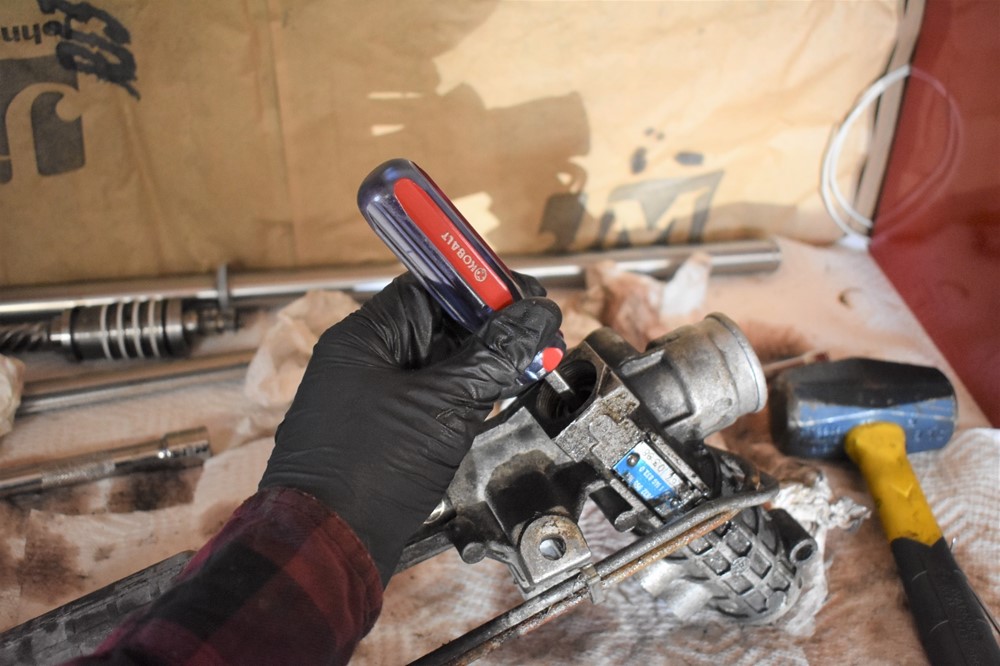
-
Use a mallet to tap the screwdriver and drive the seal out of the rack body. It shouldn’t take too much force to pop it free. Pull it out bottom of the rack.
-
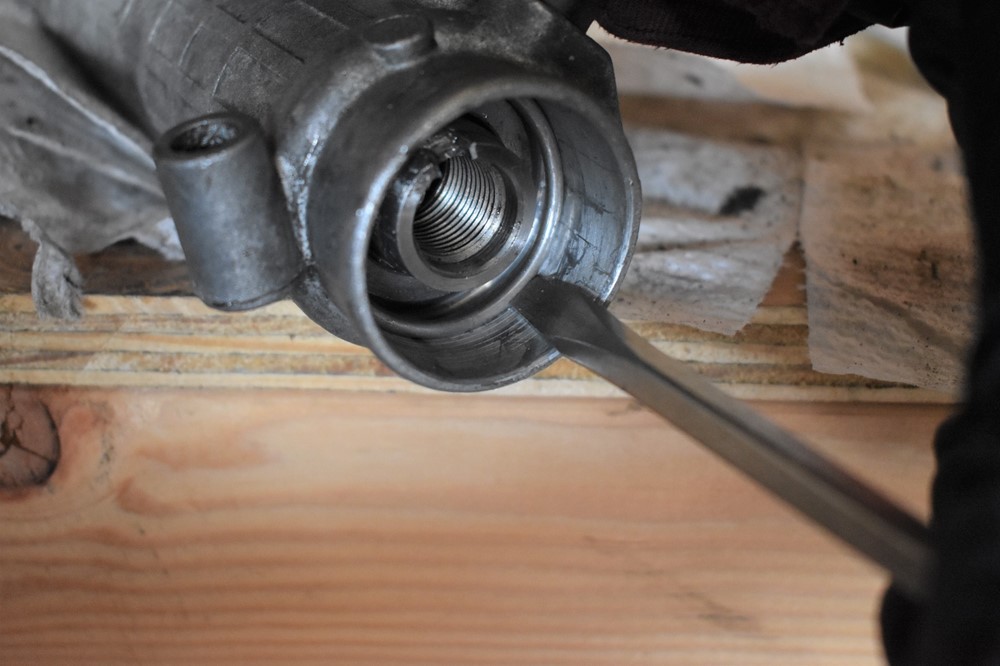
The last seal in the body is the passenger side rod guide and seal. This can be a little tricky depending on what tools you have around. At the very least, you’ll need a long socket extension, approximately 10″. Next, find the largest socket you have that will easily fit down the inside of the steering rack; our ½” drive Craftsmen 19mm socket fits nicely. Insert it into the driver side (nearest the pinion shaft), and slide it down until it butts up against the seal.
-
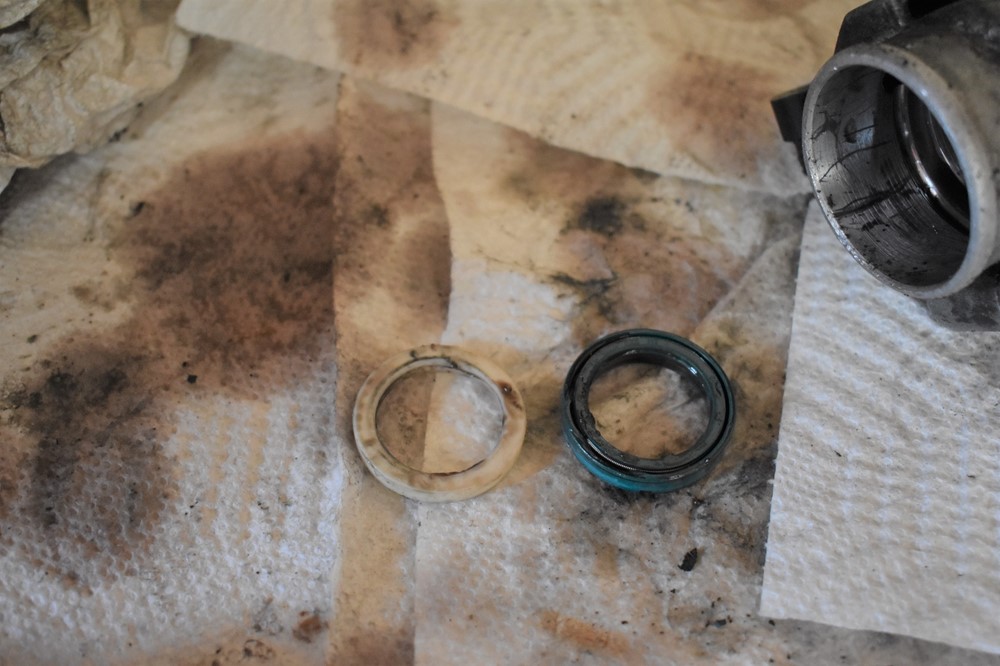
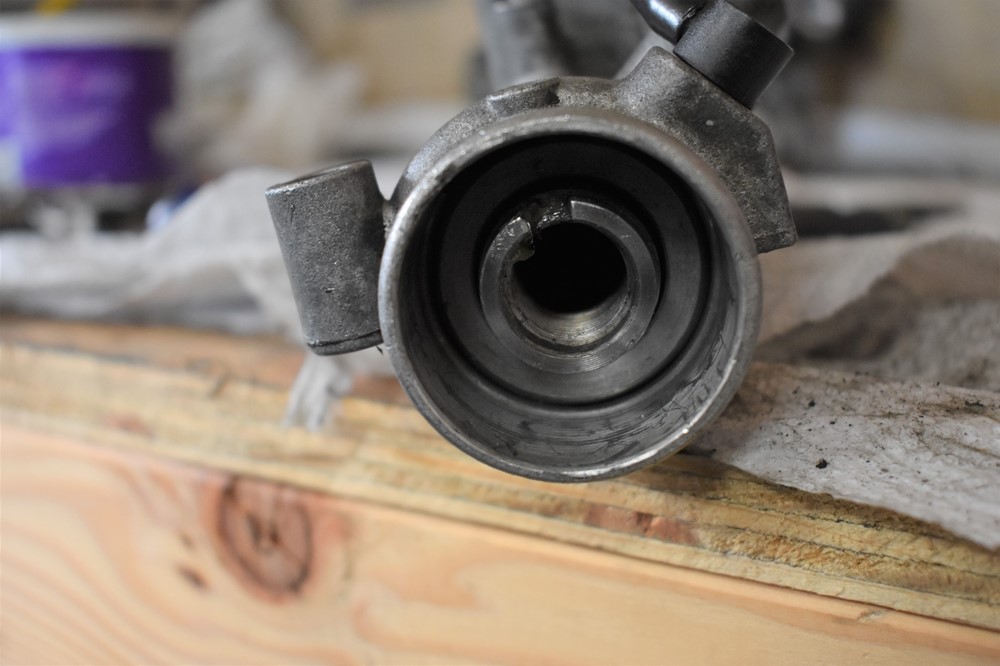
Smack the top of the socket extension with a mallet to tap the seal of the rack body. There’s a white plastic guide ring behind the seal that should come out with it.
- All of the seals are now out of the rack body. If you’ve been watching YouTube videos of those impressive guys who beautifully clean and restore old parts (looking at you “Restore It”), and are inspired to give it a try yourself, here’s your chance. We’d like to be that way, but we usually don’t have the time. We gave the outside of the rack a decent scrubbing with a brass brush, and sprayed the oil hard lines with rust converter. The critical areas that you must clean are all of the internal surfaces. Spend some time wiping out all of the internal surfaces to make sure they’re free of old grease and crud. Run some rags or paper towels through the length of the rack with a rod or socket extension to wipe them entirely clean. This is important for the long-term health of the rack.
-
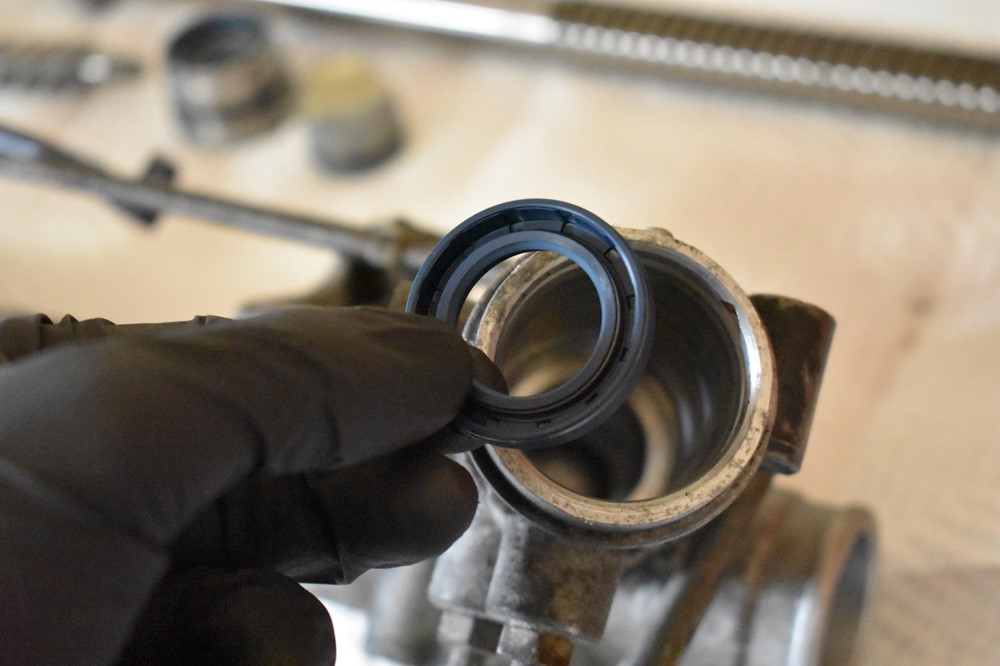
We’ll start with the lower pinion shaft seal. It’s #14 in your kit. It goes into the rack body in this orientation.
-
Start by installing the seal onto the pinion shaft, with the grooved side down onto the shaft.
-
Carefully slide the pinion shaft into the rack body, being particularly gentle getting each scraper started into the body. Press the shaft all the way into the body.
-
Pull the pinion shaft back out of the body, we’re not ready for it to be installed yet.
-
The internal seal and guide are a little tricky. Find the socket you used for the passenger end cap seal (~23mm), and place the socket on the large extension you used earlier. The seal (# 13) and guide (# 1) go into the shaft from the passenger side like this, plastic guide first.
-
There are a couple of ways to insert the parts into the body. We don’t like trying to drop them into the body; it’s too easy to get them spun around in the shaft. Stand the socket and extension on your work surface, set the seal on the socket groove side down, and then set the plastic guide on top of the seal.
-
Now carefully lift the rack body over the extension, passenger side down, and slide it over the extension. Take your time and make sure the guide and seal go in smoothly. Then flip the rack over, and use a mallet to tap the guide and seal until you feel that they’re fully seated. If trying to get components installed at the same time makes you nervous, you can perform this step with 1 piece at a time, first the plastic guide and then the seal.
Re-Assembly
-
We’re finally ready to put it all back together! Insert the rod into the passenger end of the rack body, with the toothed end going in first. When the end of the rod bumps into the internal seal, gently push and twist it until it smoothly passes the seal. Push it all the way in until it bottoms out on the internal seal. You should be able to see the end of the toothed section through the plunger hole. Twist the rod so that the teeth face the plunger hole, as shown.
-
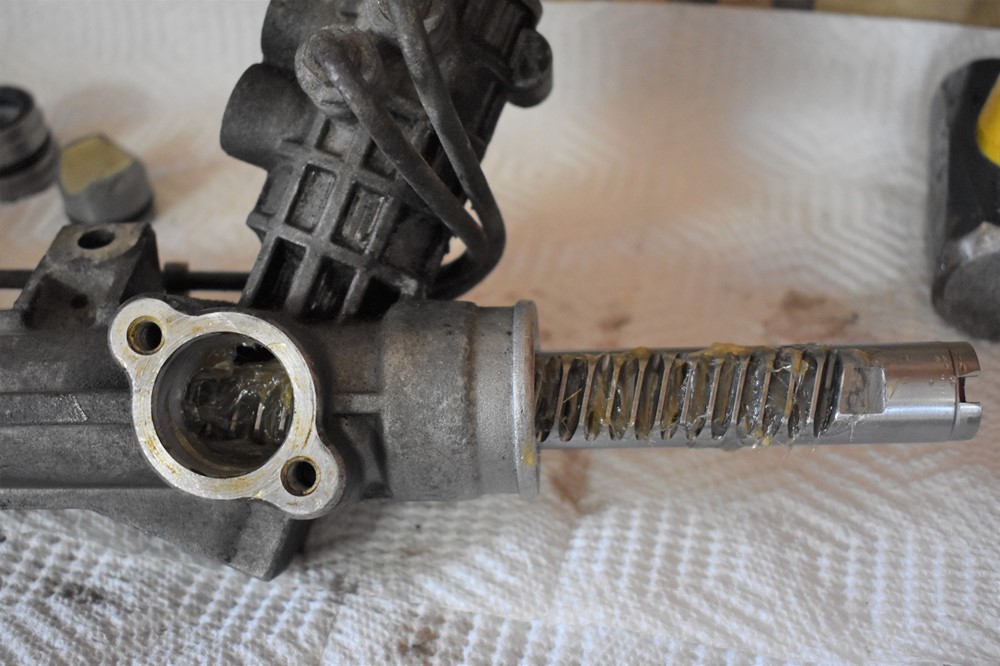
Grease the toothed section of the rod thoroughly. Make sure each groove is well filled. You’ll need to grease the end sticking out of the rack and the area you can see thrugh the plunger hole, then slide the rod towards the passenger end to expose the teeth you can’t see at first. Make sure you get the entire toothed section. For reference, the reason you don’t want to grease the rod before inserting it into the rack body is to avoid getting grease in the end section before the seal, that should only be seeing oil, not grease.
-
Rotate the rod so that the teeth face opposite the plunger hole, so that they’re aligned with the pinion shaft. Grease this side of the rod, sliding it back and forth and adding grease until you’re comfortable that the entire surface is coated.
-
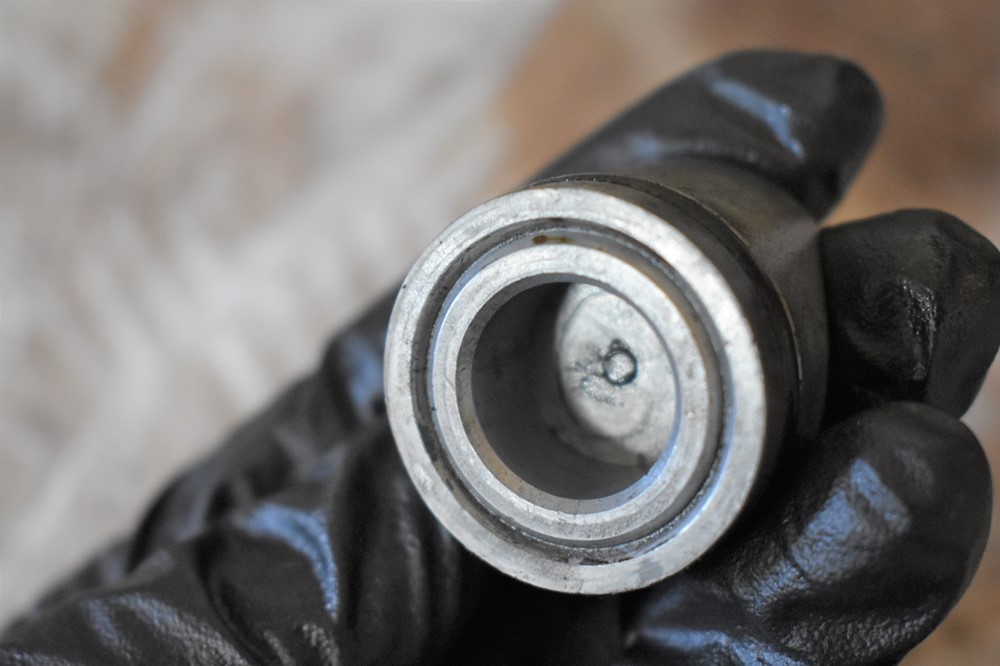
Flip the body over, and pack grease into the lower pinion bearing. Make sure the bearing is well packed, and rotate the inner race around several times to make sure everything is well coated.
-
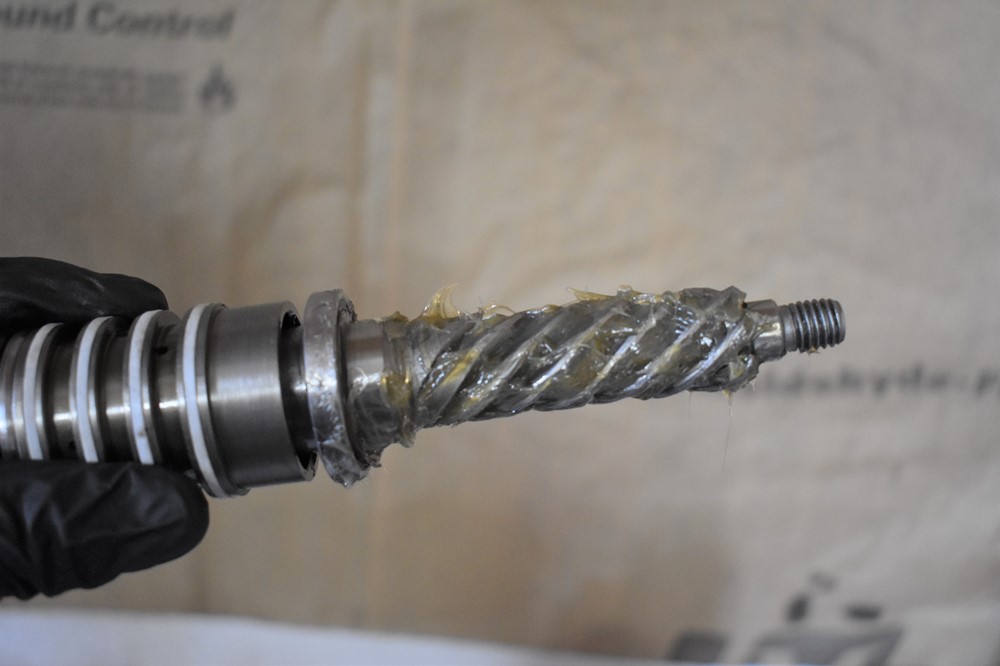
Grease the teeth on the pinion shaft. As with the rod, make sure each groove is well filled with grease.
-
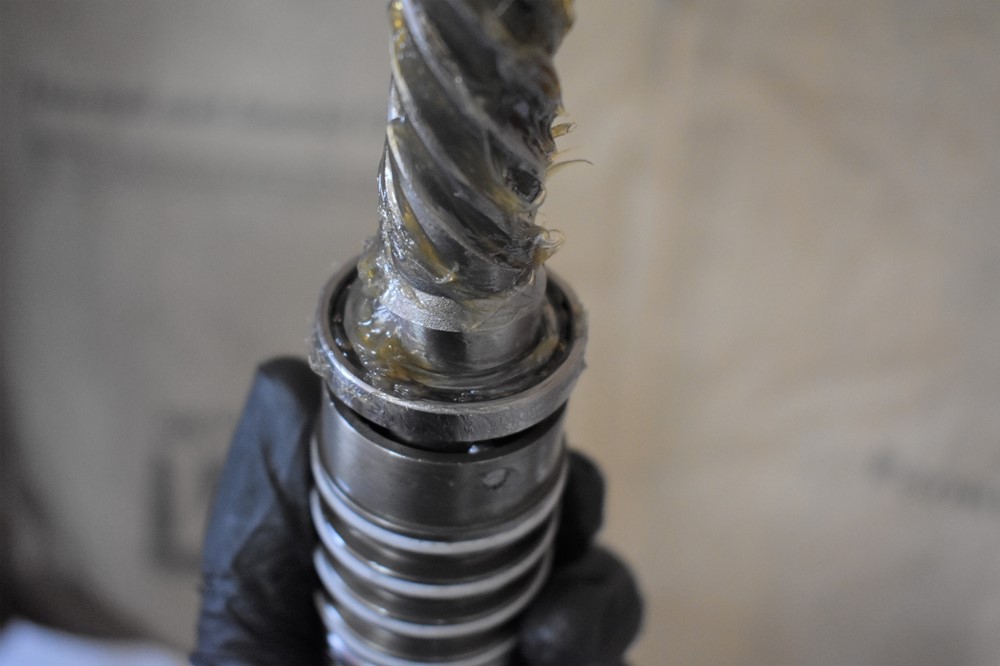
Pack the bearing above the pinion teeth with grease.
-
Now pack the bearing in the pinion shaft cap with grease. Rotate the inner race to make sure all of the rollers are well packed with grease.
-
Reinstall the pinion shaft cap back onto the pinion shaft, with the o-ring side first.
-
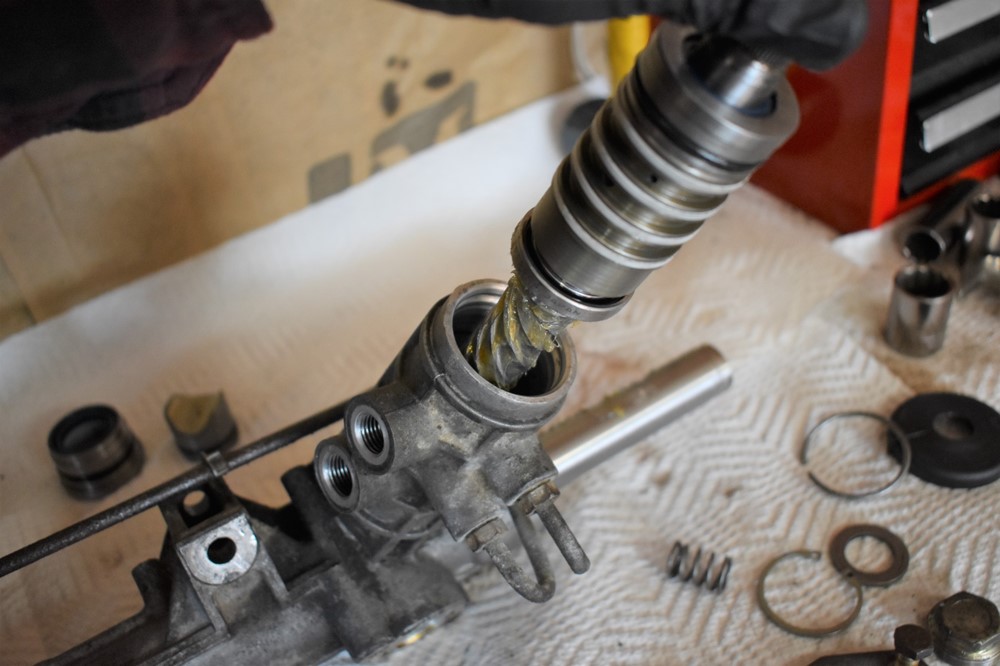
Carefully insert the pinion shaft into the top of the steering rack body. You want to avoid getting grease in the top part of the body, so try to center the shaft as you insert it down through the seal.
-
Once the pinion teeth start to engage with the rack teeth, you may need to rotate both the rack and pinion to get them to engage correctly. Once they do, you should be able to carefully push the pinion shaft the rest of the way in, it will rotate as it goes in.
-
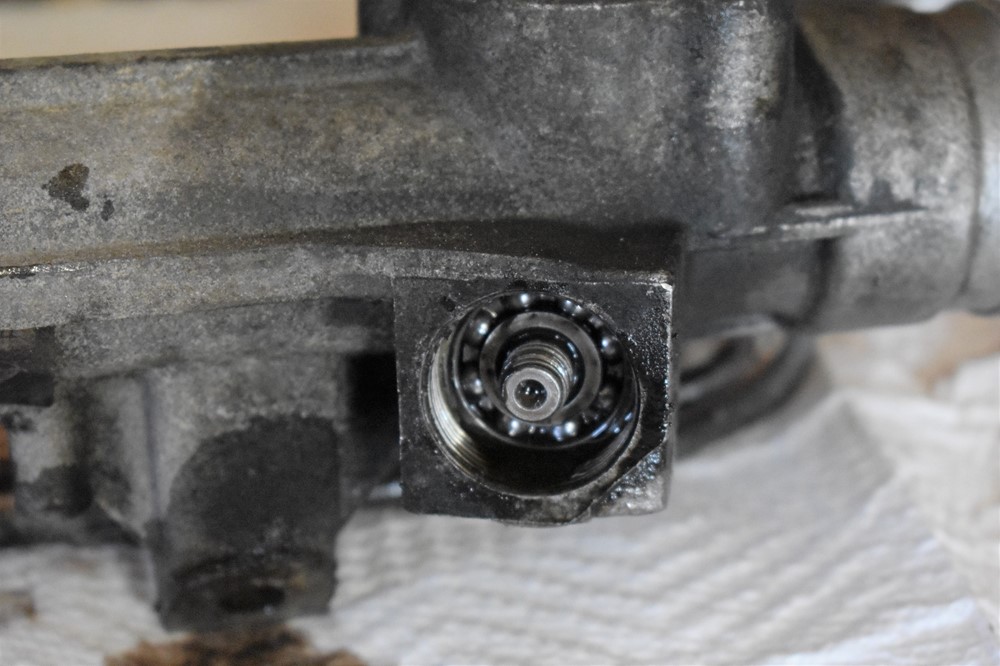
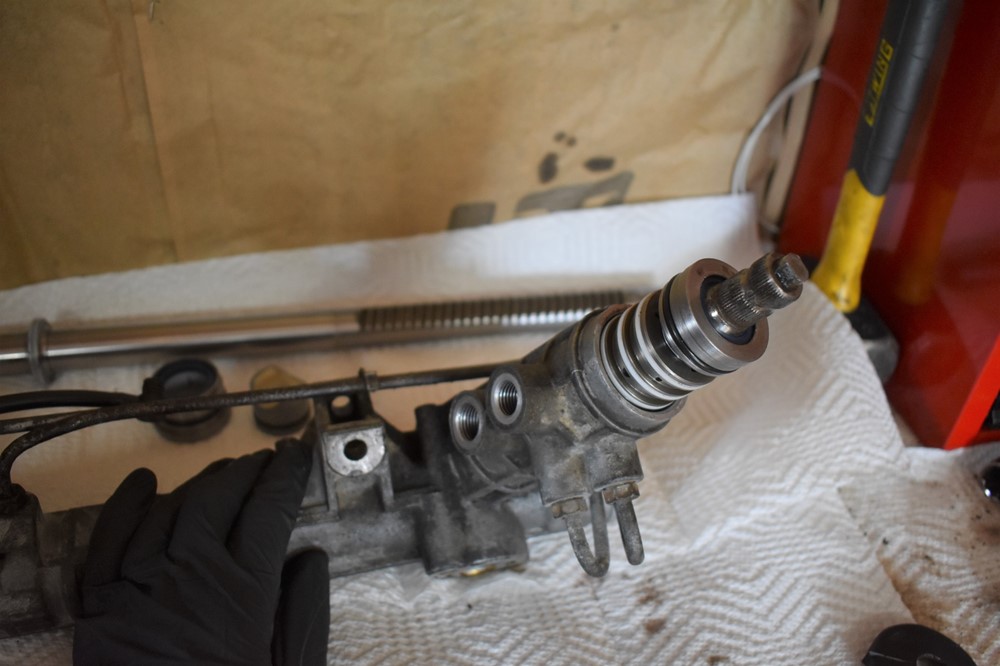
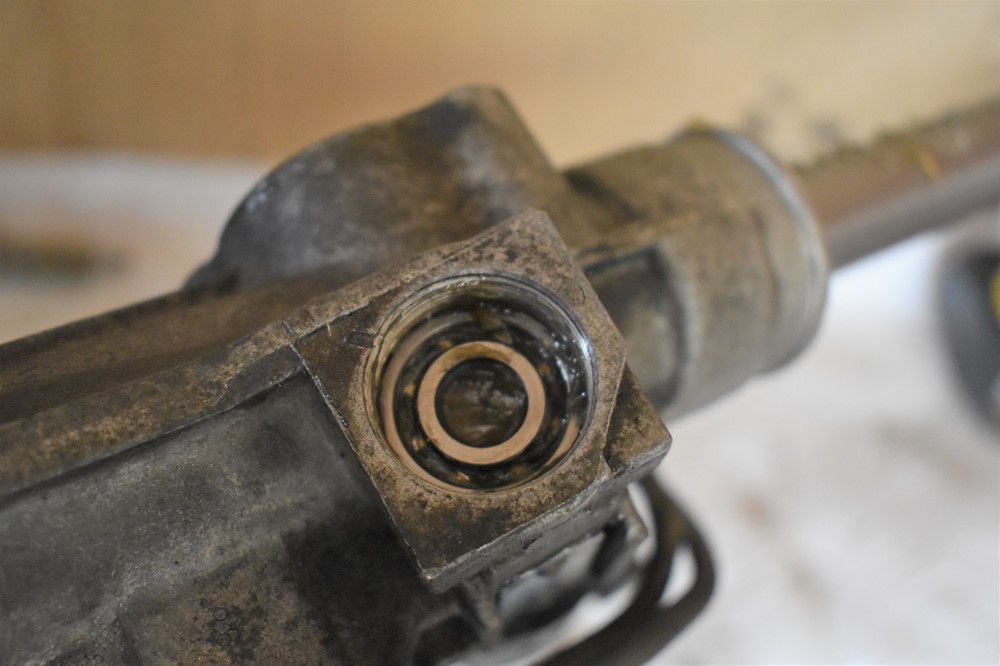
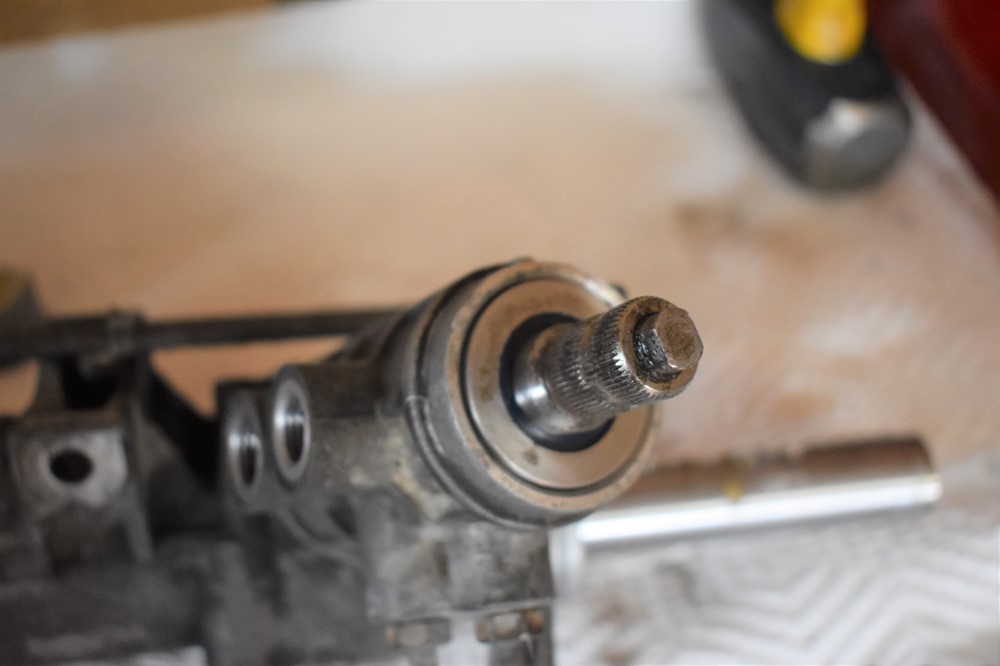
If the pinion shaft is seated deeply enough, you’ll be able to see several threads sticking out of the bottom of the lower pinion bearing. Start the nut back onto the shaft.
-
Tightening the pinion shaft nut is a little questionable. The correct way to do it is by holding the top of the pinion shaft with an 8mm wrench, while tightening the nut with a 15mm wrench. We’ve found this a little difficult to do well. We’ve found that it’s a little easier to just start tightening the nut, letting it drive the rack towards the passenger side until the teeth bottom out, then tightening to spec. You’re putting a little stress on the pinion shaft teeth, but it’s well within what they can handle, and the 8mm flat at the top of the shaft seems to what to round off a little too easy. Pick your poison – either way, get the nut tightened up. Since we haven’t been able to find a torque spec, and the nut is locking, we just torque it good and tight, about the same amount of muscle we had to use to loosen it.
-
Reinstall cover that goes over the pinon shaft nut and tighten.
-
Move back to the top of the rack body. The pinion shaft cap probably didn’t fully seat when you inserted the shaft, that’s fine. Use a large socket or a ¼” socket extension to gently tap the cap down around it’s perimeter until you can see the groove for the C-clip.
-
Re-install the C-clip, making sure it snaps fully into the groove.
-
Pack some grease around the shaft and C-clip. We’re not 100% convinced that they need it, but the racks we’ve rebuilt have it, so who are we to question.
-
Re-install the pinion shaft dust cover.
- If you removed the oil hard lines, install the new o-rings (#11 in the kit) and re-install the lines. Check all 4 holes before installing the lines to make sure they’re free of any stray grease from the rod.
- Check the two vent hose ports for grease, and clean out any that you find.
-
Install new o-rings (#10 in the kit) into the groove on each vent hose fitting, and press the fittings into the vent ports completely.
-
Apply a good layer of grease to the bearing surface of the plunger.
-
Install the plunger, making sure it’s oriented correctly to ride on the rod.
-
Make sure the plunger spring is clean, and insert it into the center of the plunger.

-
Make sure the plunger washer is clean, and place it over the spring onto the plunger.
-
Make sure the plunger cap is clean, and place it over the spring. Use the two bolts to pull it down into place and tighten.
-
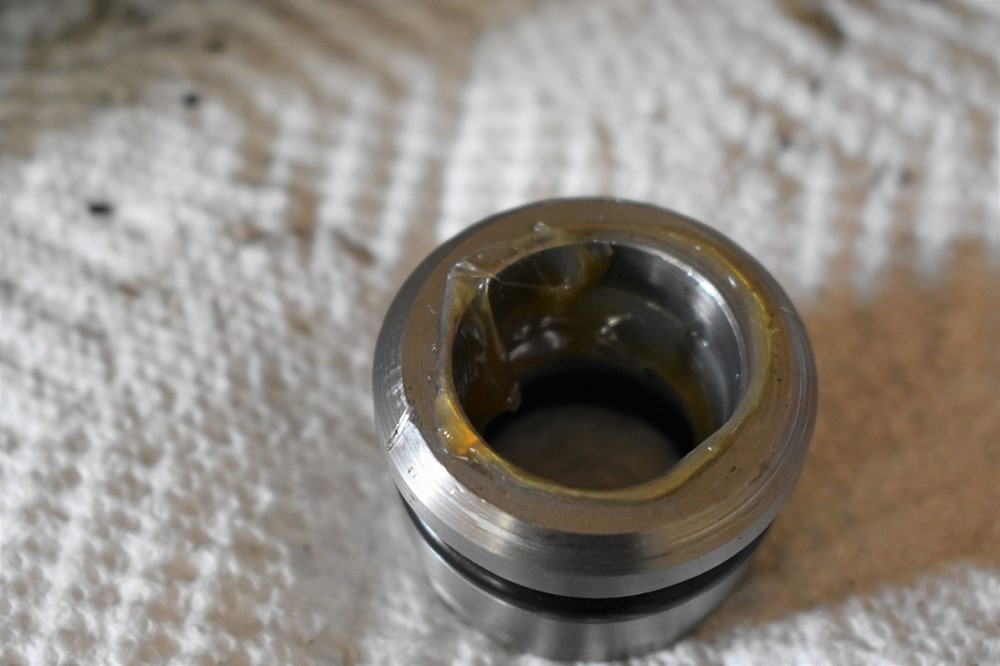
Apply a liberal layer of grease to the plastic guide and liner, but not the seal, on the passenger end cap.
-
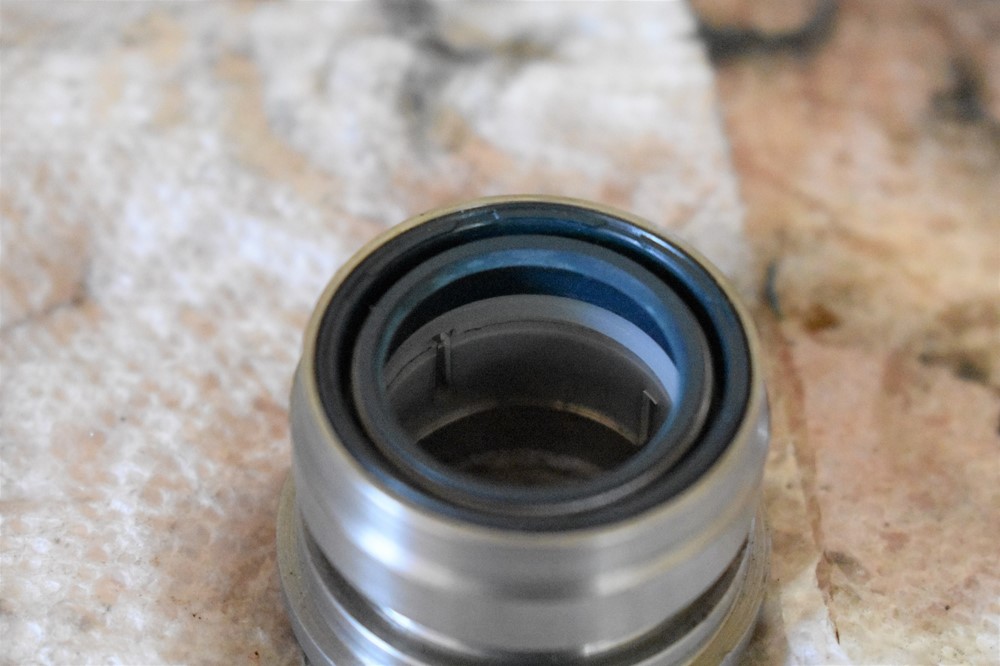
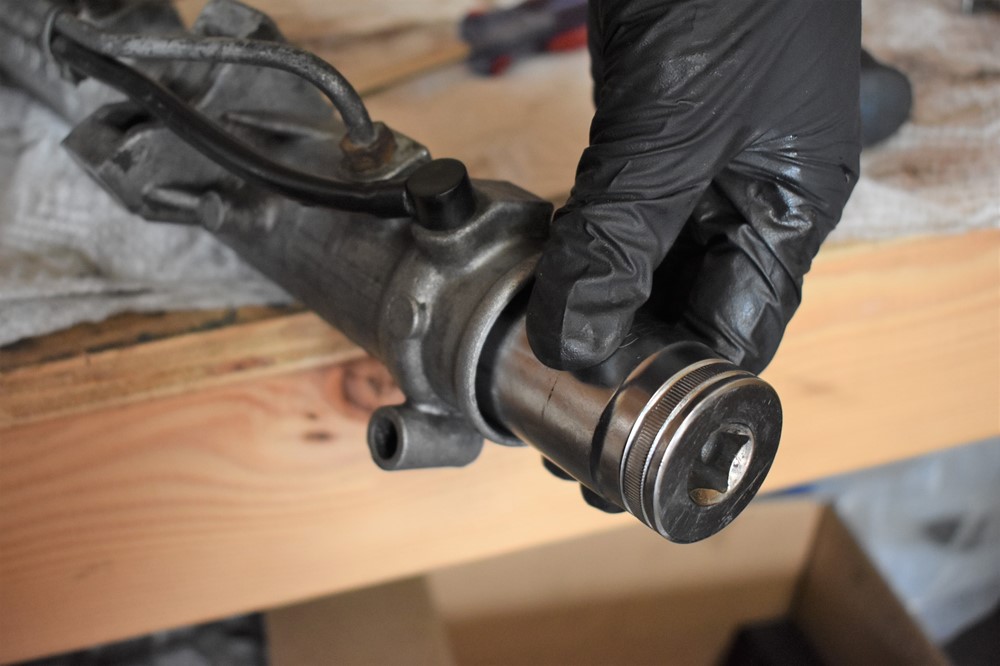
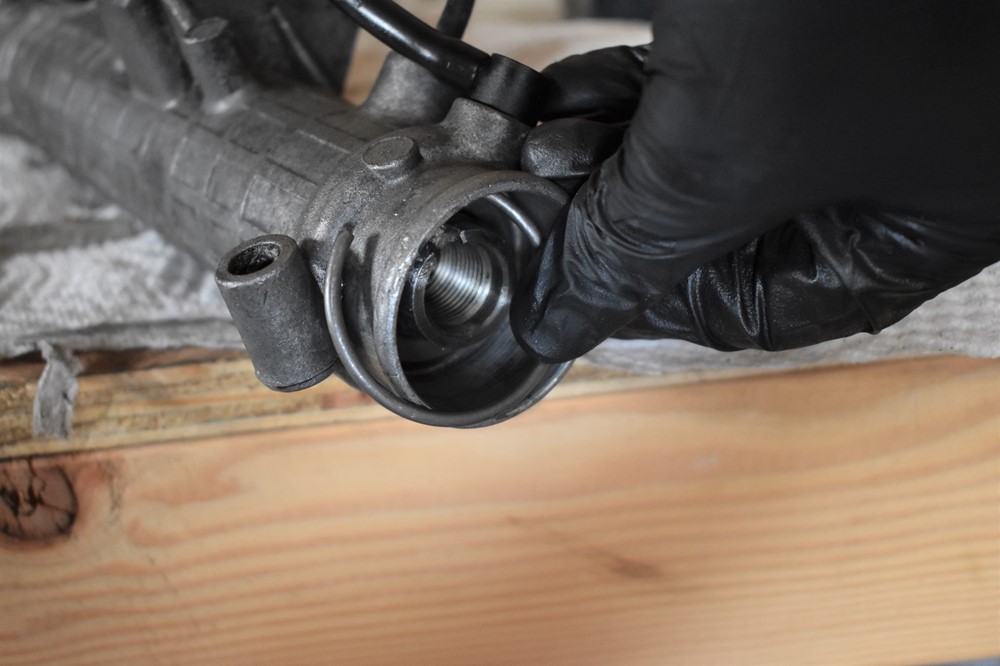
Install the passenger end cap over the rod and into the end of the rack.
-
Use a large socket (like the 32mm deep socket here) or a ¼” extension to tap the cap in until you can see the groove for the locking ring.
-
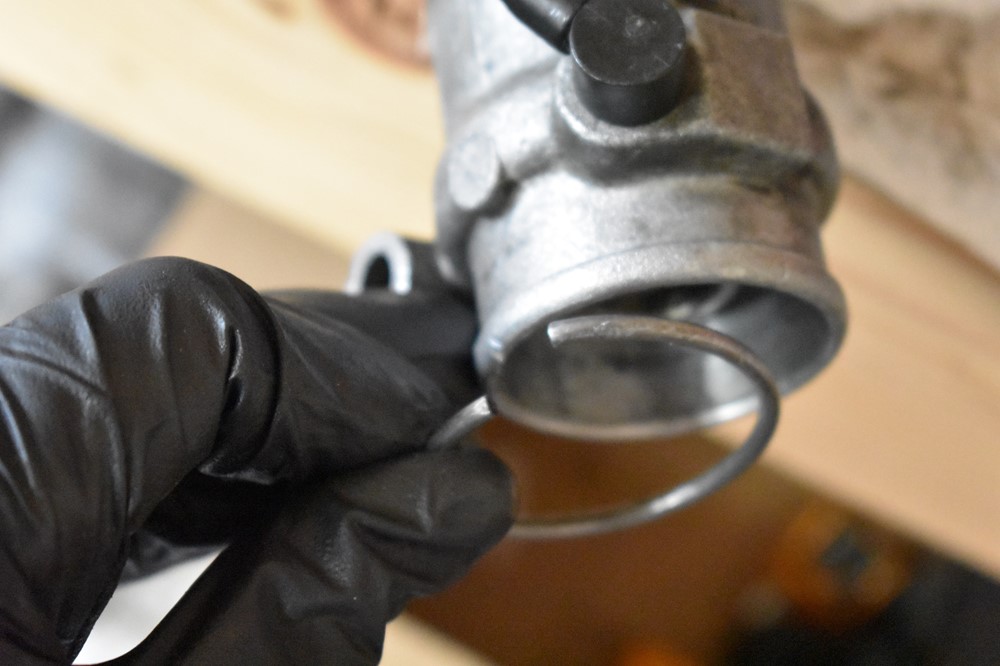
Installing the locking ring can be a real pain, but we’ve found a method that works consistently. Start by holding the ring in this orientation relative to the rack body.
-
Insert the right end of the ring into the rack body until the tip is seated in the groove.
-
Use one hand to press on the middle part of the ring like this:
-
Then slip a screwdriver under the tip of the ring that’s still outside the body, and carefully pry it up until the ring snaps inside the body.
-
Now use the screwdriver to press around the perimeter of the ring and work it back until it’s completely snapped into the groove.
-
You’re done! Congratulate yourself on completing a very hard, but very satisfying job.
- If the rack is going back into the car, then it’s now time to re-install it.