
E30 Turn Signal Stalk Replacement
How-To Credit
This how-to is a Classic Bimmer Bits original, with much credit due to the many members of the community who have helped us learn along the way!
Parts
-
Turn Signal Stalk
- 6-button OBC no airbag (61311373025)
- 6-button OBC with airbag (61311377077)
- 13-button OBC no airbag (61311375190)
- 13-butto OBC with airbag (61311377966)
- Steering wheel nut (31106774714)
(We make a commission for parts purchased through the Amazon links above, which helps keep this site hosted and free. We only link to OEM or OE parts, the same quality parts that we use on our cars.)
Tools
- T25 or T30 torx bit (for airbag cars only)
- Small flathead screwdriver
- 22mm socket and extension
- Large phillips head screwdriver
- Torque wrench
Torque Specs (ft-lbs):
- Steering wheel nut: 58 ft-lbs (79 N-m)
Prodedure
- You need to start by removing the steering wheel. If your car is not equipped with an airbag, skip to step 4. If you do have an airbag, start by disconnecting the battery, and wait an hour to make sure the system is discharged (most of us aren’t quite sure if there are capacitors in the system or not, but better to be safe than blow up airbag in your face!).
- Reach behind the steering wheel and feel the two holes at the 3 o’clock and 9 o’clock positions on the back of the wheel. Use the T25 or T30 torx bit (depends on your car) to remove the two screws in these holes. Carefully pull the airbag out of the front of the steering wheel and tilt forward.
- Carefully pull the yellow plug out of the back of the airbag and set it aside in a safe place. Treat the airbag with caution at all times, it’s no joke. Skip to step 5.
-
Use a small flathead screwdriver to carefully pry the logo out from the top. There’s a small slot in the top of the logo that will fit the screwdriver.
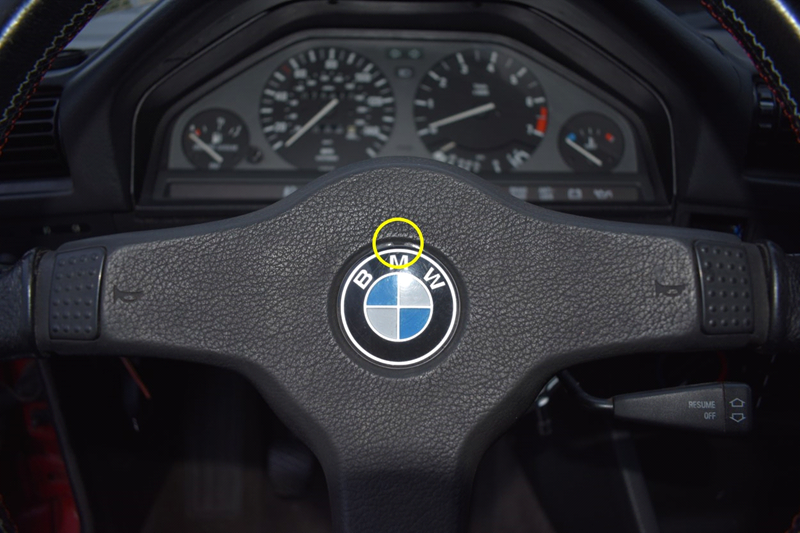
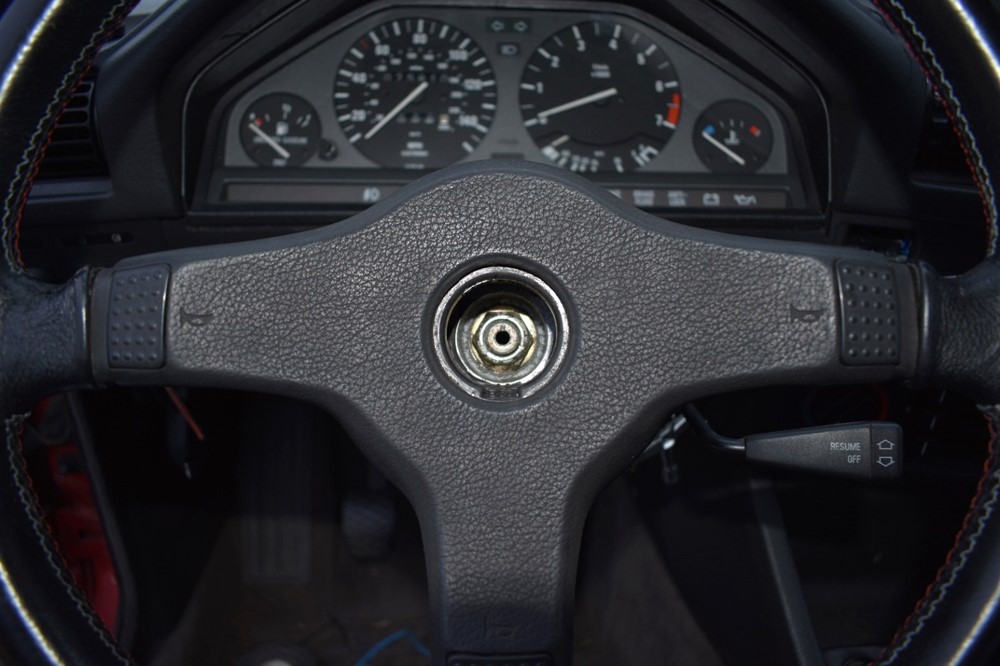
- With the logo removed, the steering wheel nut is exposed. Before doing anything else, put the key in the ignition, turn it to the accessory position, and the get the wheel lined up as near dead center as you can. You’ll need to this make the sure the steering wheel goes back on straight later on.
-
Use a 22mm socket and extension to remove the nut. The steering wheel will be locked in place with the key out, so be a little bit careful how hard to you lean on the wrench, you don’t want to apply a ton of stress to the wheel lock.
-
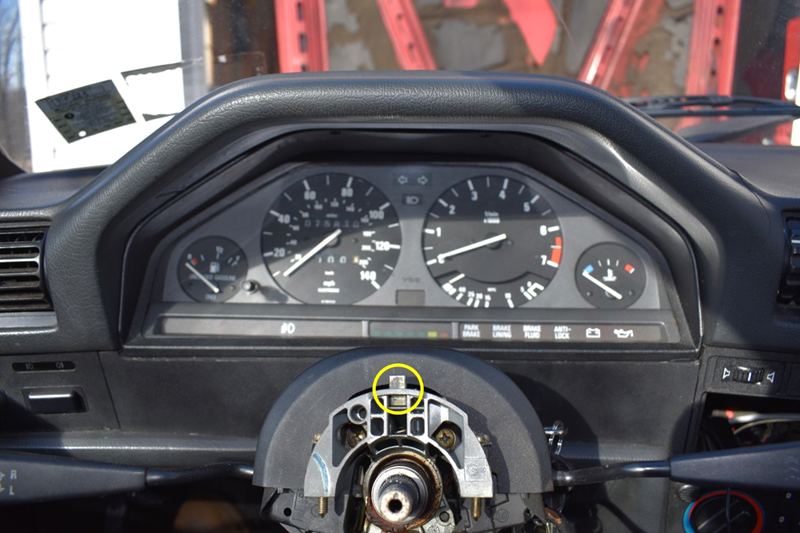
If you’ve tried to the pull the wheel off and been unsuccessful, you’ll realize that the wheel lock holds the wheel onto the steering column. Insert the key into the ignition and turn it the accessory position to release the wheel, and pull the wheel off the steering column. If your car has an airbag, disconnect the yellow plug from the steering column. Notice the wheel lock in the up position with the wheel off and the key removed in the picture below.
-
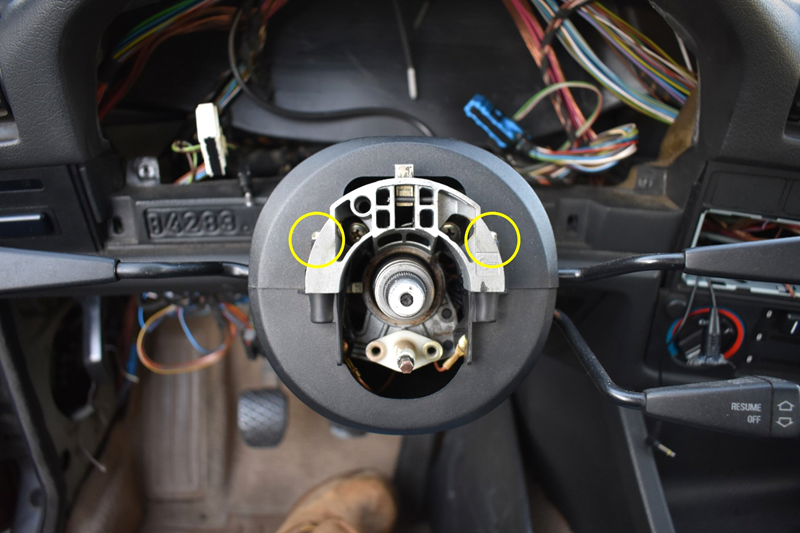
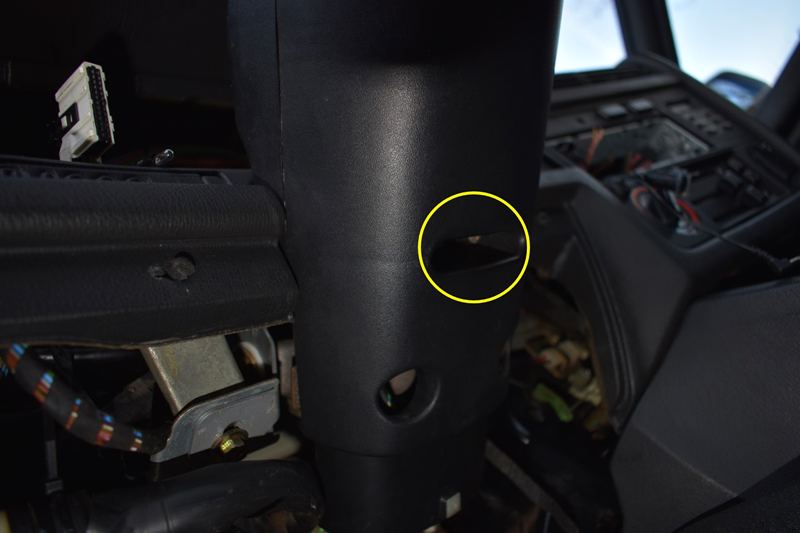
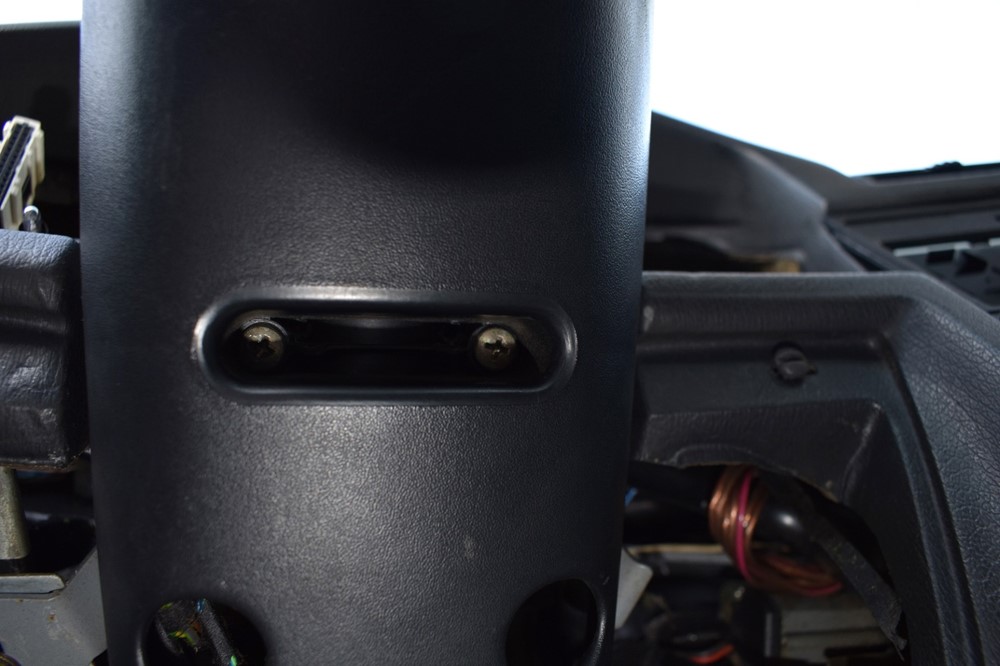
There are 4 bolts that hold the lower steering column cover to the upper cover. Using a large phillips head screwdriver, first remove the two front screws from the top cover.
-
Look under the lower steering column cover for the lower two screws. Use the phillips head screw driver to remove them, and the lower cover will drop off.
-
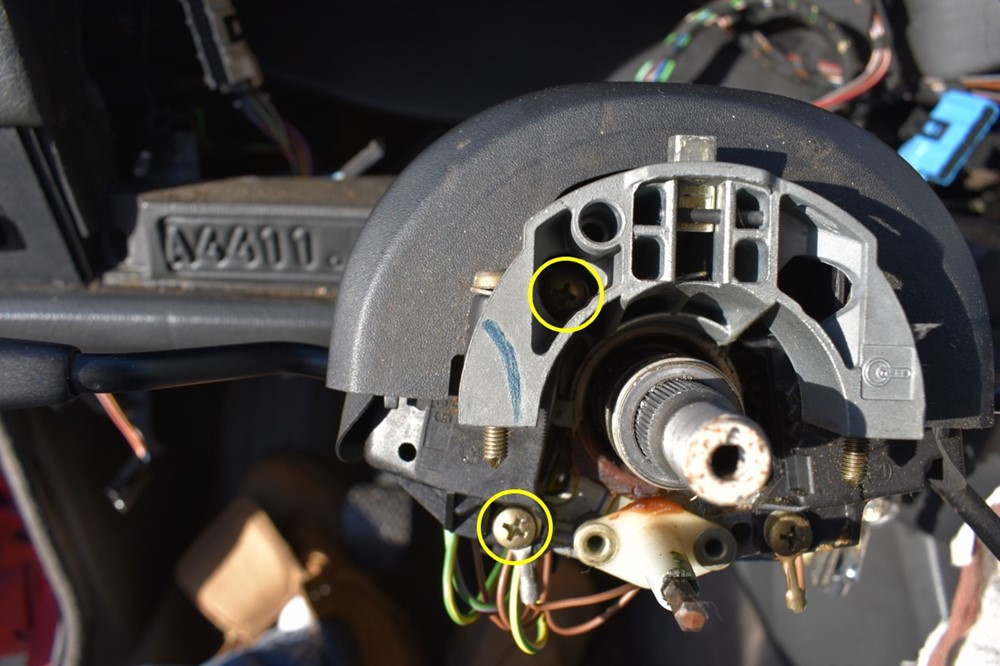
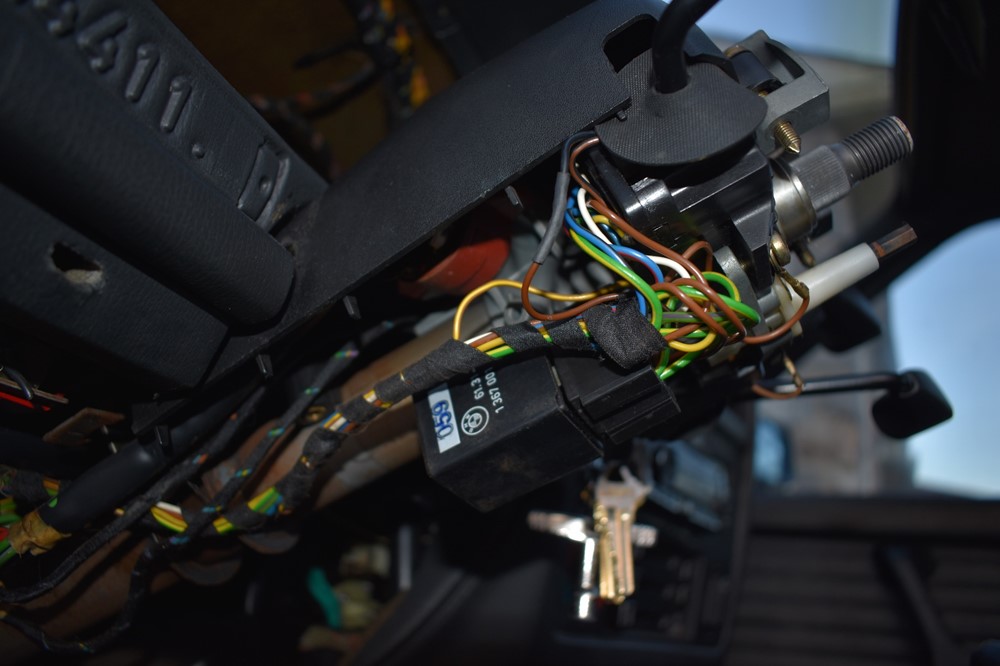
With the cover off, you can now see the bolts that hold the turn signal stalk in place. Remove both of them with a phillips head screwdriver.
-
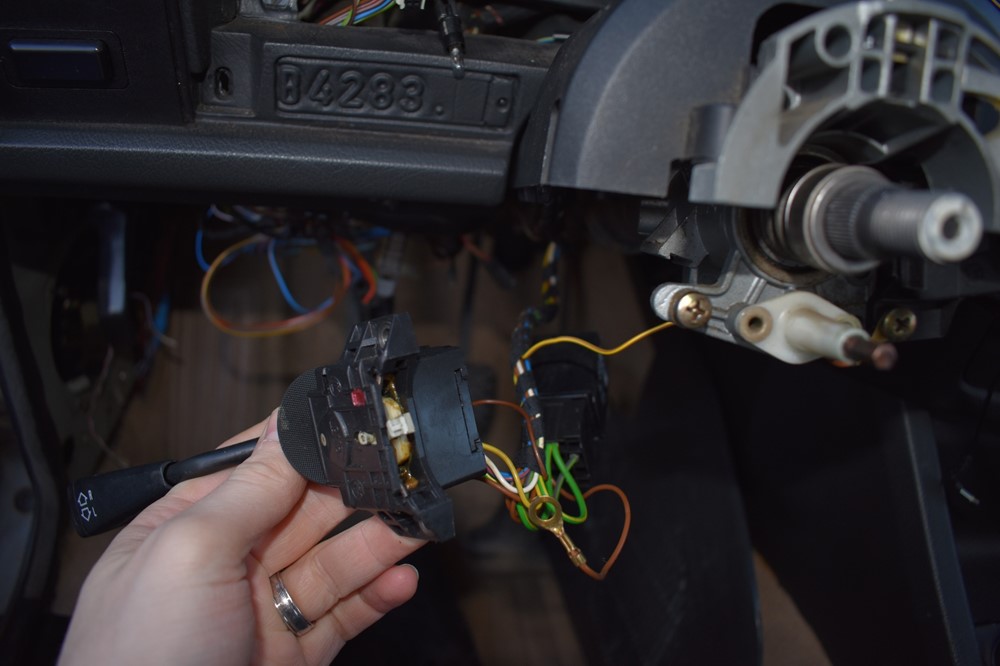
Pull the stalk out and away from the steering column. Make sure not to lose track of the ground wire terminal on the lower screw.

-
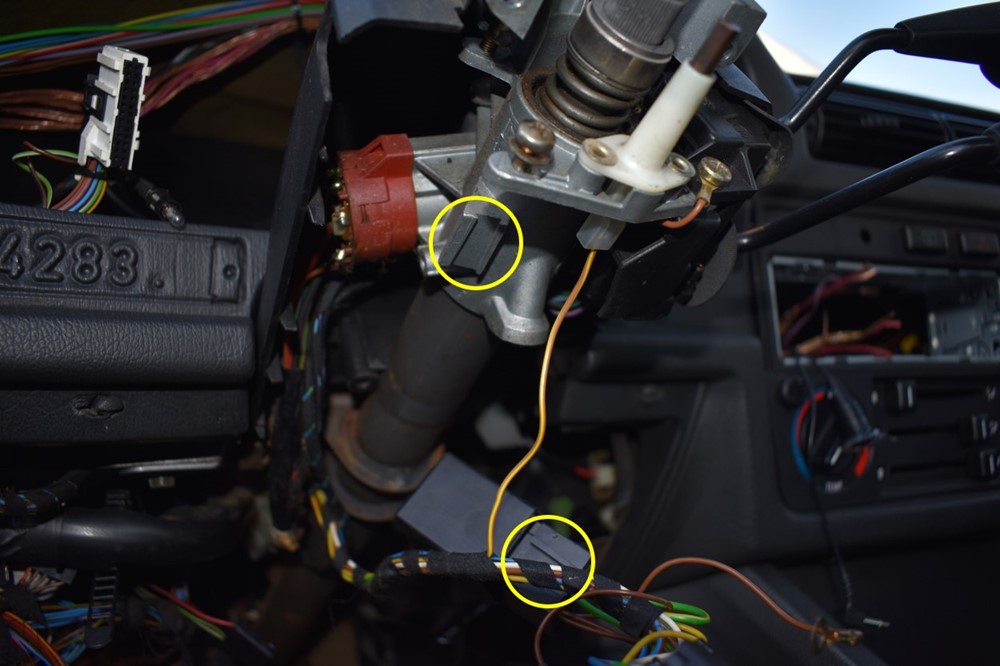
In the turn signal wire harness, there’s a relay clipped to the underside of the steering column. The connector for the relay sits in a keyed slot, slide the relay down the length of the steering column to release it. Here it’s shown in place, and then removed, with the slot on the column and the key on the relay connector circled.
-
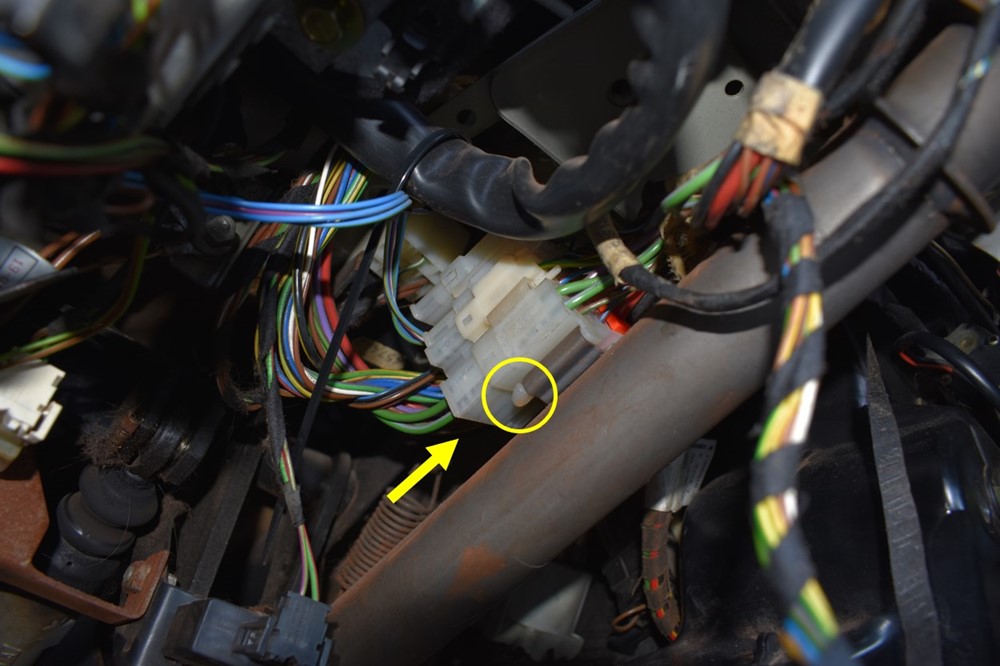
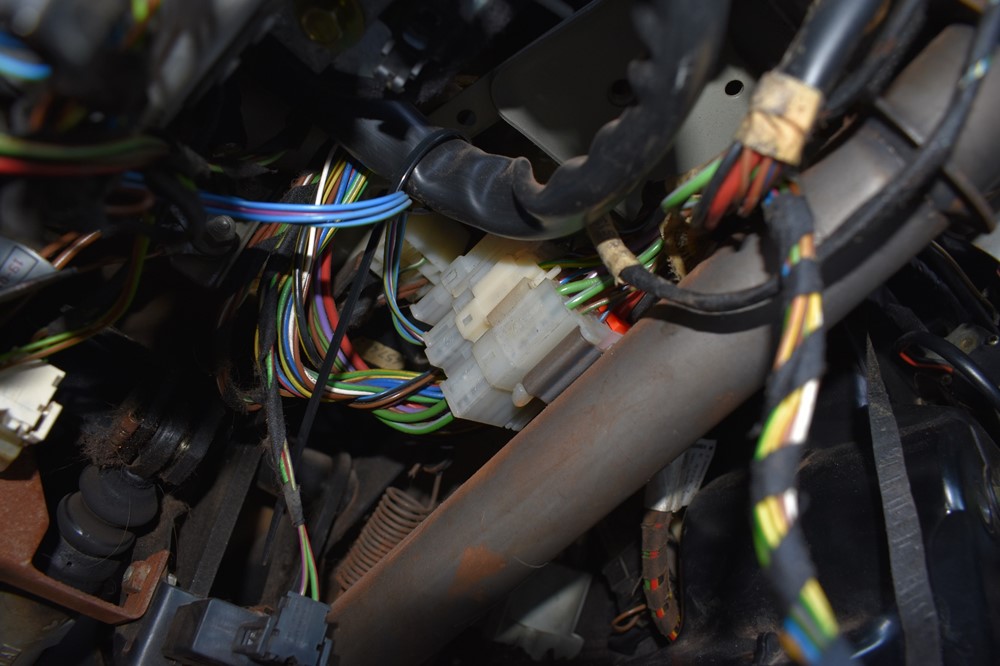
The wire harness for the turn signal connects to a bundle mounted to the top of the steering column. Squeeze the tabs on the bottom of the harness (one side circled below, there’s a 2nd tab on the other side of the column, and push it upwards along the length of the steering column to release it.

-
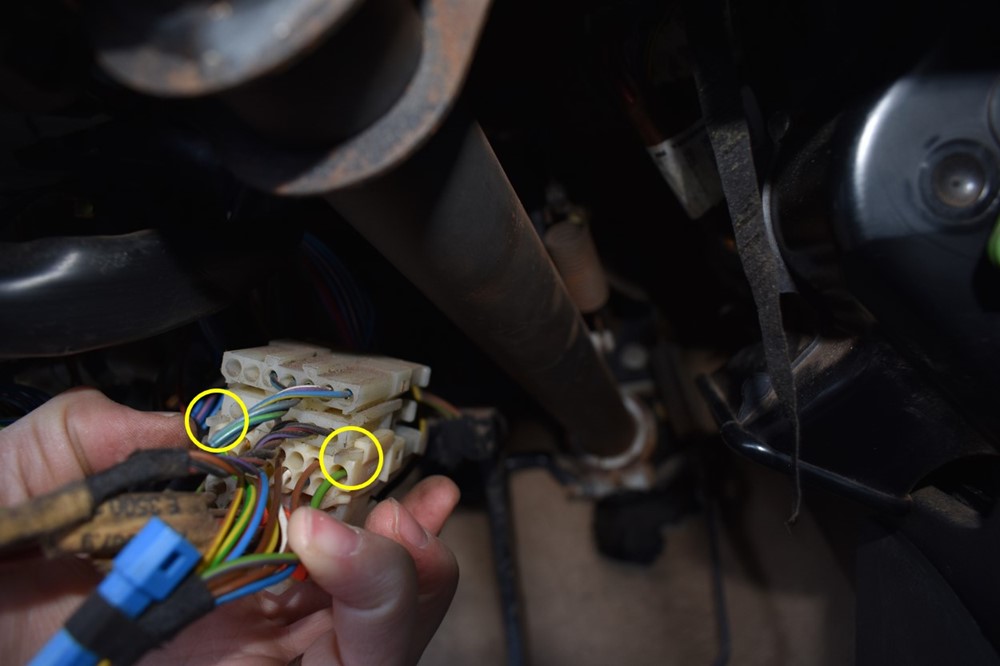
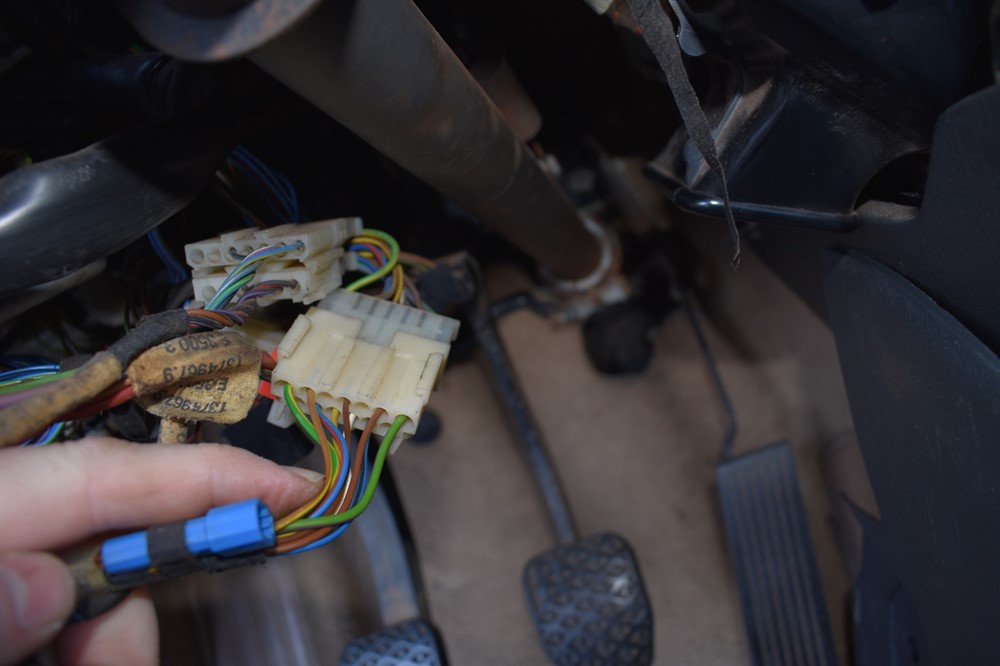
The turn signal connector is the 2nd from the bottom in the stack of connectors. There are clips on the bottom of each connector that hold it to the one below. You need to get the turn signal connector out of the bundle, by squeezing the tabs on the connector and sliding it away from the ones above and below it.

-
Unplug the turn signal connector. Note, if your car is equipped with a 13-button OBC, there’s an extra blue plug on the turn signal stalk. If equipped, unplug this connector too.
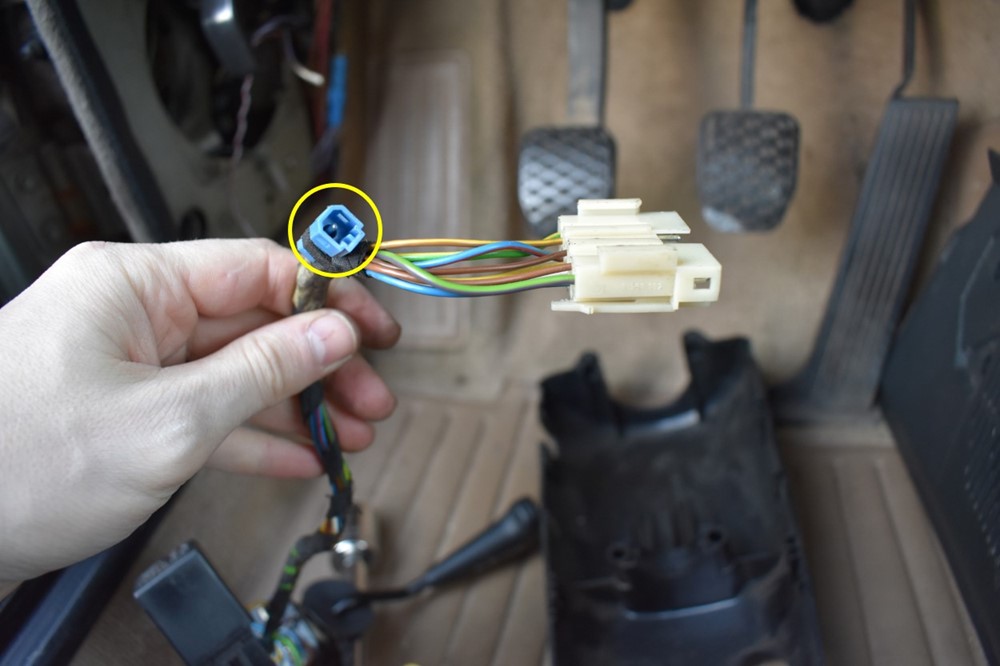
- Your old turn signal stalk is now completely free, and can be removed from the car.
-
To install the new stalk, start by plugging it back into the connector. Don’t forget to also plug in the blue single pin connector if equipped for the 13-button OBC.
-
Reclip the connector back into the connector below it, and the two connectors above it. Reclip the whole bundle back onto the steering column.
-
Reclip the relay back into its slot on the bottom of the steering column.

-
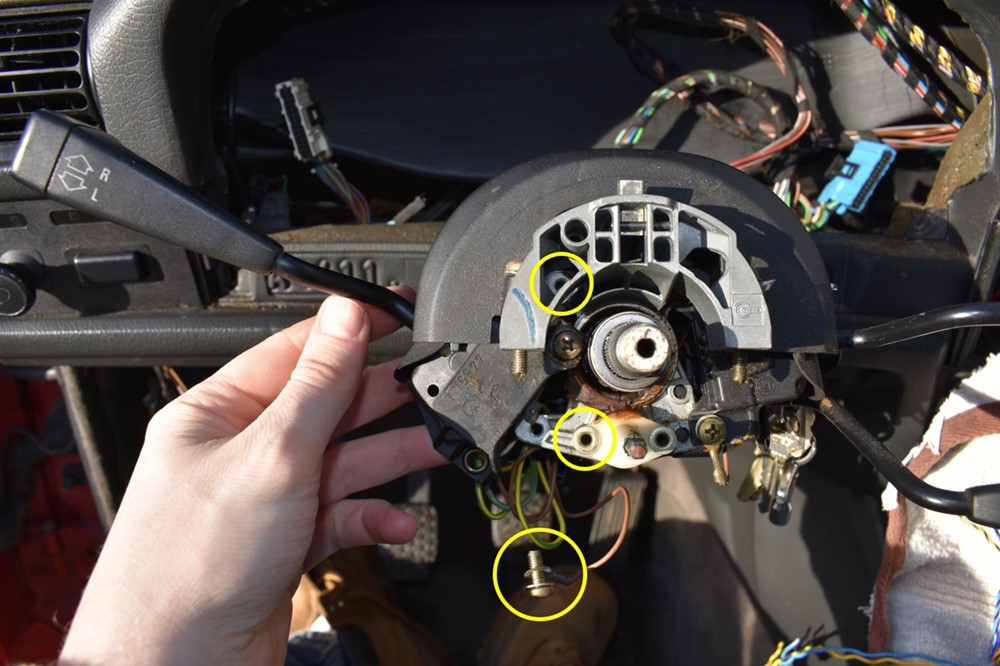
Slide the new turn signal stalk back into place, aligning the two holes in the stalk with the two holes on the steering column (circled). Reinstall the two phillips head screws. You can place the screw in the top hole of the stalk before you slide it into place on the column; it’s a little trick to drop into place if you don’t. Don’t forget the grounding wire terminal that goes on the bottom screw (circled below).
-
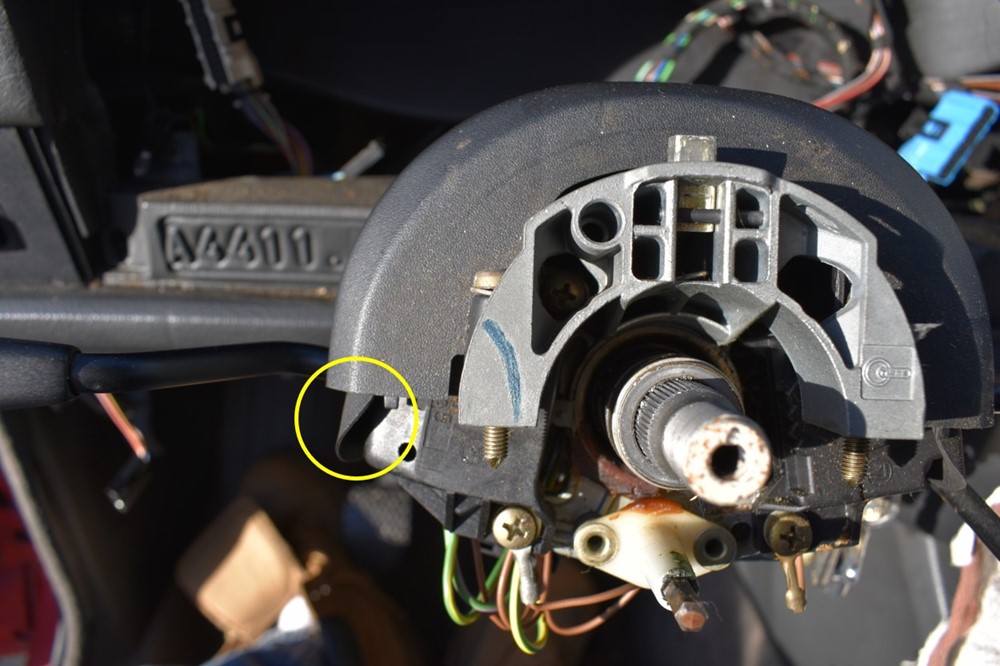
Reinstall the lower steering column cover, and reinstall the 4 phillips head screws that hold it in place. Make sure the rubber disk on the turn signal stalk (circled) is tucked inside the upper and lower steering column covers.
-
If not already, turn the key to the accessory position. Slide the steering wheel back onto the column, making sure it’s centered. If your car is equipped with an airbag, reconnect the yellow plug on the steering column. Reinstall the washer and a new lock-nut, and torque to spec. Although most of us end up using our old lock-nuts, it’s really a good idea to replace it since it’s so safety-critical; you REALLY don’t want this to come loose. Once the wheel is on, you can remove the key to lock the wheel while torqueing the nut.

- If not equipped with an airbag, reinstall the BMW logo into the front of the steering wheel.
- If equipped with an airbag, carefully reconnect the yellow plug into the back of the airbag, and set the airbag back in place. Reinstall the two torx screws. Reconnect the battery.
Sign up to never miss a new How-To from Classic Bimmer Bits!