
E30 Windshield Replacement
How-To Credit
This how-to is a Classic Bimmer Bits original, with much credit due to the many members of the community who have helped us learn along the way!
Parts
- Windshield
- Windshield Gasket (if needed)
- Windshield Locking Strip
- Locking Strip Cap (if needed)
Tools
- Plastic Trim Removal Tool (See picture in step 1)
- Dish Soap and Water
- Optional: Locking Strip Tool
Torque Specs (ft-lbs):
- N/A
Prodedure
-
Windshield replacement is a very do-able job on our cars. The most difficult part is the locking strip installation, and that just takes patience and perseverance. Some people swear by the Lisle locking strip tool for installation. We like it, if it never slips out of the gasket groove. Once it’s out, we haven’t yet found a good way to get it started again, and it’s very easy to start chewing up the locking strip with the metal edges of the tool. In the tool’s defense, Bavarian Auto sells a version with a modified tip to better fit our locking strips; we haven’t tried that one, it may be better all around.

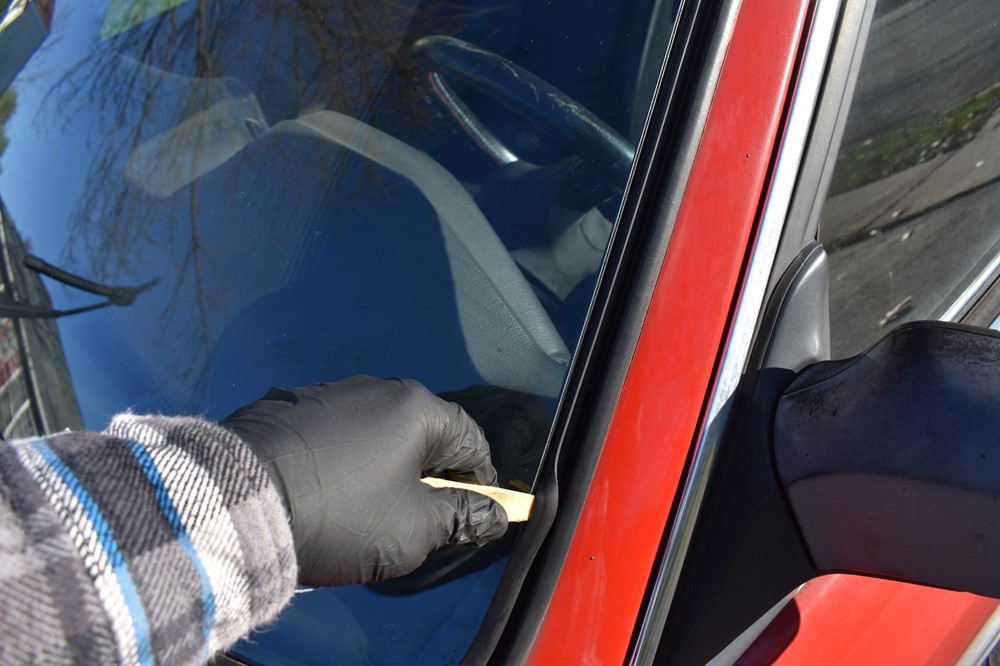
We like to use a plastic trim removal tool, like the one pictured below. There’s no magic to it, it takes some time and muscle, but it’s effective, and nearly impossible to damage the windshield, locking strip, or gasket. We’ve installed multiple windshields this way, and think it’s the best, especially if you’re planning to re-use the windshield gasket or locking strip.

-
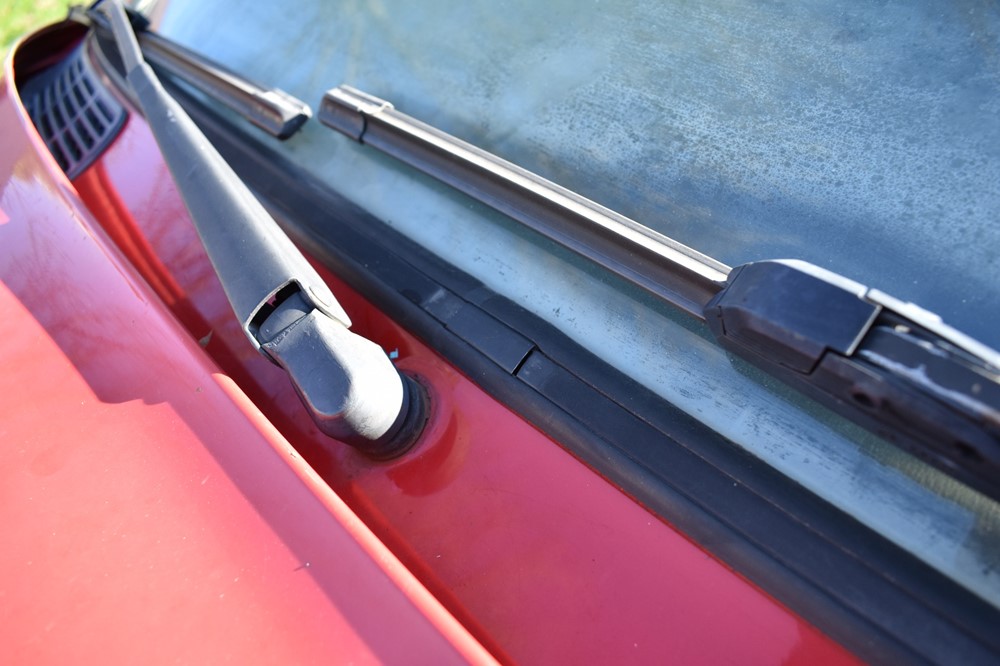
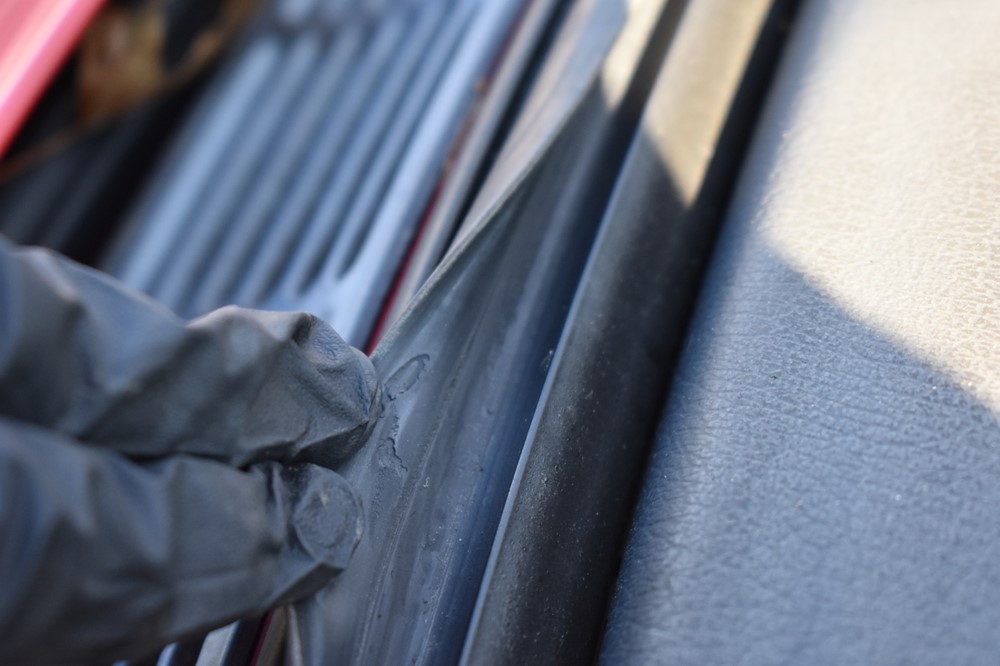
To remove the windshield, start with the lockstrip trim clip. It should be right at the bottom, middle of the windshield.
-
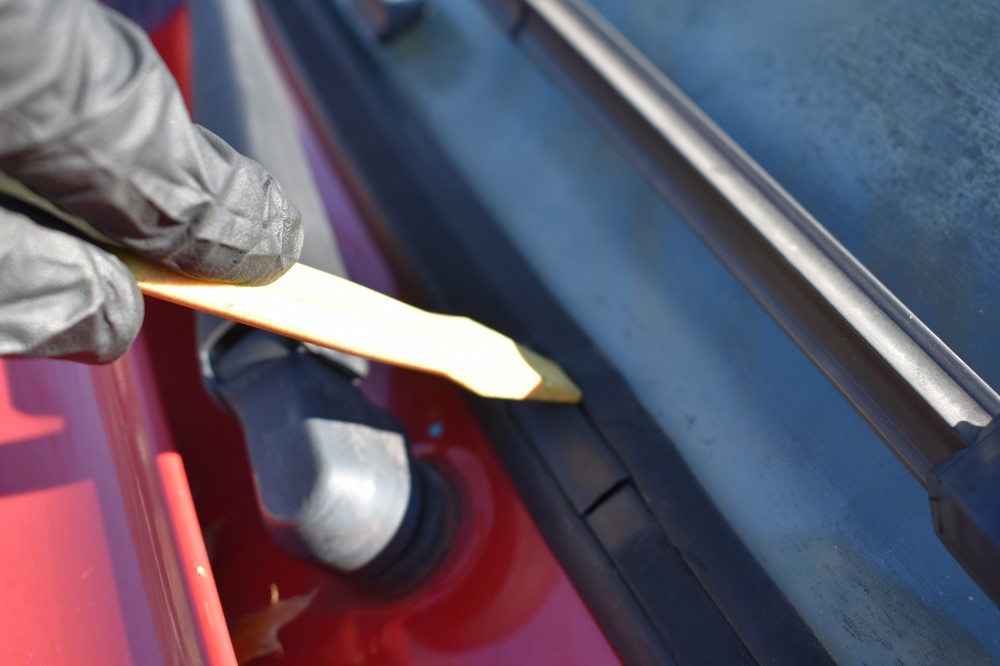
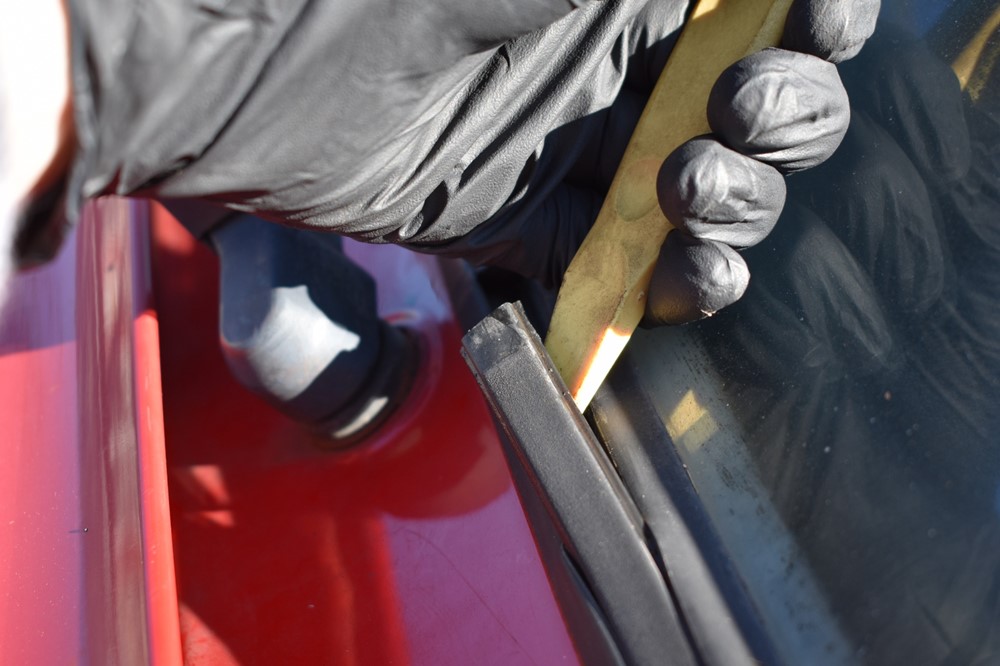
Carefully work the trim removal tool behind the top edge of the clip as shown. Don’t go right at the middle of it; it’s very thin sheet metal and will bend or collapse easily. Work the trim removal tool behind it right at one end, where the locking strip is inside the clip and supporting it.
-
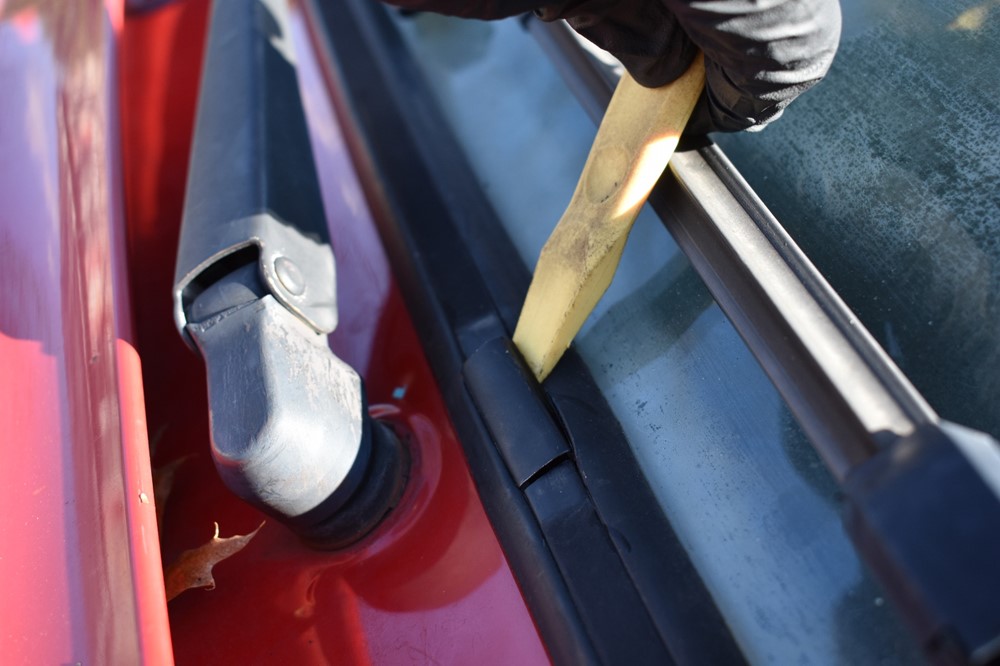
Pry the trim clip outwards until it pops out, as shown.
-
Use the trim removal tool again to pry the end of the locking strip out of the gasket.
-
At this point, the locking strip simply pulls out. Be careful with this step, especially if you want to re-use the locking strip. With years in the sun, the locking strip can get stiff. If your strip is chrome, there’s a good chance it’s pretty brittle by now. Just grab the strip and start pulling it up and out of the gasket, working your way around the windshield.
-
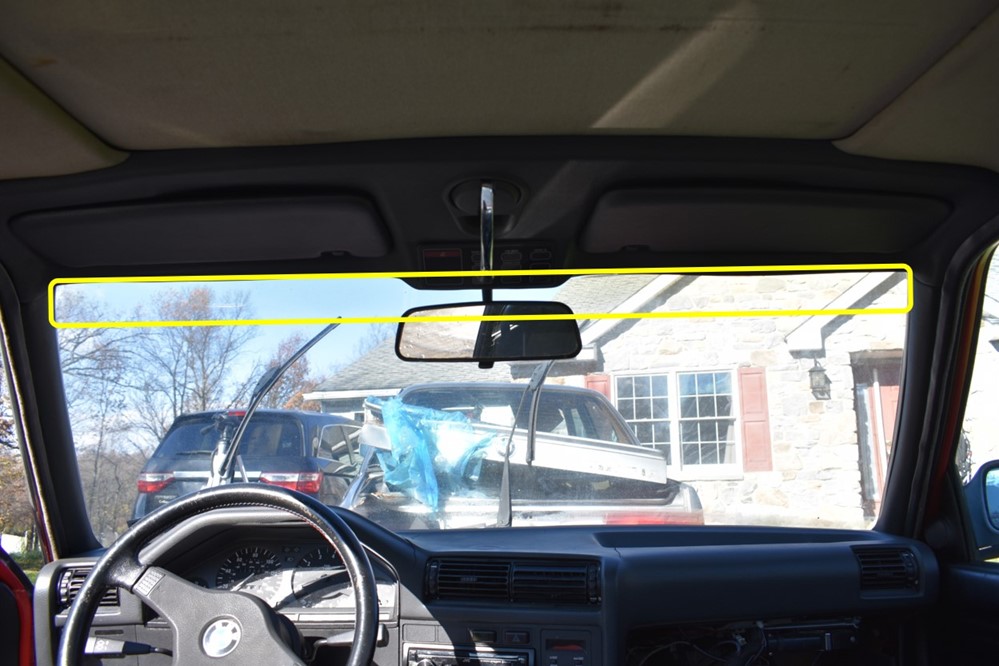
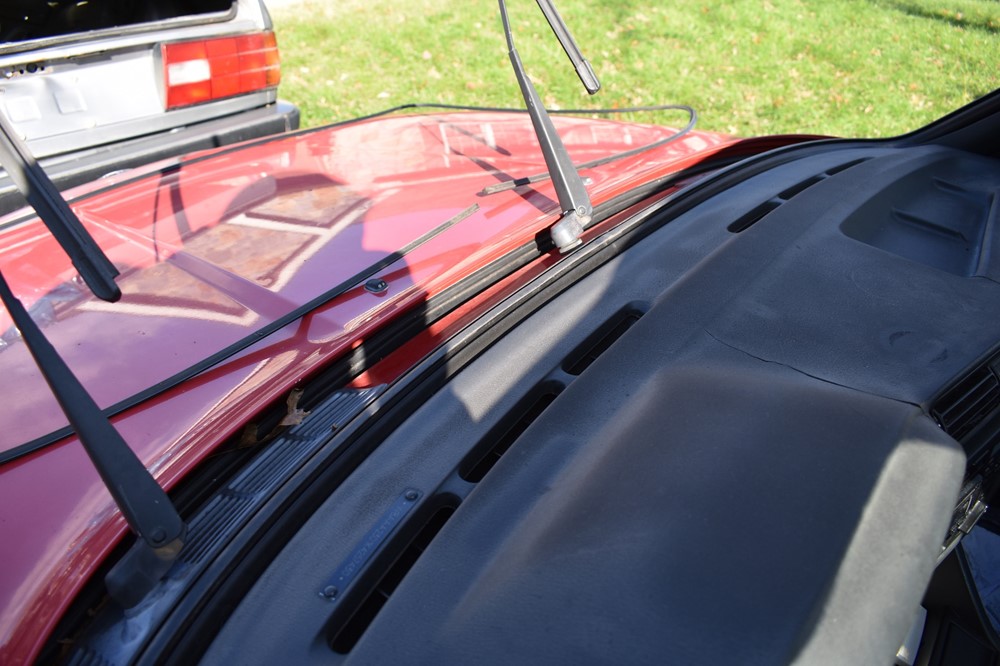
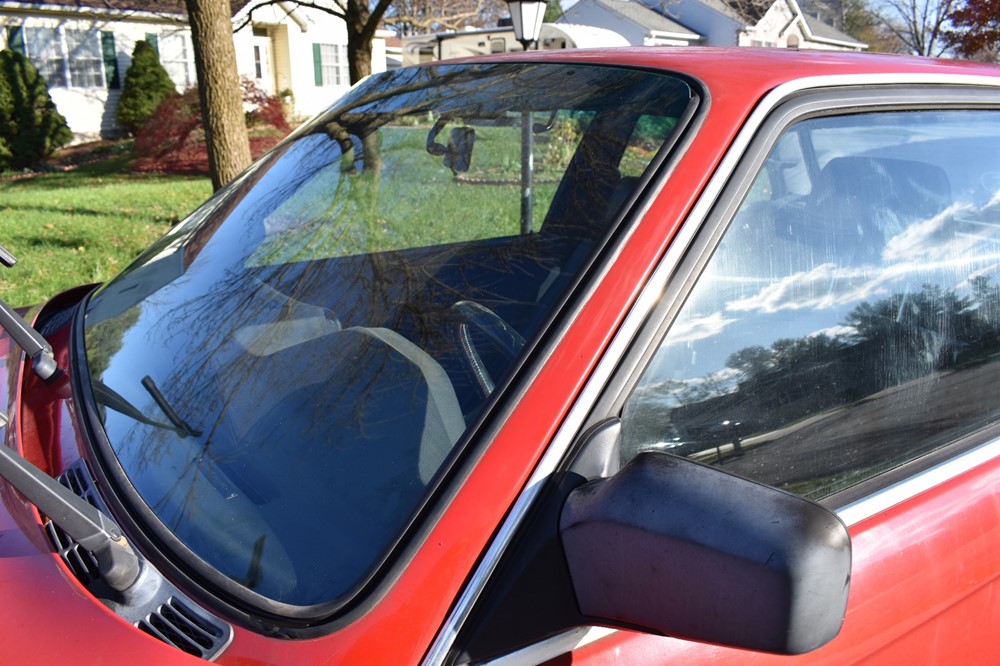
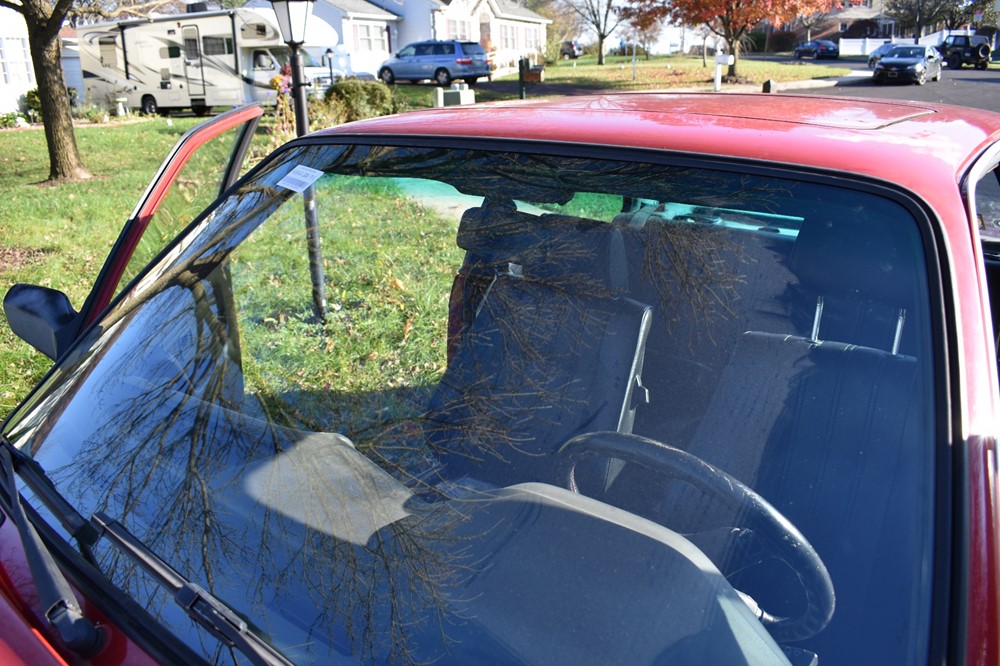
You’re ready to remove the windshield now. Fortunately for us, BMW didn’t use any sealant around the windshield, making removal pretty easy. That’s not to say that there isn’t sealant on your windshield; if it’s ever been replaced, it’s not uncommon to find sealant in the gasket groove. Anyhow, the next step in removal is to push the top of the windshield out of the gasket. Sit in the driver seat and look up at the windshield. You’re going to be pushing all across the top the windshield, in the region shown.
-
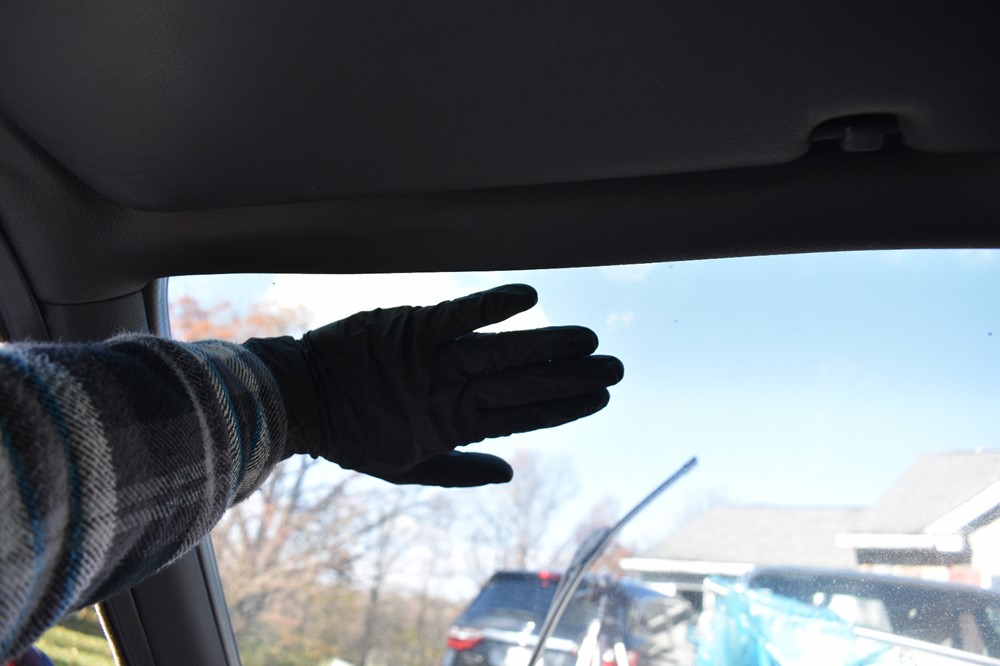
You need to carefully, but firmly, push upwards and outwards across the top of the windshield. Used the full palm of your hand to avoid point loads on the glass. Push just until you hear or feel it just start to peel away from the gasket. Then move your hand over about 8 inches and push again. Work your way across the windshield until you’ve broken the 30 year old seal between the gasket and windshield. Then work your way back across, pushing the windshield up and out of the gasket. You’ll know what feels right; you can be firm, but you’re not trying to flex the glass. Once the initial seal is broken, you’ll feel the whole windshield moving and know that you can safely push it up out of the gasket.
-
Move back outside the car. The top of the windshield is now sitting on the outside of the gasket.
-
You can now pull the windshield outwards until just the bottom edge is resting in the gasket.
-
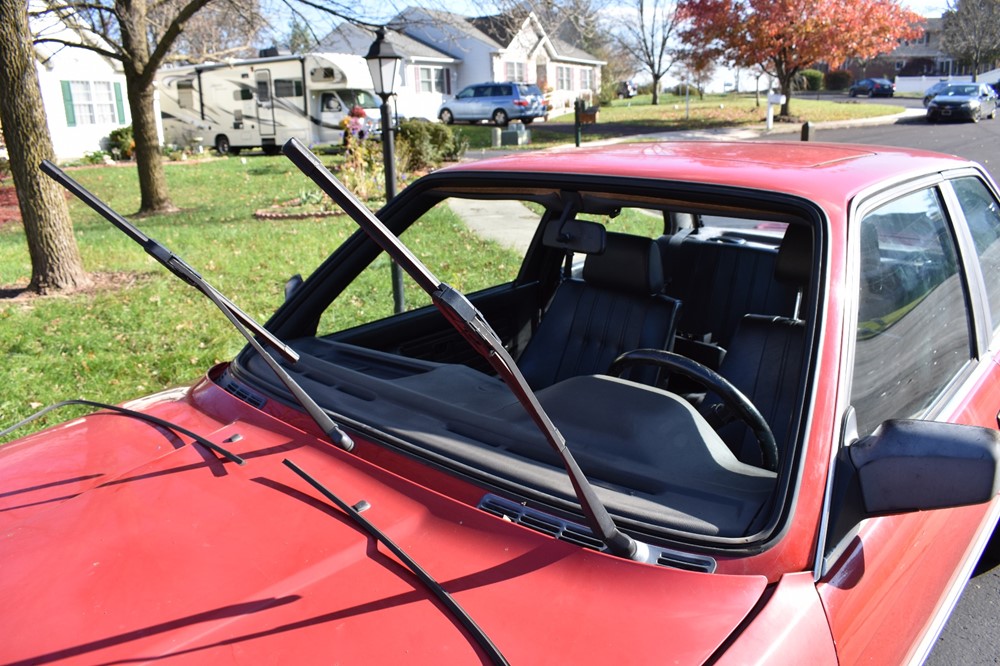
You can now lift the windshield up and out of the car.
-
This is a great time to clean your dash, especially any gunk or bugs that have managed to wedge themselves between the dash and windshield.
-
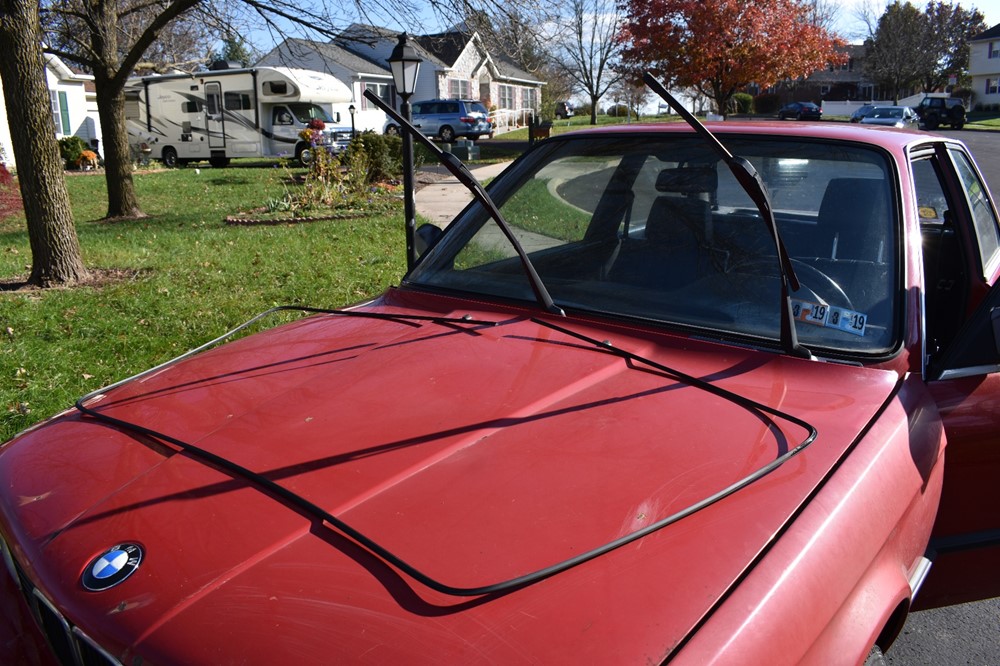
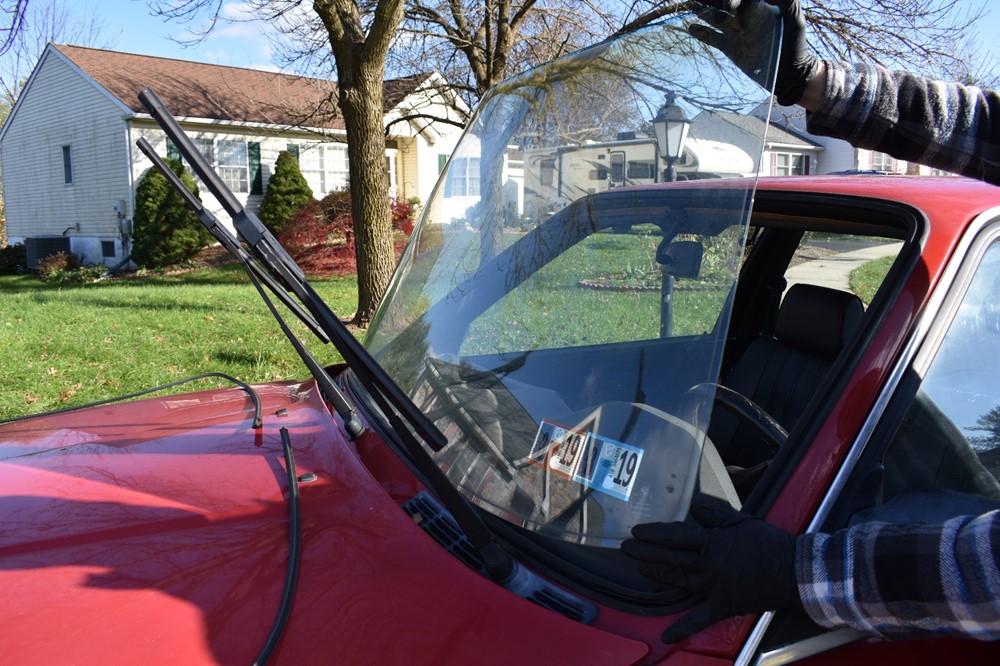
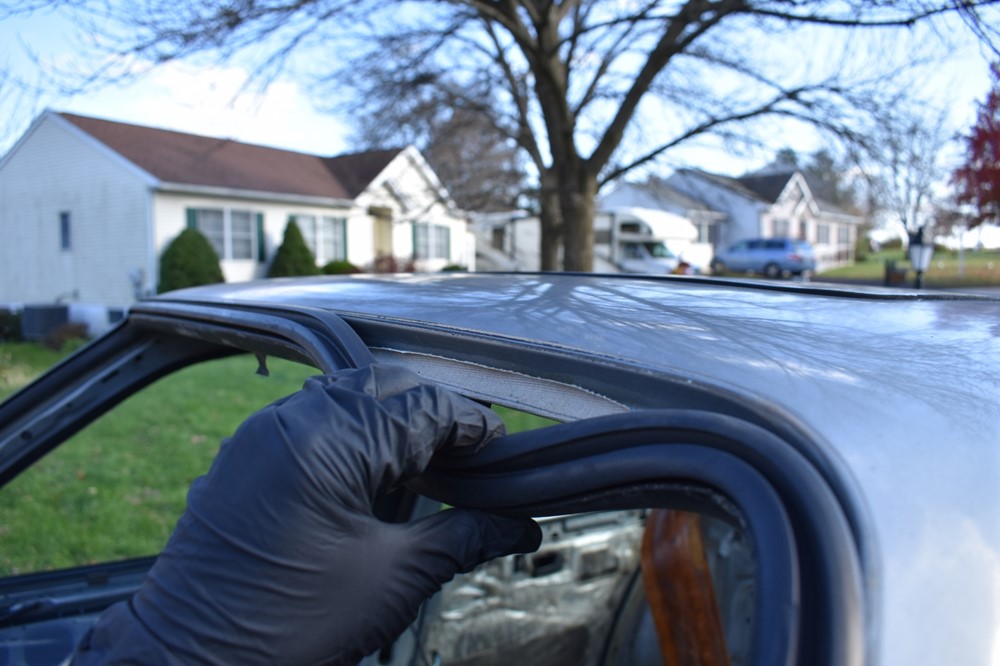
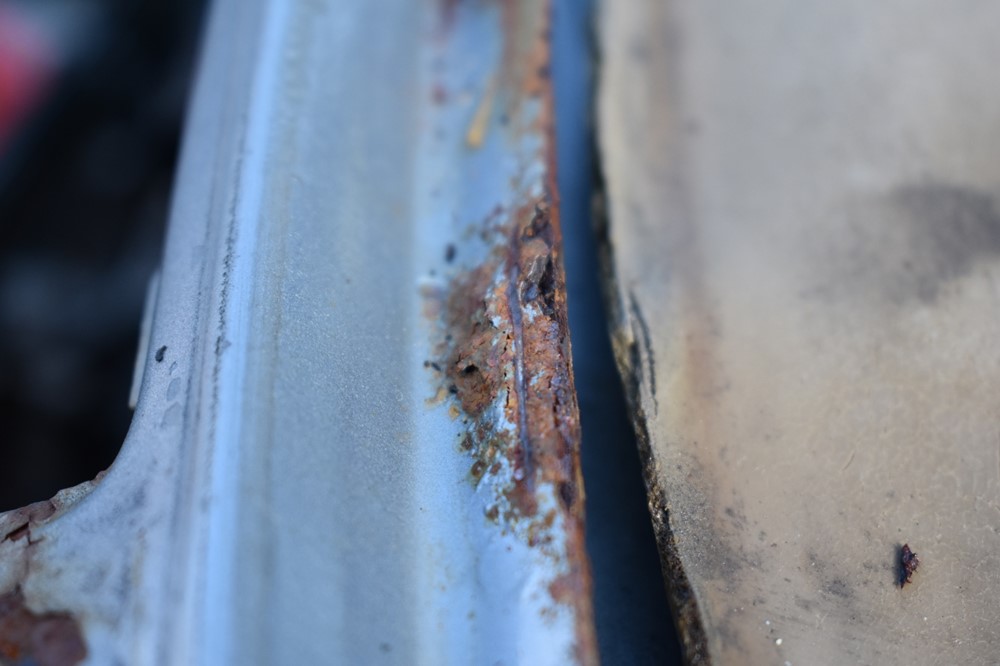
If you’re replacing the windshield seal, now’s the time. Peel the seal down from the top, then out away from the windshield frame (pay no attention to the fact that we switched cars for this pic, since we wanted to re-use the seal on the other car!). With the seal out, look for any rust around the perimeter; it tends to show up at the bottom outside corners where water can most easily pool.
-
Installation of the new seal is straightforward. Start at the bottom and press the seal firmly onto the edge of the windshield opening, and pull it down and outwards to seat it. Work your way around the seal, paying particular attention to the corners to make sure the seal is fully seated. When you’ve worked your way all the way around to where you started, you may a little “extra” seal left, leaving a bump. Work the seal in either direction to smooth everything out.
-
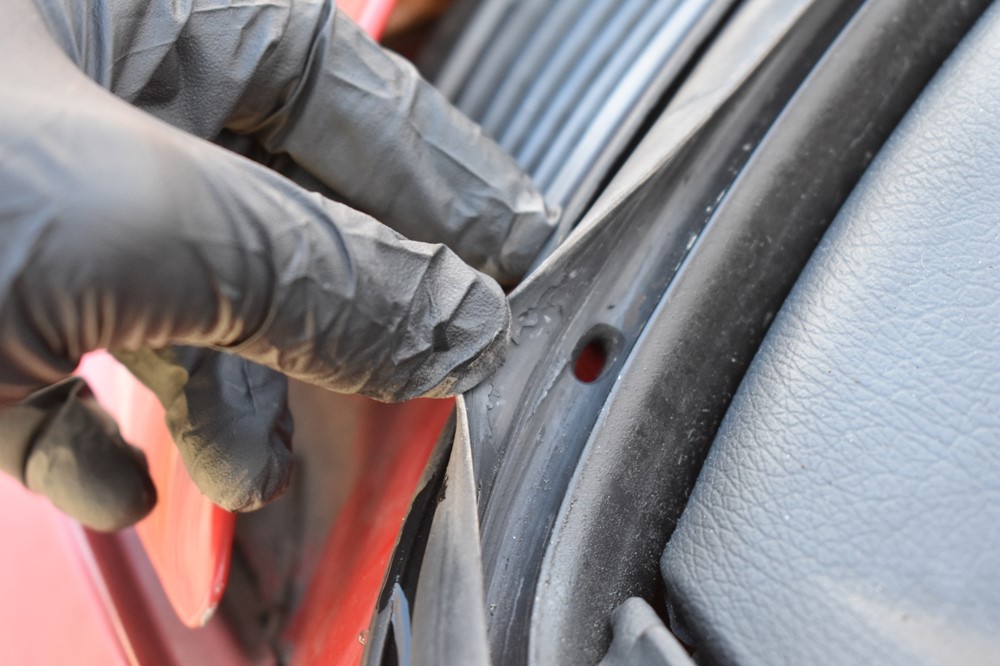
If you plan to re-use the seal, there are a couple of key things to check. Inspect it in general for tears or damaged sections. If your old windshield had sealant on it, you’re going to need to clean it all out to ensure a good seal with the new windshield. Typically, you rub your thumb up and down the seal and most of the sealant will peel out, our you can use the round end of the trim removal tool to scrape up and down the inside of the seal. You want it to be as clean as you can get it. There are two drainage holes in the seal, on the bottom of the groove near each end of the windshield. These must be clear to allow any water that does get inside the seal to drain. If not, it will work its way back behind the windshield and leak down the inside of the firewall.
-
Before installing, it’s worth taking a look at your new windshield. It’s way easier to remove any stickers and clean the glass with the windshield out of the car.
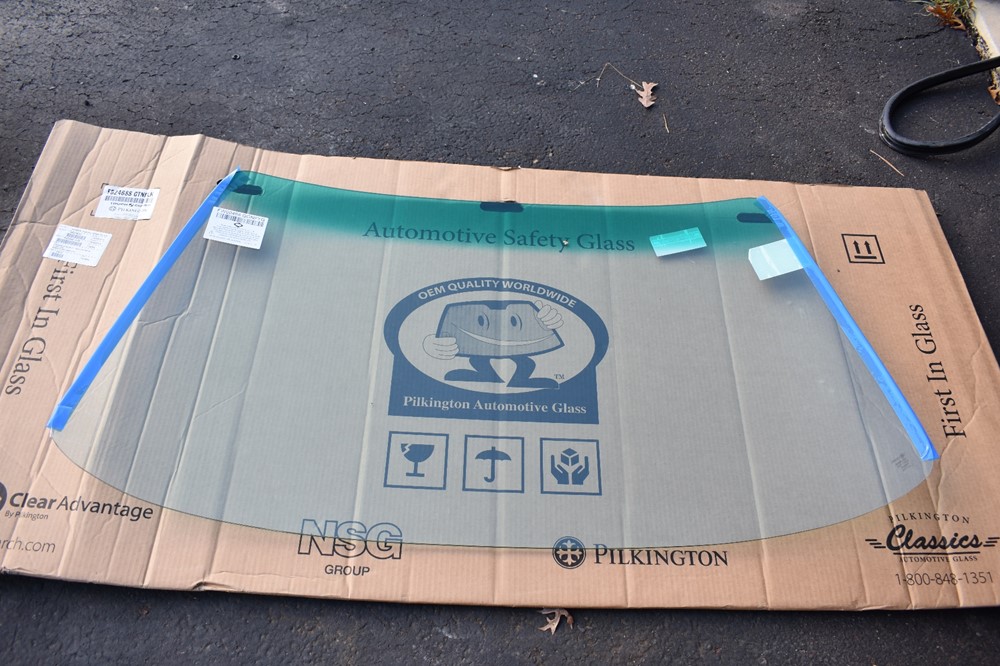
-
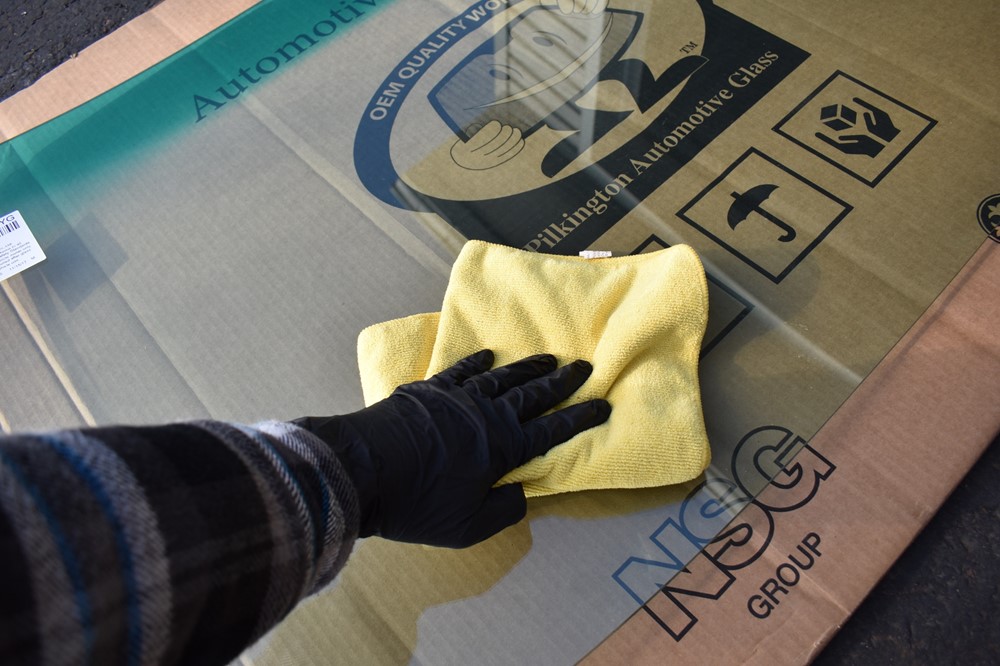
Goo Gone is great for sticker residue, along with a plastic scraper and paper towels to wipe it all up. There are a multitude of opinions on the best way to clean auto glass. Once any grease or adhesive is gone, we like just a damp microfiber cloth for cleaning, and a dry microfiber cloth to dry.
-
Alright, you’re ready for installation. Carefully set the bottom of the windshield into the seal groove. Make sure the windshield is sitting cleanly in the seal groove.
-
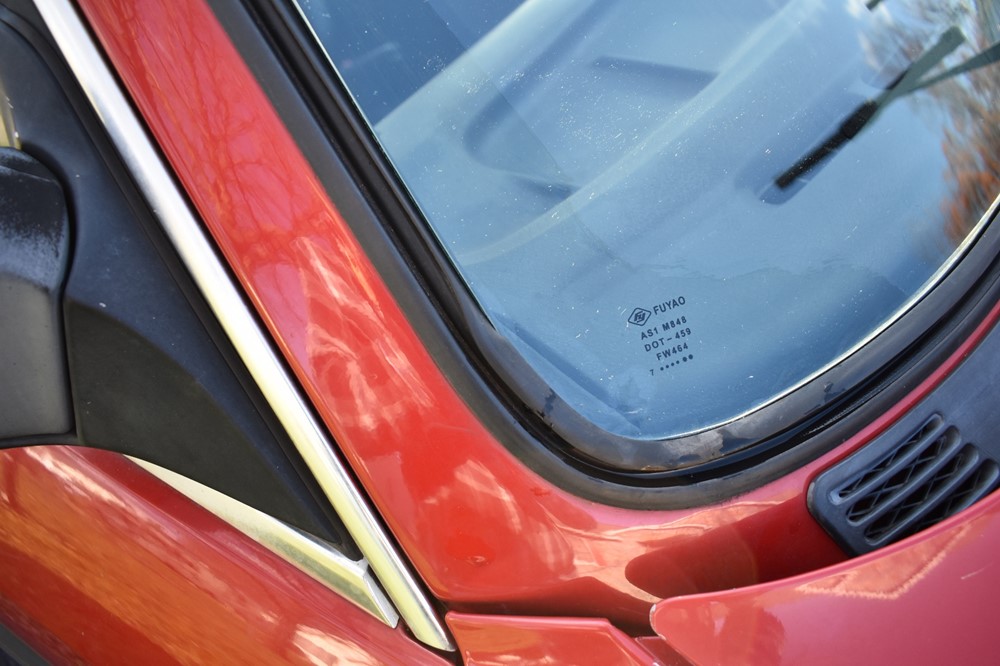
Now you need to center the windshield in the opening. Look at one side of the windshield, noting the distance between the edge of the windshield and the edge of the seal. Then move to the other side of the windshield and compare.
-
Carefully push or pull the windshield to center it. You may need to compare the two sides a couple of times. You really want the windshield to be centered, to ensure the best seal, but also to make your life easier trying to install the lock strip. When you peel back the edge of the seal, you want the gap on either side to be equal, like this.
-
Now you need to set the windshield fully into the gasket. Insert the trim tool behind the edge of the seal at the bottom of the windshield, then slide it up the side of the windshield, to pull the seal over the edge of the windshield. Work your way up to the top corner. You may need to press the windshield down gently as you go to seat it in the seal groove.
-
Repeat on the other side.
-
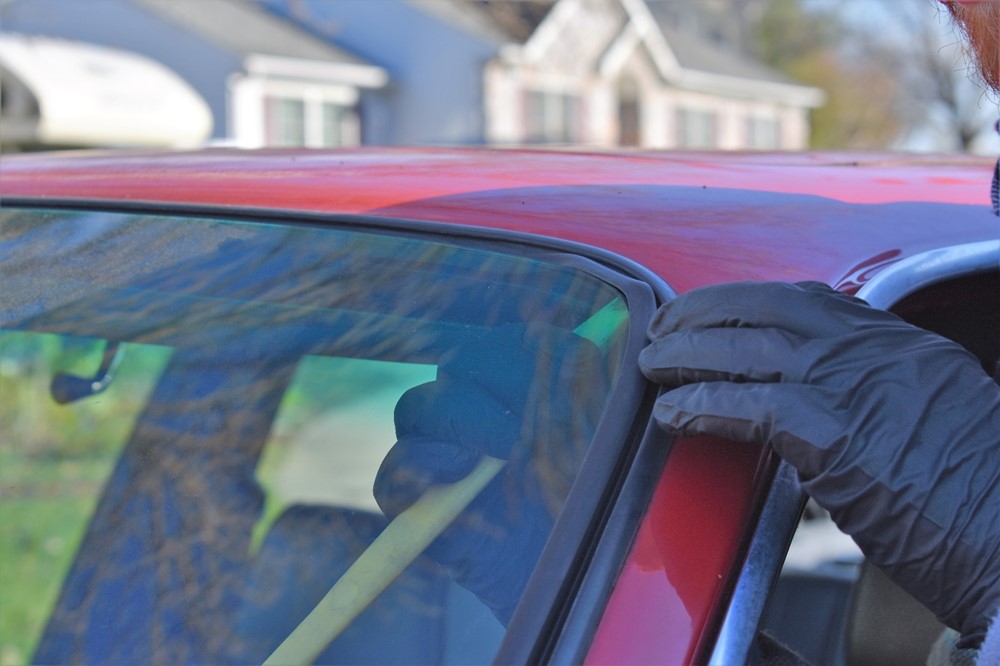
To set the top edge, open the driver door so you can access the inside and outside of the glass simultaneously. Use the trim tool from the inside to push the lip of the seal upwards, while using your other hand to gently press on the glass from the outside, if needed. You’re just trying to seat the corner of the windshield into the groove at this step.
-
Move to the passenger side and repeat.
-
Move inside the car again, and use the trim tool to push the lip of the seal up and over the edge of the windshield. Start at one corner and work towards the middle, then move to the other corner and work back in. Generally, about halfway to the middle, the seal will stop catching on the windshield when you push it up. Step outside the car and push the top of the windshield inward to seat it in the seal groove. Then move back inside the car and keep working the seal until the windshield is fully seated.
-
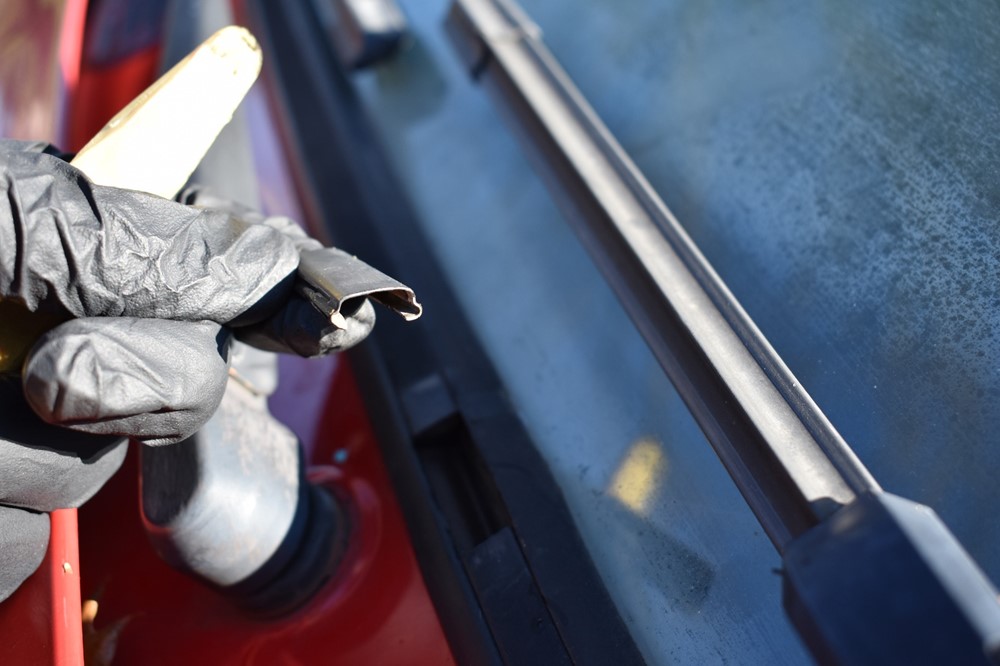
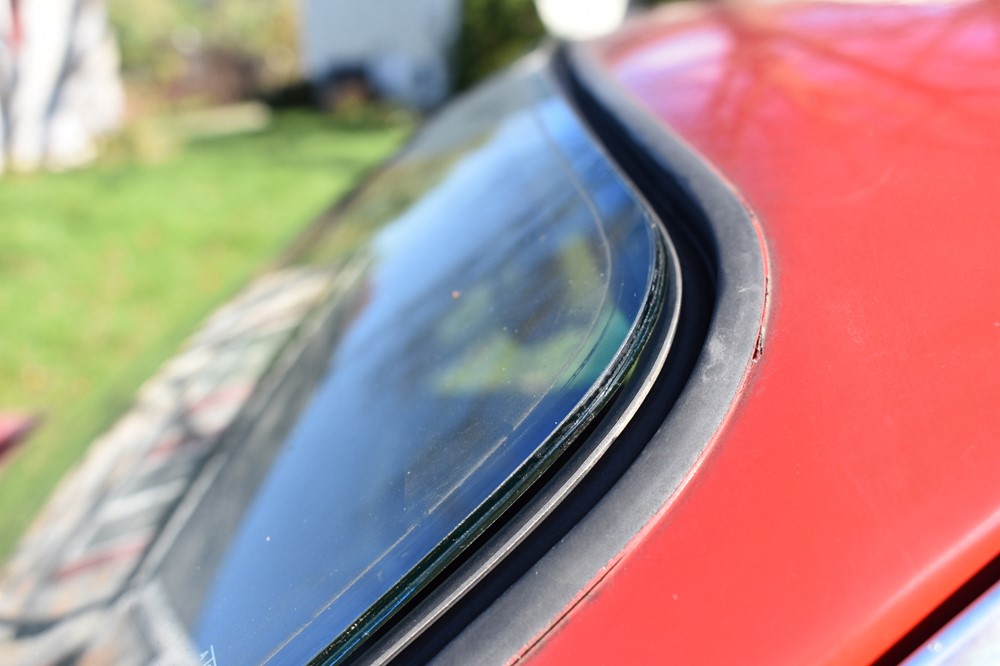
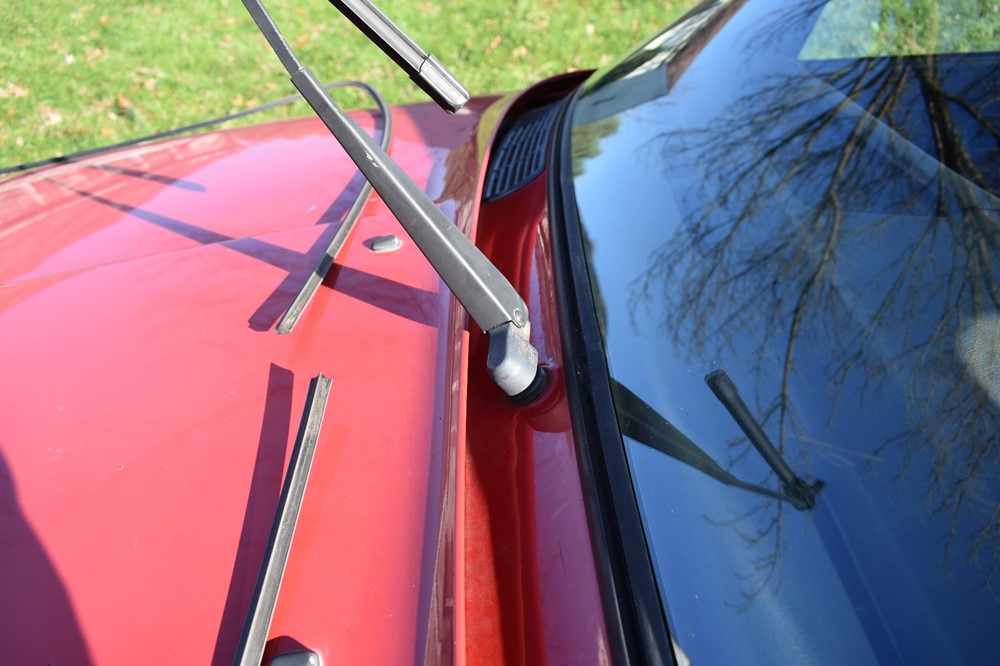
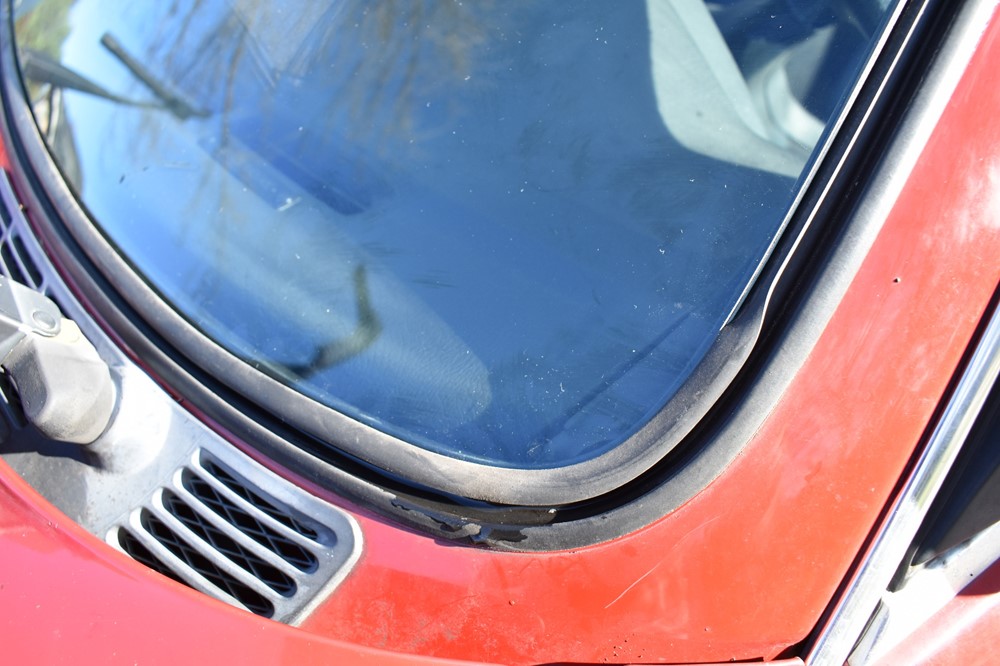
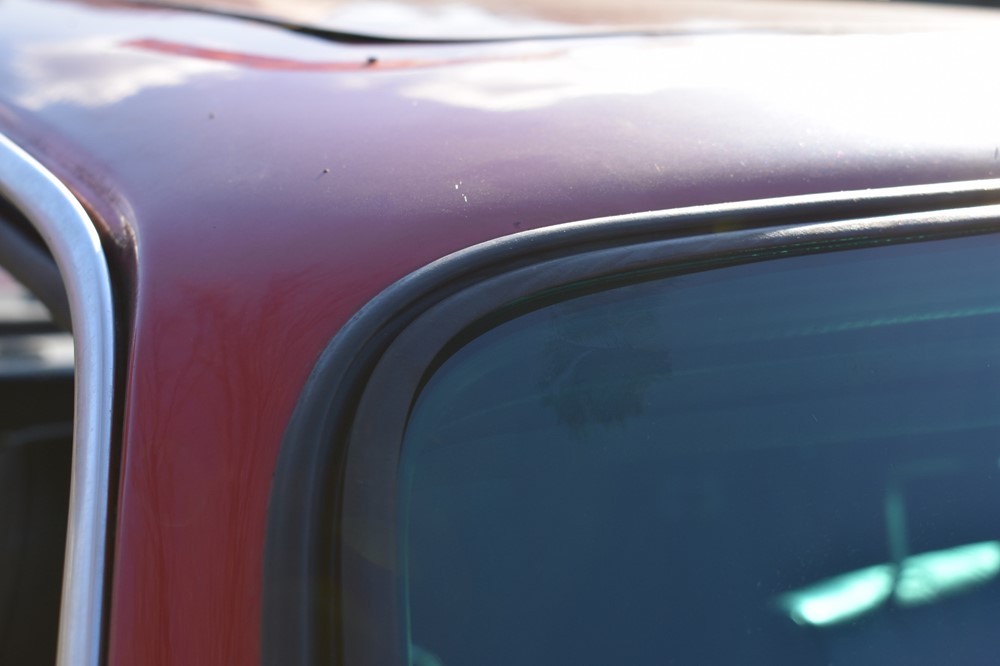
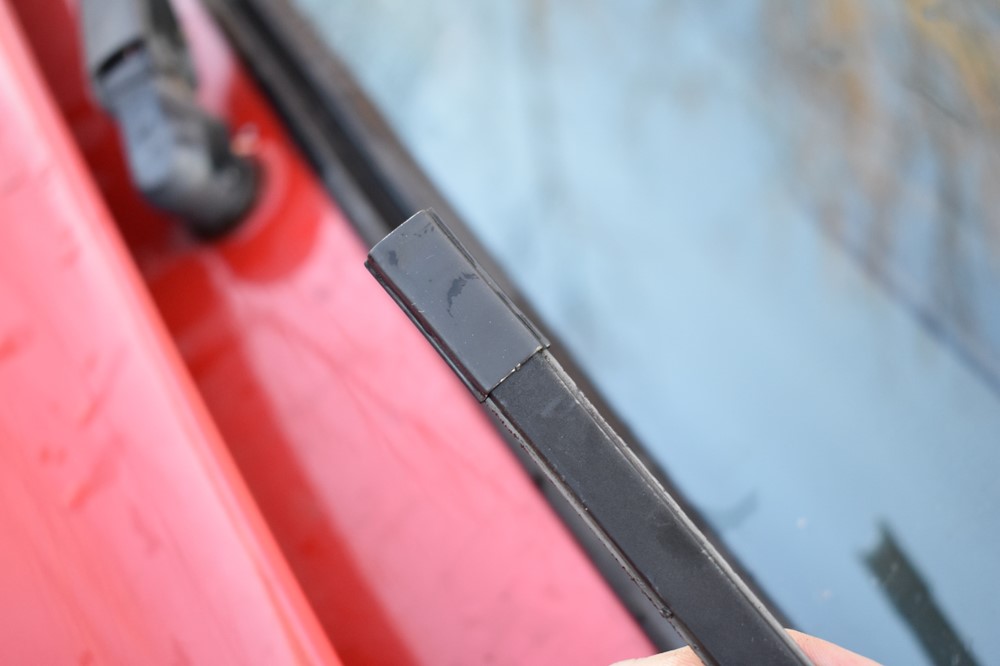
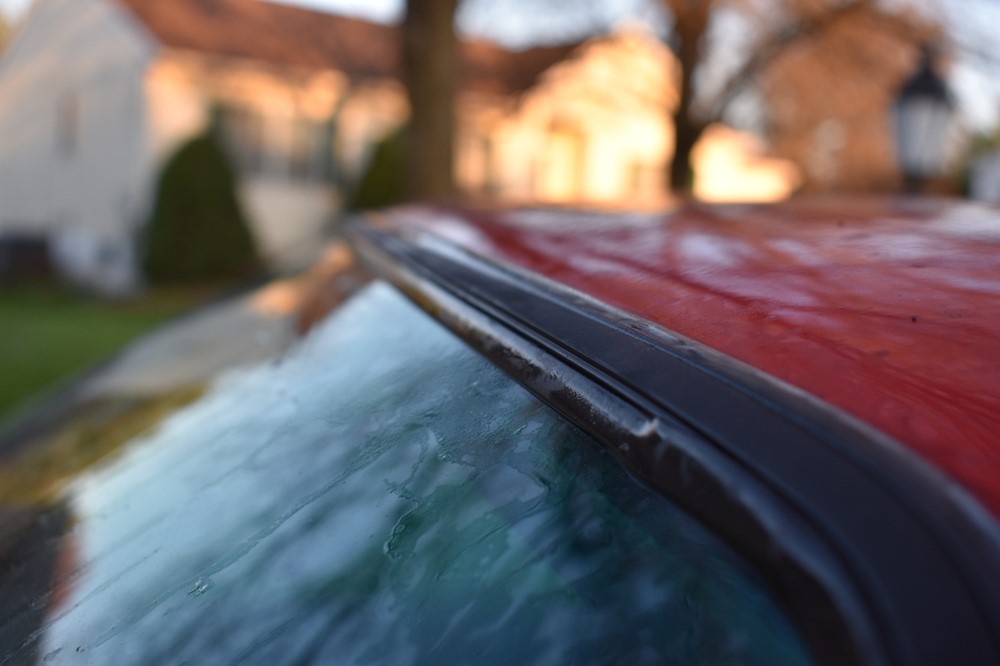
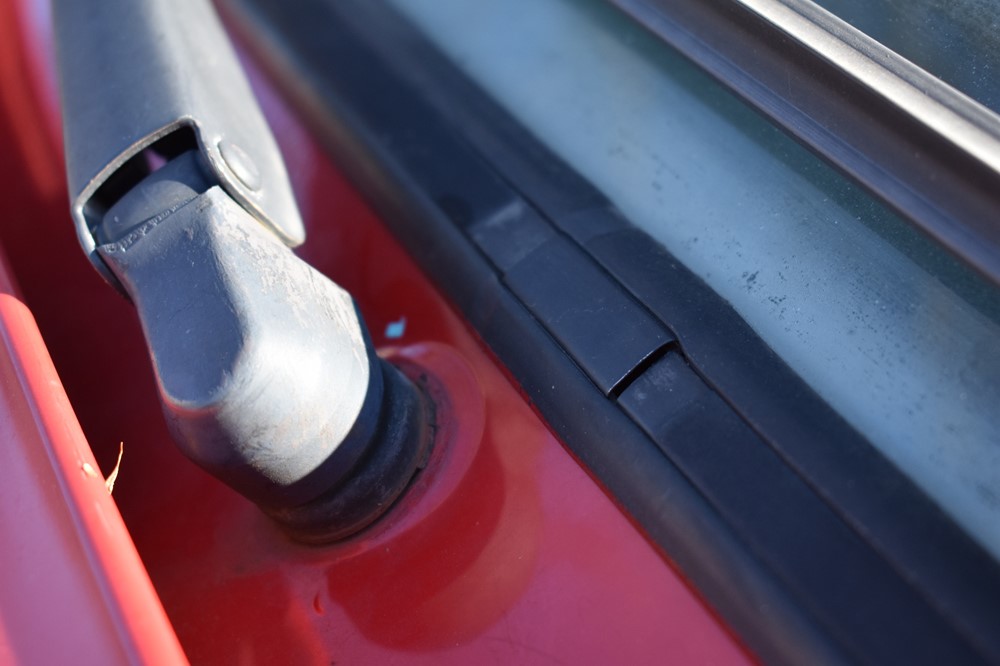
Now, the “fun” part (read: not fun at all) – the lockstrip. The whole rest of the job can be done in 20-30 minutes; the lockstrip can take anywhere from 20 minutes to an hour or more, depending on how lucky you are. First, decide if you’re going to re-use your lockstrip or not. It is certainly possible to re-use the lockstrip, and worth considering since new ones are pricey. The downside you need to be prepared for is this: new lockstrips come too long so that you can trim the end to exactly the right length; but they shrink over time, so if your lockstrip is old, it’s very possible that by the time you’ve worked your way around to the end, you could end up with a gap that’s too big to cover with trim clip, like the image below. If you want to save $80, go for it, it’s not going to affect the way the windshield seals, it’s just a visual thing.
-
Start by sliding the trim clip over one end of the lockstrip, until the end of the clip and lockstrip are nearly flush. This is to protect the trim clip from damage or collapsing while you install it.
- Fill a container or spray bottle with water, and add a generous amount of dish soap. Lube the groove in the seal generously at the bottom of the windshield.
-
If you’re re-using the lockstrip, you want the trim clip to be in the same place it was before, since the lockstrip already is shaped for the corners. If you’re using a new lockstrip, start right behind the center windshield wiper base, since it will hide the clip. Insert the trim clip into the seal groove, seating the outside edge under the lip of the seal. Then, insert the trim tool behind the inside edge, and flex the seal out and over the trim clip. Your goal is to get the end of the lock strip fully seated in the seal (note, the trim clip isn’t shown in this picture).
-
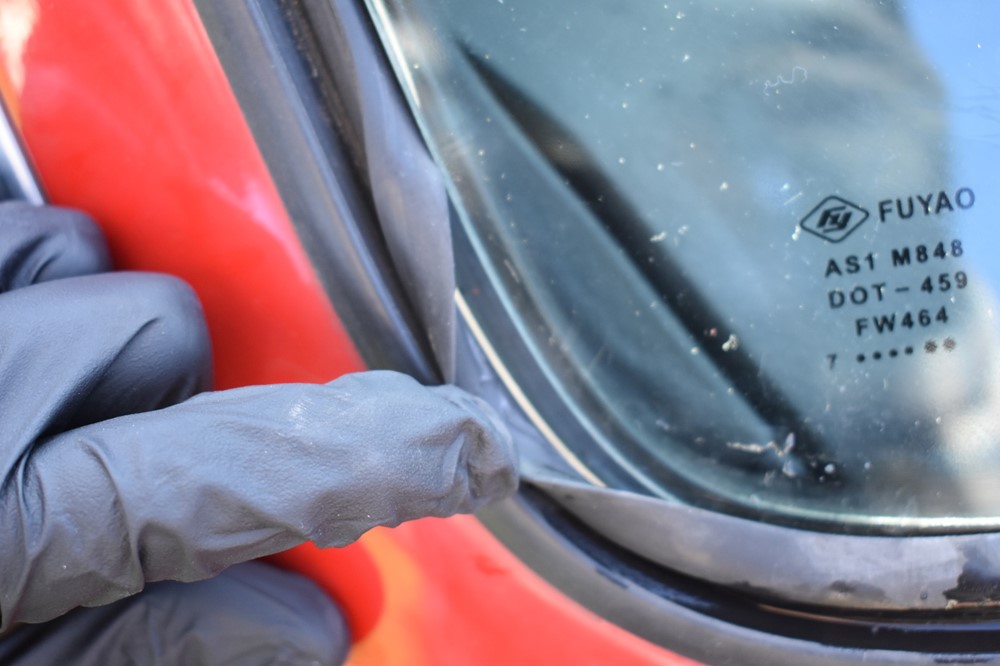
Next, you need to get the outside edge of the lockstrip seated in the seal, out to the bottom corner of the windshield. Lube the groove with your soapy water. While pressing the lockstrip into the seal, stick the trim tool under the edge of the seal in the area you got started, and slide along the lockstrip, guiding the edge of the seal over the edge of the lockstrip.
-
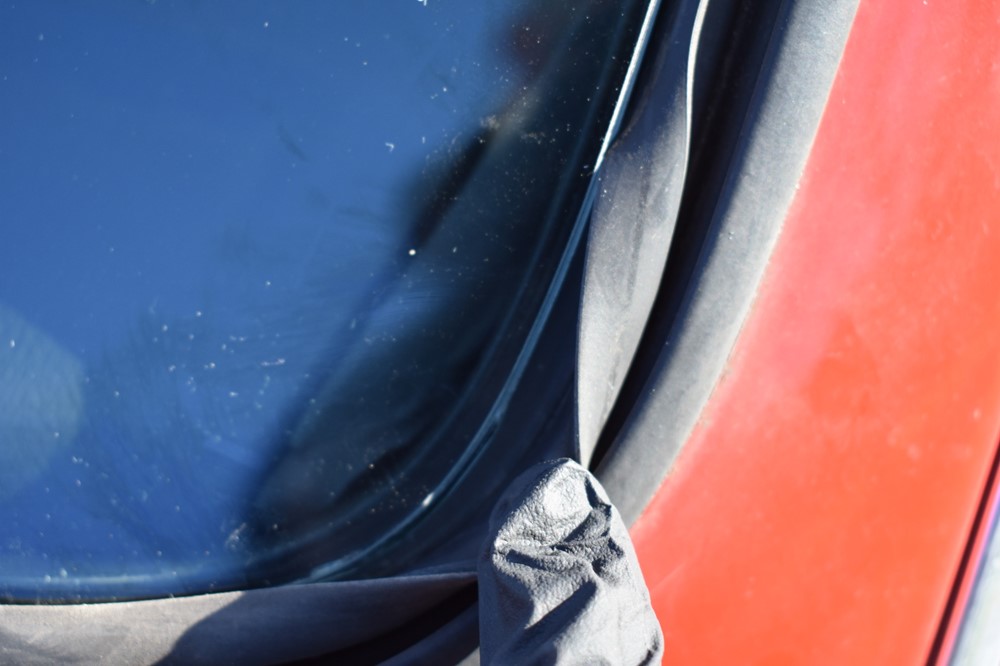
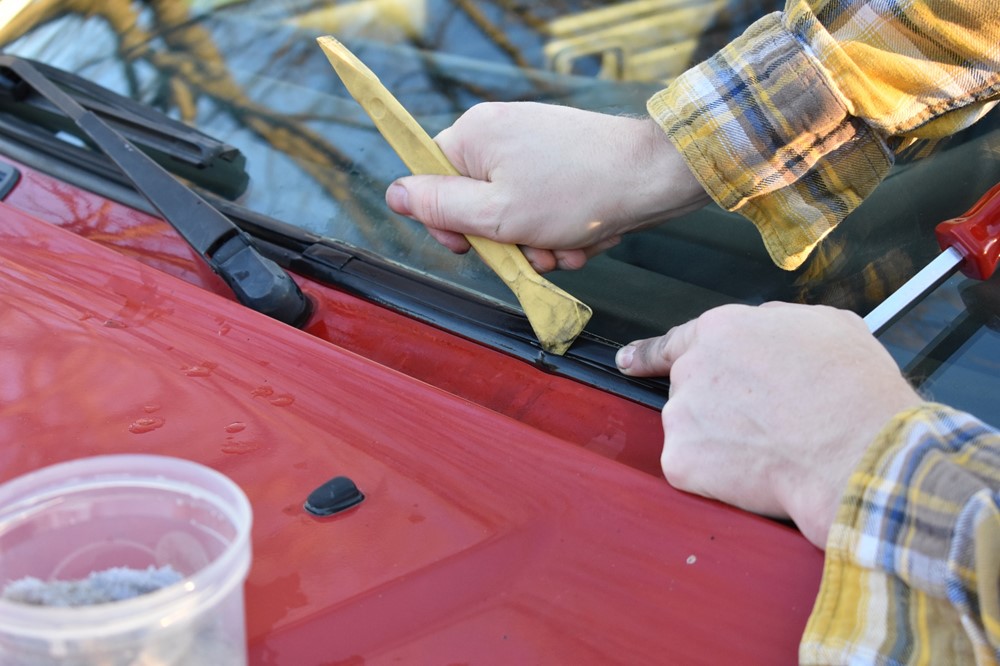
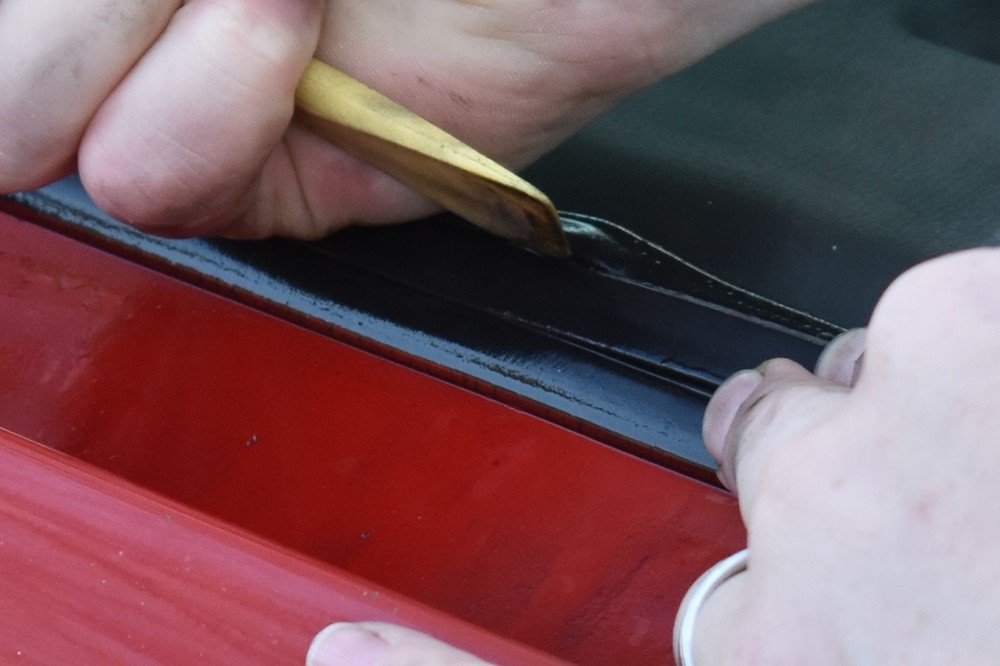
This step is what makes the lockstrip install hard. With the bottom edge seated, you need to seat the top edge. Use your soapy water generously here to make things slide easier. Stick the trim tool under the edge of the seal at the beginning, where the lockstrip is already in, and slide along the lockstrip to pull the edge of the seal over it. This can really take some force, don’t think it’s going to be gentle. You’re also not going to be able to seat the lockstrip with one long slide. It usually goes an inch or two at a time.
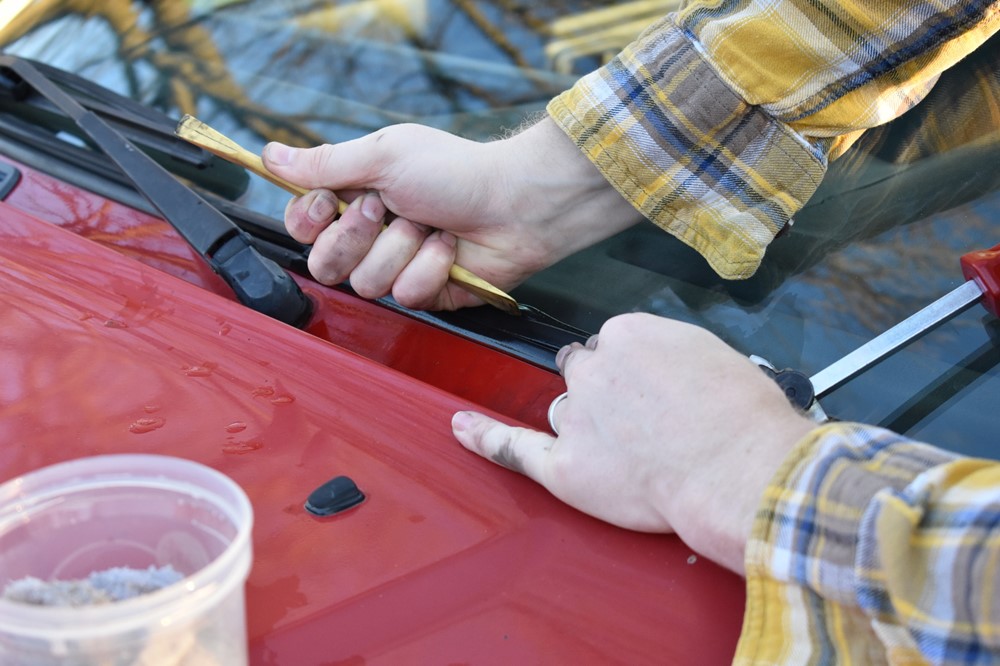
-
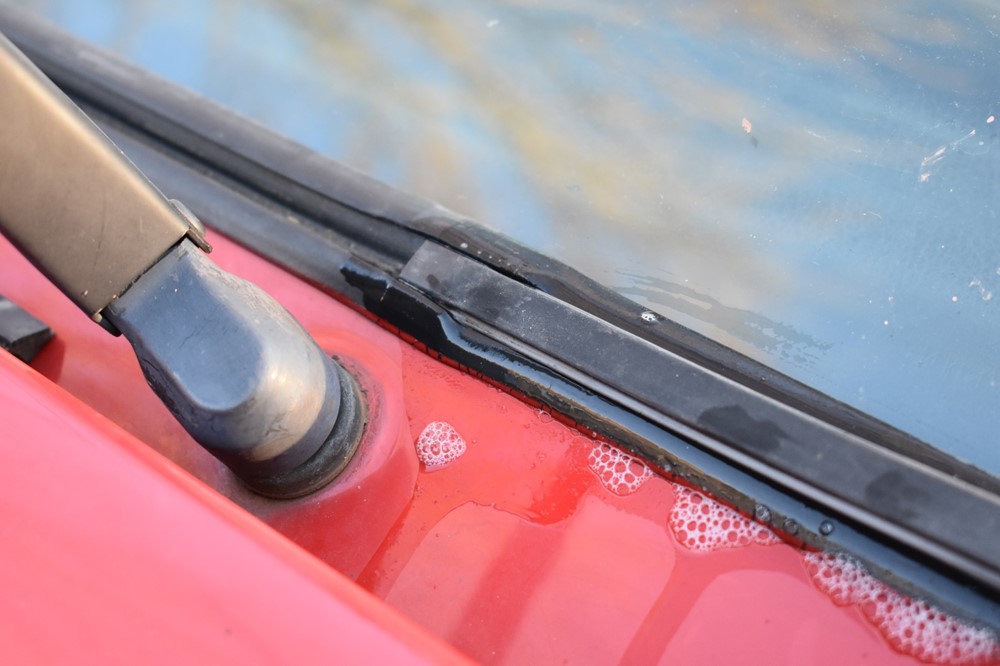
This is exactly what you’re trying to accomplish with the trim tool. As the tool slides from the left to the right side in the image, the wedge shape is pushing the edge of the seal up and out, so that it can snap over the edge of the lockstrip. Notice how raised the edge of the seal is right where the trim tool is inserted. Since the outside of the lockstrip is already seated, this motion will not fully seat the lockstrip into the seal.
-
Work your way to the first corner. If you’re re-using the lockstrip, this won’t be too bad, since the lockstrip will already have curvature to fit the corner. If you’re using a new lockstrip, gently work it into a shape that matches the curve in the seal. Seat it the same way you do the straighter sections, with one exceptions. The straight sections of seal, it’s always easier to seat the outside edge, then the inside, since the inside has more give. At the corners, it sometimes easier to seat the inside edge first. Just be flexible, see what works, if you’re having trouble one way, try the other. Use lots of soapy water to help.
-
The first vertical side is the same as the bottom, seat the outside edge of the lockstrip first (shown in the picture below), then wrestle the inside edge into place. Work in sections of 8″ or so at a time. The sides typically go a little easier than the top and bottom. As always, lots of soapy water to lube the seal and lockstrip!

-
Work your way around the top corner and across the top of the windshield. Unless you’re much taller than I am, you’ll need to open the doors and stand on the door seal to reach towards the center.
-
Keep working your way around, seating outside then inside, lubing as you go, until you reach the end.
-
Lube up the trim clip that is currently sitting fully over the starting edge of the lockstrip. Use the edge of the trim tool to carefully work the trim clip over so that it covers the joint between the two ends of the lockstrip. If you re-used the lockstrip, this is where you may run out of the lockstrip. If you’ve got a little gap left even when you slide the trim clip over, you’ll realize why we like starting right behind the windshield wiper post!
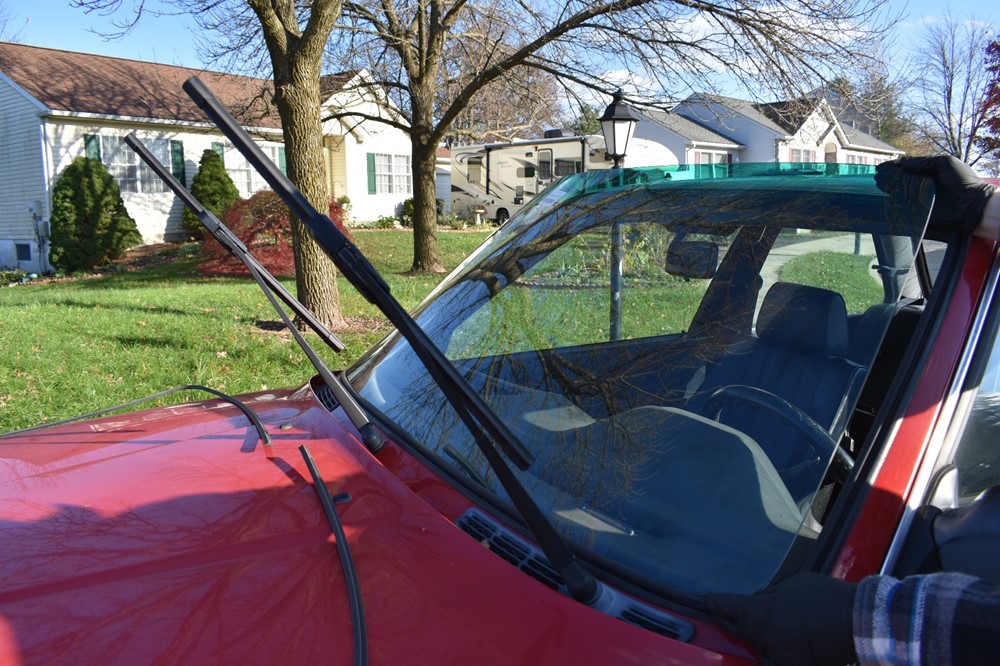
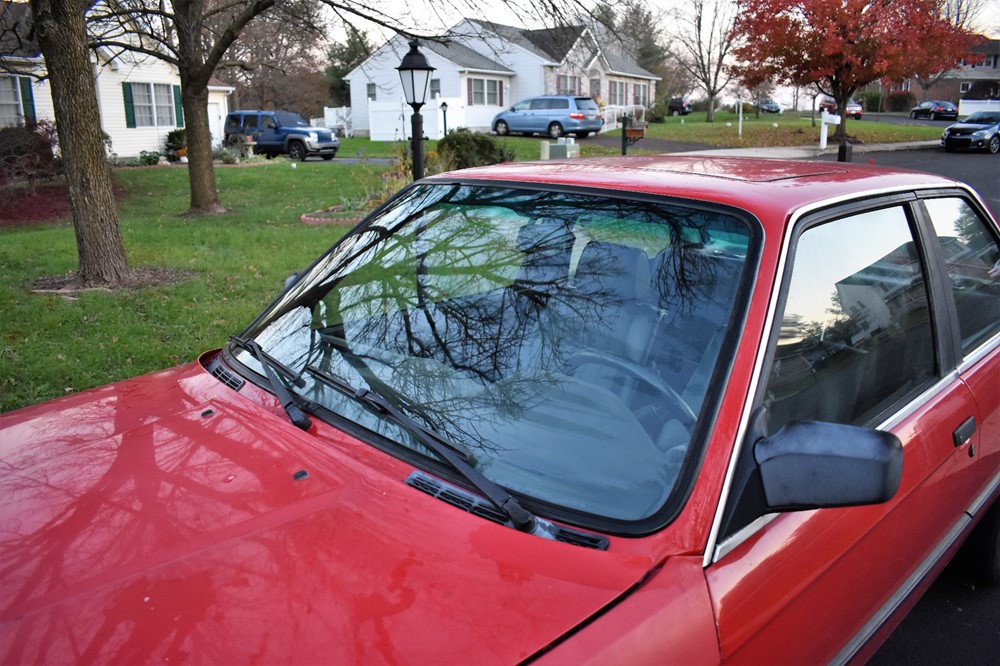
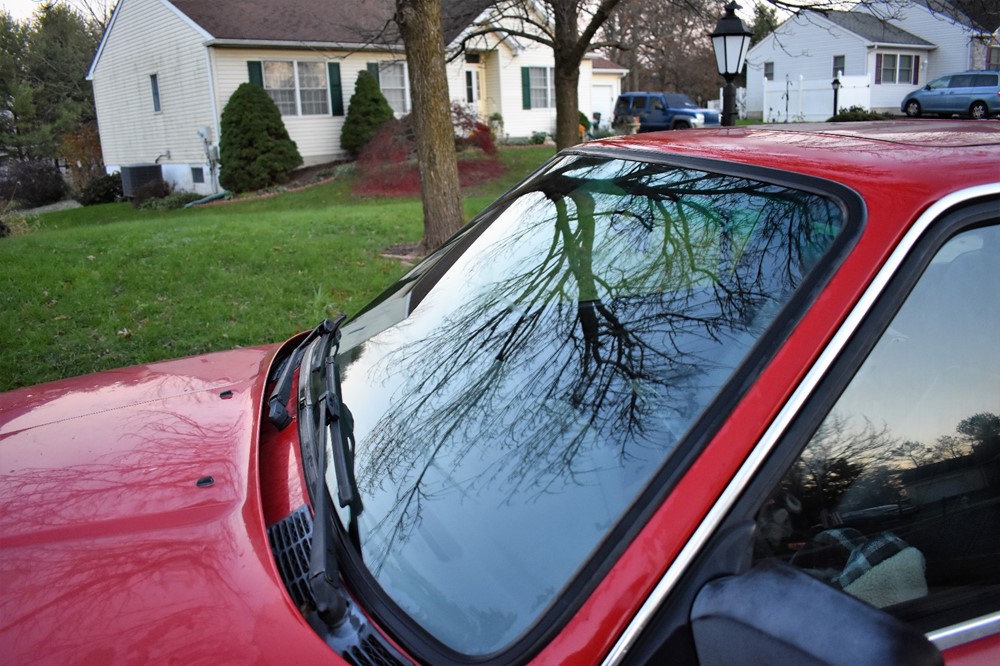
- You’re done! Enjoy the glossy look of your new windshield. You’re car and windshield probably need to washed, or at least rinsed, from all the soapy water and handprints that likely cover it now.
Sign up to never miss a new How-To from Classic Bimmer Bits!