
E30 Glove Box Replacement
How-To Credit
This how-to is a Classic Bimmer Bits original, with much credit due to the many members of the community who have helped us learn along the way!
Parts
- Glove Box (if replacing)
Tools
- 8mm combination wrench (a ratcheting combination wrench will make the job easier)
- Flathead screwdriver
Torque Specs (ft-lbs):
- N/A
Prodedure
-
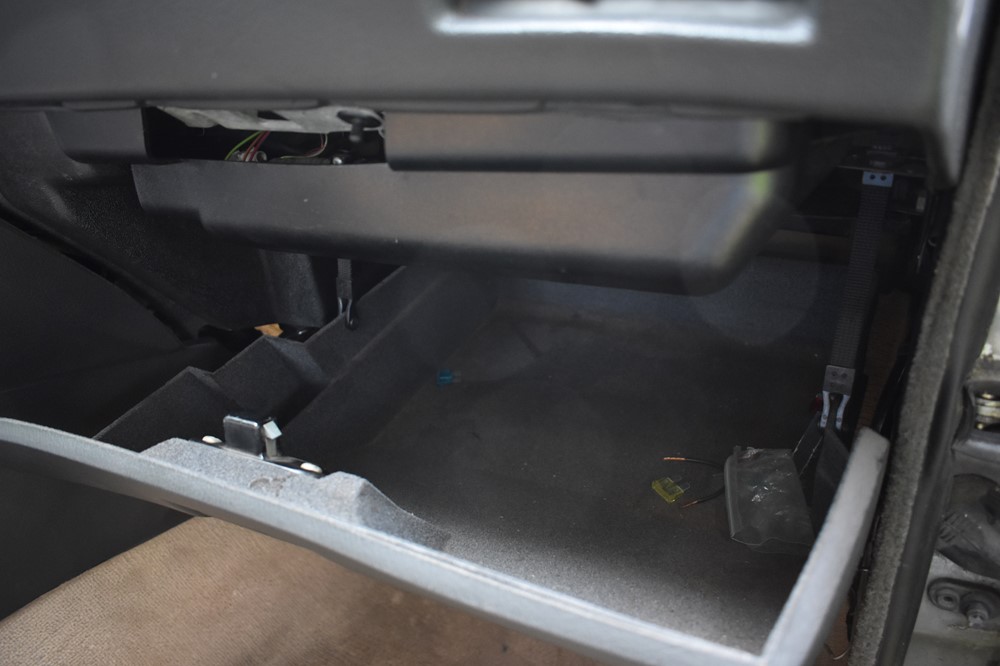
Open the glovebox. Notice the two straps that hold the glove box up.
-
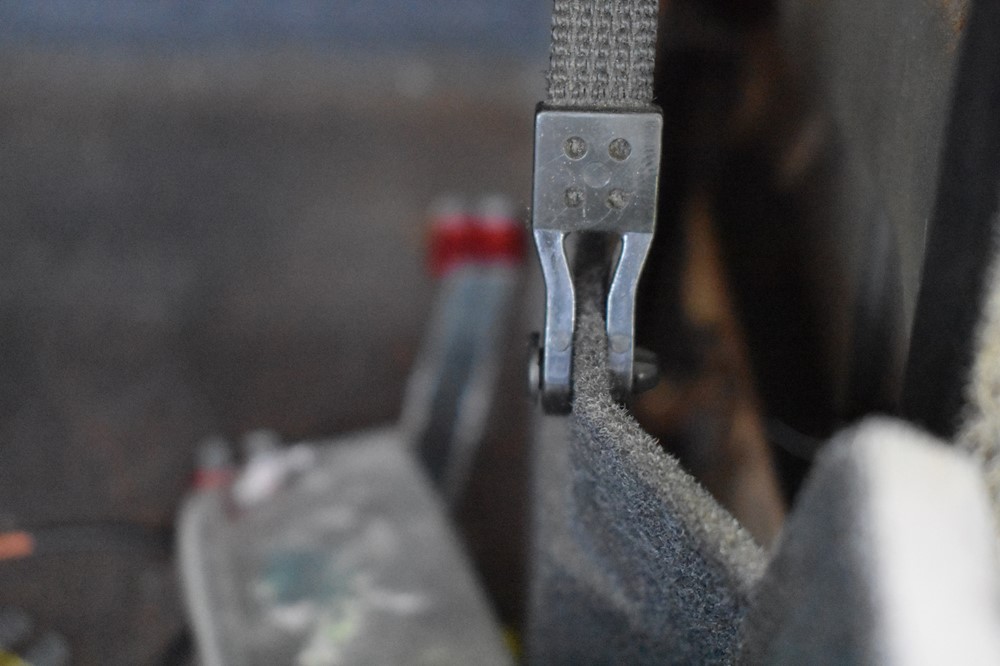
Where each strap is attached to the glove box, a retaining pin holds the strap in place. Push both pins out completely. It may be helpful the use the side of a flat head screwdriver to get the pin started.

-
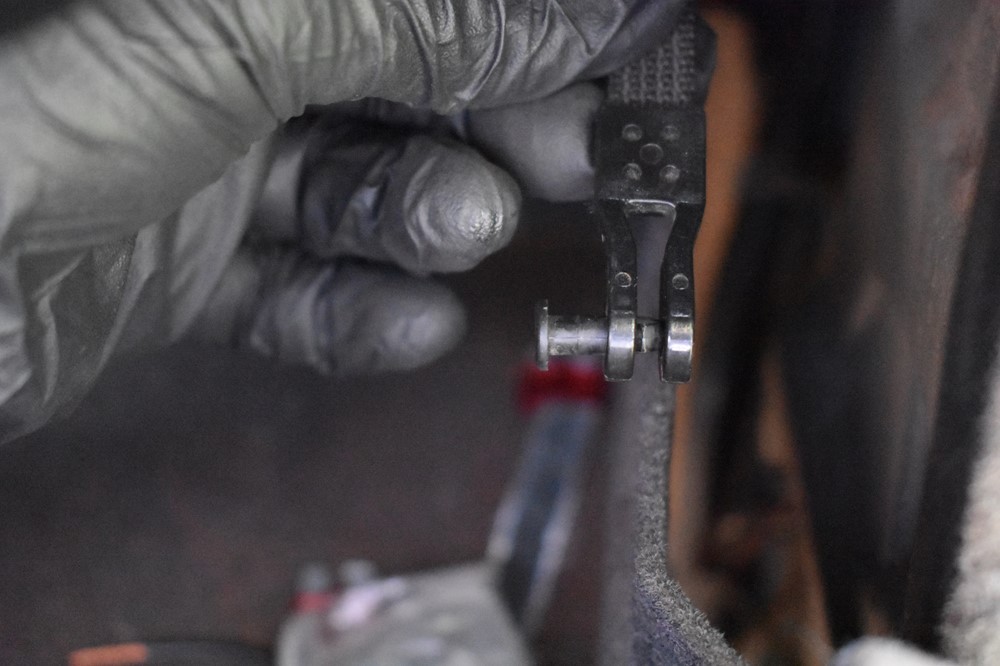
We always put the pin partially back into the clip to avoid losing it.
-
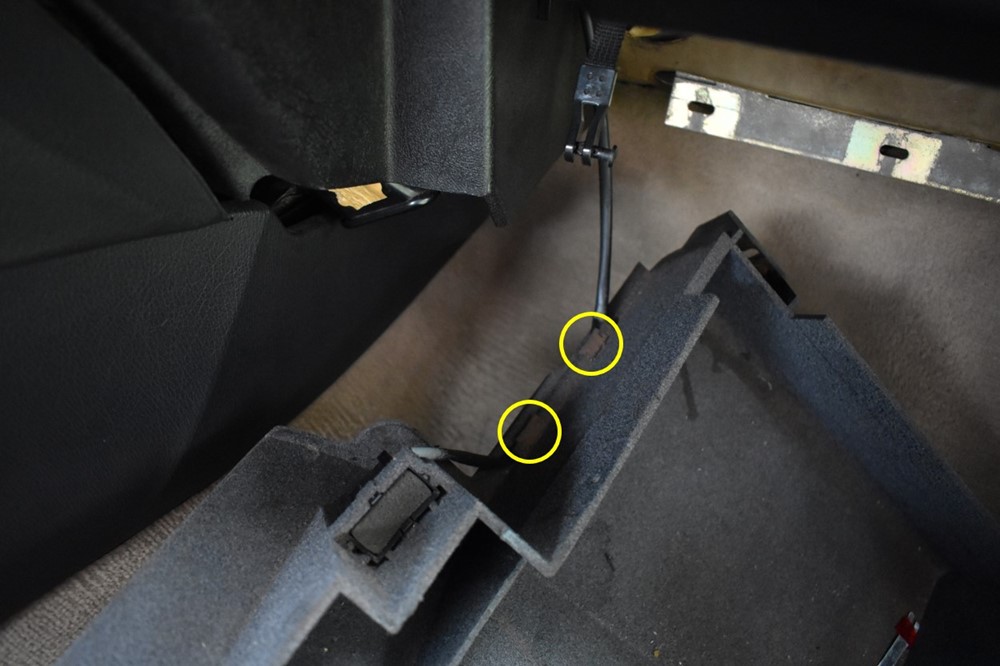
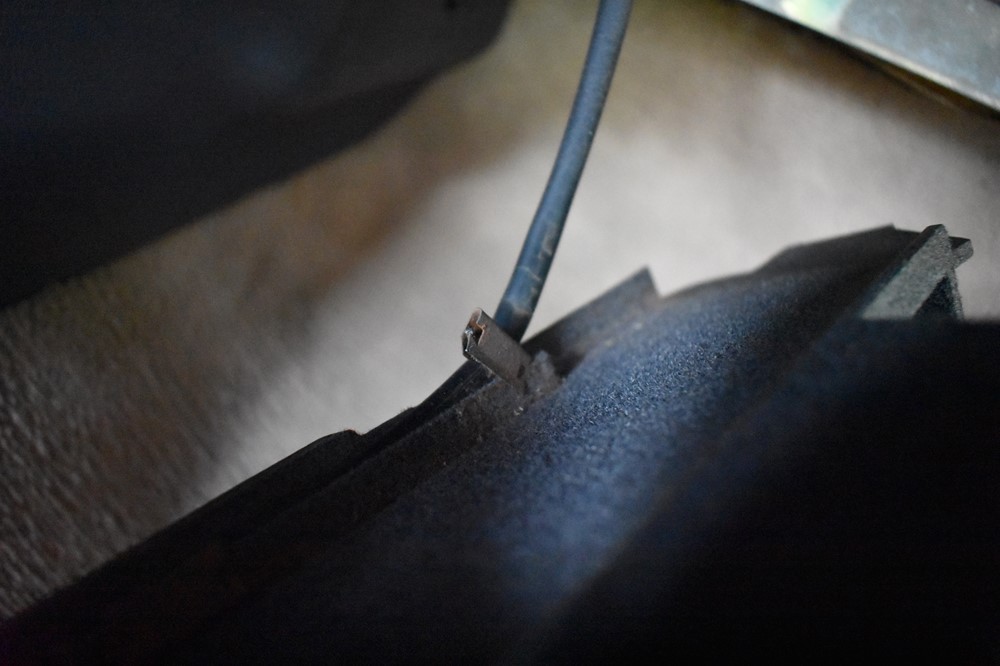
The glove box will now open much lower. At this point, you’ll need to remove the wiring and charging port for the nifty glove box flashlight that BMW shipped with some of these cars. There are two retaining clips that hold the wiring in place. Use a flathead screwdriver to pry them off (notice in our picture that the box is already off the hinges – bad idea, do what we say, not what we do!).
-
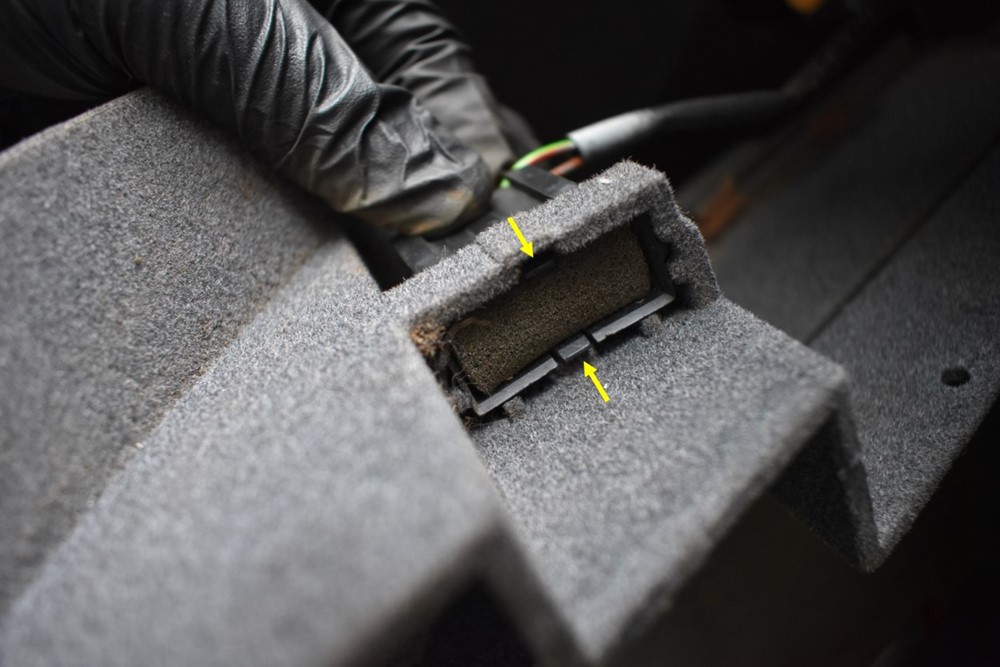
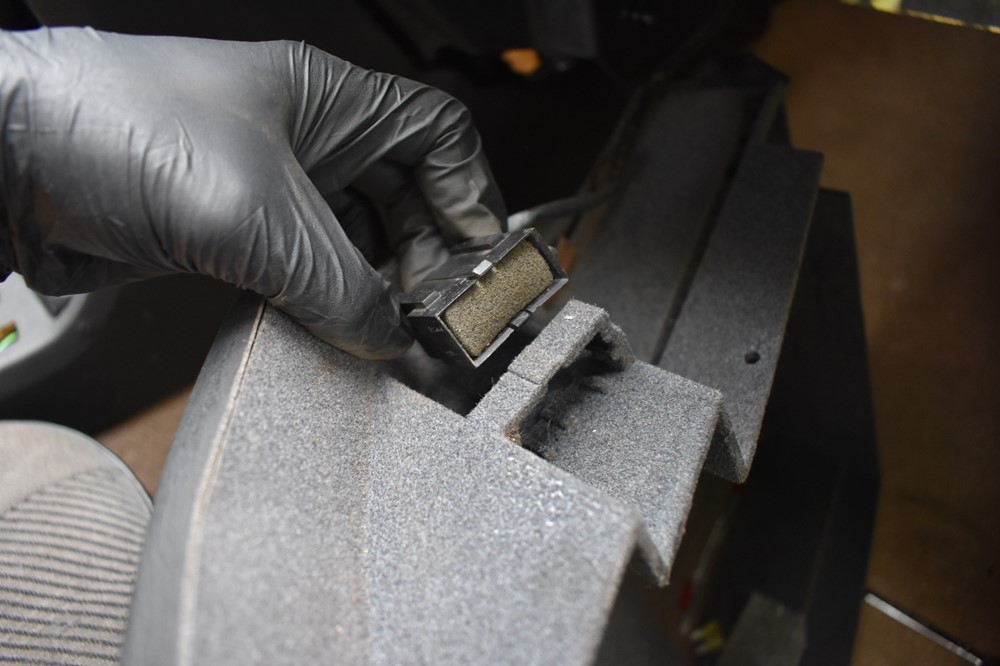
With the clips removed, you just need to remove the flashlight charging port itself. There are two tabs that hold it in place. Use a small flathead screwdriver to push the tabs in. You can push one tab in, rock the port away from that side to free the tab, then push the other tab in to free it completely.
-
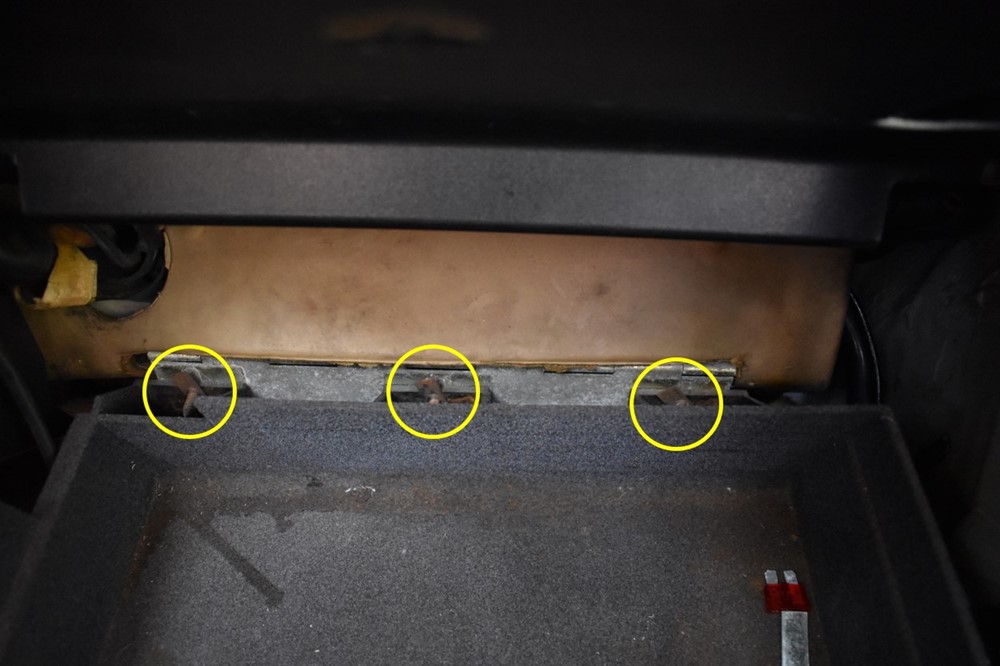
Now look at the back of the box, and you’ll see 3 threaded metal retainers with screws poking through. These screws attach the box to its hinge, and will need to be removed to get the box out. It’s helpful to see them from the inside before you try to find them blindly from behind the box.
- Close the glovebox.
-
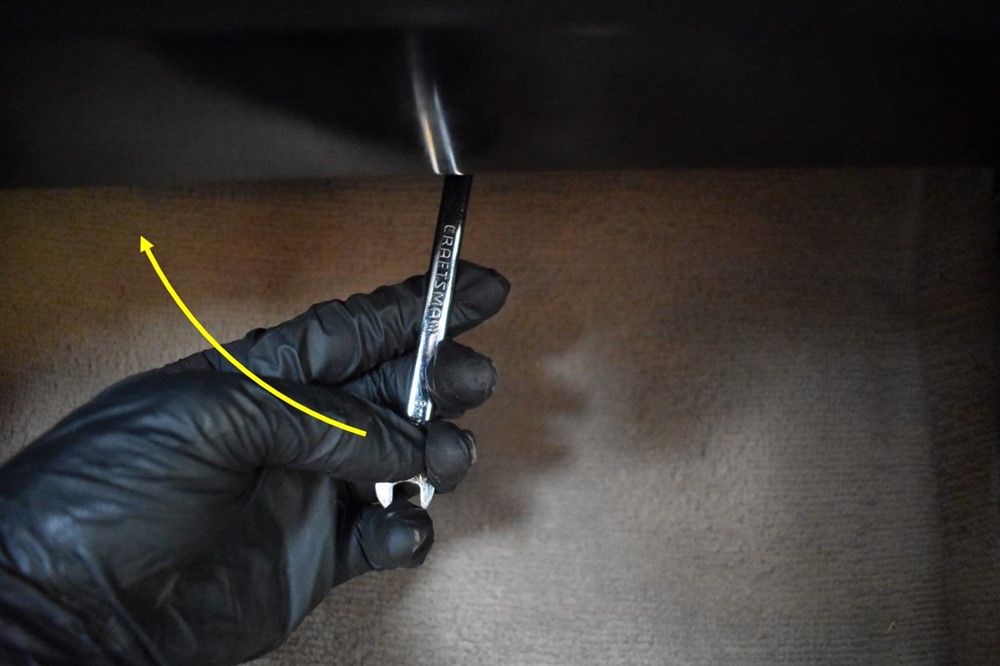
With the 8mm wrench, remove the 3 screws from the back of the box. A ratcheting combination wrench will make this part easier, but you can also use a normal combination wrench, or a ¼” drive socket wrench. When you remove the last screw, be prepared to support the box with your hand. Don’t forget that since the screws entering from the back of the box, you need to turn the wrench clockwise from your viewpoint.
- With your free hand, open the glove box latch to drop the box, and pull it out of the car.
- To reinstall the box (or install a new one), the process is essentially reversed. However, you’ll notice that the screws in the back of the box go through slots, so there’s a lot of vertical play, which takes some fiddling to get right.
- Hold the box up to the hinge. The hardest part is getting the three screws started. If you can borrow a 2nd set of hands, have your helper hold the box in place. Hold one of the metal strips over the slot, and insert a screw from behind the box. Start all 3 screws this way.
- Once you have the screws started, close the glovebox, and push the back up slightly until it looks about right. Snug up the 3 screws.
- Open the box, and close it again. As you close it, notice if it closes smoothly, or if it binds up on the latch. If it does, loosen the screws, adjust the box up or down, and re-tighten the screws.
- You may need to repeat step 14 several times until you’re happy with the way the box closes.
- Re-install the flashlight charging port by pushing it into place until it clicks
- Re-install the two wire retaining clips to hold the flashlight wires in place.
- Reinstall the two straps by holding them in place and pushing the pins through the strap and corresponding holes in the glovebox.
An outstanding share! I have just forwarded this onto a friend who had been conducting a little homework on this. And he actually bought me dinner simply because I discovered it for him… lol. So allow me to reword this…. Thank YOU for the meal!! But yeah, thanx for spending some time to talk about this issue here on your web site.
An excellent post, congratulations !!