
E30 Timing Belt Replacement
How-To Credit
This how-to is a Classic Bimmer Bits original, with much credit due to the many members of the community who have helped us learn along the way!
Parts
- Timing belt (11311711081)
- Timing belt tensioner (11311711154) (not needed if purchased with kit in link above)
- Tensioner spring (11311267746)
- (Optional) timing cover seal (11141269557)
- (Optional) tensioner pin (11311280960)
- (Optional) water pump replacement
- (Optional) camshaft seal replacement
- (Optional) accessory belt replacement
(We make a commission for parts purchased through the Amazon links above, which helps keep this site hosted and free. We only link to OEM or OE parts, the same quality parts that we use on our cars.)
Tools
- E30 radiator fan wrenches (cheap set from Amazon)
- 10mm socket
- 13mm socket
- 13mm combination wrench
- 22mm socket
- Breaker bar for 22mm socket
- E12 socket
- Socket extensions
- Torque wrench
Torque Specs (ft-lbs):
- Camshaft pulley bolt: 48 ft-lbs (65 N-m)
- Crankshaft pulley bolts: 16 ft-lbs (22 N-m)
- Radiator fan nut: 30 ft-lbs (40 N-m)
- Timing belt cover bolts – 10mm socket: 7.4 ft-lbs (10 N-m)
- Timing belt cover bolts – 13mm socket: 16 ft-lbs (22 N-m)
- Timing belt tensioner bolts: 16 ft-lbs (22 N-m)
- Water pump pulley bolts: 7.4 ft-lbs (10 N-m)
Prodedure
- Replacing the timing belt is a critical job for your E30 – it’s a known failure point in our engines, and when it goes, it’ll likely take the cylinder head, and potentially the block, with it. If you don’t know how old your belt is, or if it has more than 60k miles on it, you’re best off replacing it. It’s a big job, but not an overly complicated one. If you’ve got the tools and a dedicated weekend, you can definitely do it. If you’ve done it before, it’s not unreasonable to complete the job in a long afternoon/evening. This write-up is for a 1989 325i, but it’s relevant to all M20 E30’s; you may notice a couple of small differences, like the location of the crank position sensor, but nothing critical.
- Start by removing the radiator.
-
Next, you need to remove the fan. This is a royal pain unless you have the right tools; do yourself a favor and spend $25 on Amazon to buy a set of these wrenches.

-
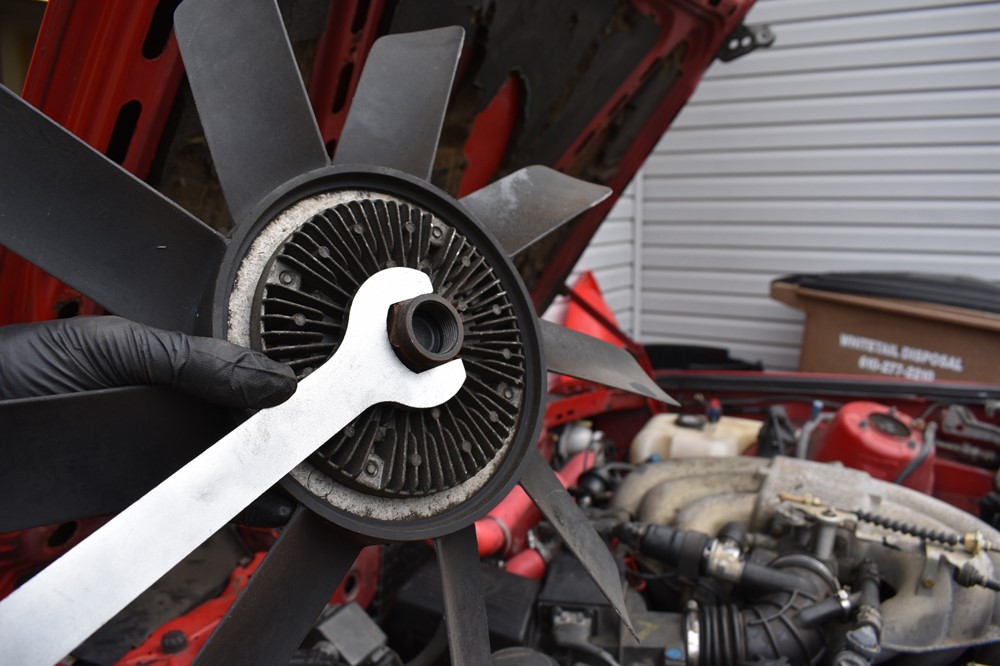
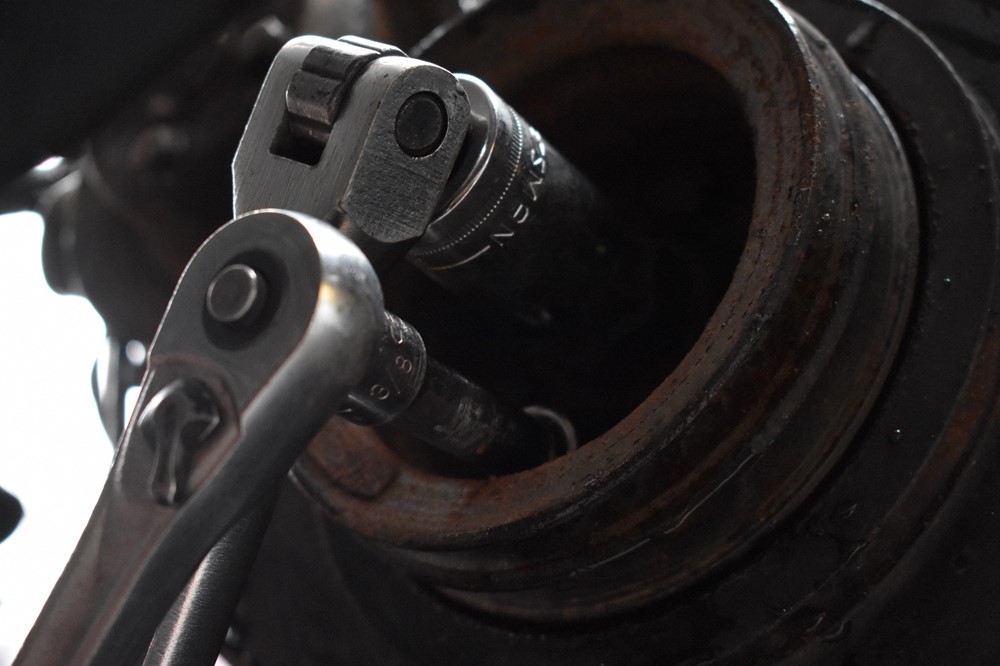
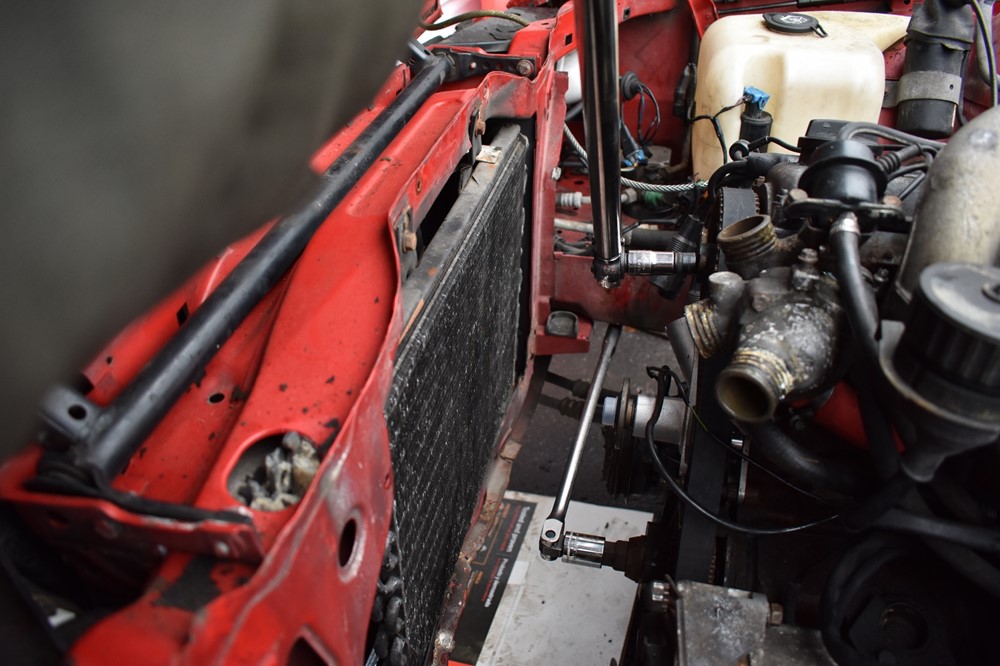
The next step is tricky to get pictures of. The box wrench goes on the fan clutch, and the pulley wrench goes over the bolts on the water pump pulley. You’re trying to hold the water pump pulley in place so that you can break the fan loose and spin it off the threaded stud on the water pump. The easiest way to show it is by starting with the “after” shots. Here’s the box wrench on the fan clutch.
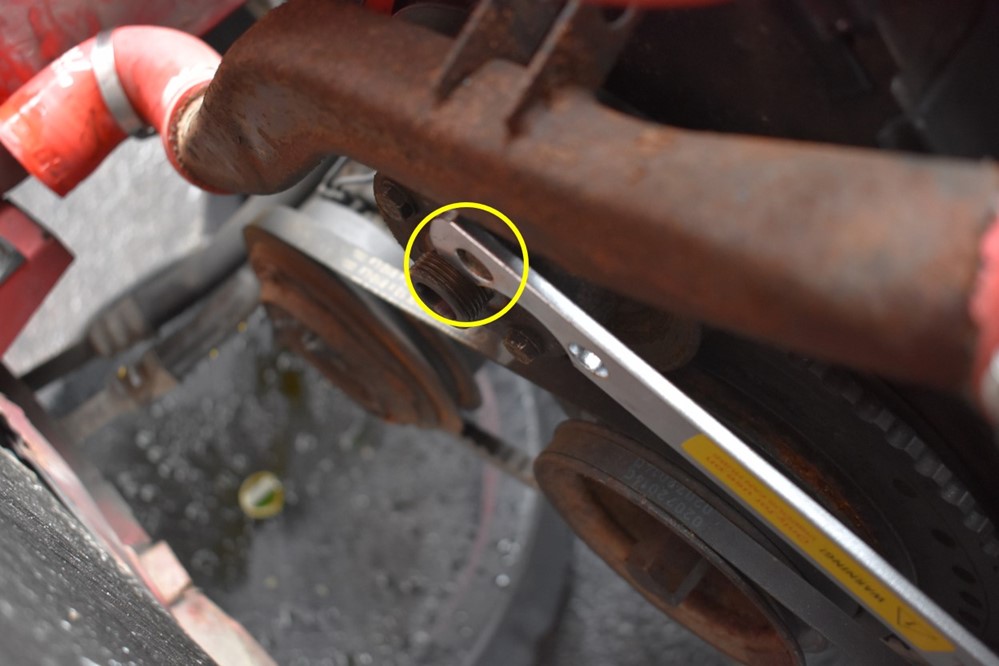
And here’s the pulley wrench on the head of a bolt on the water pump pulley. Ideally, you want this wrench over two bolts on the pulley. Depending on your tool, it may or may not fit very well. If it doesn’t fit over two bolts, you’re not out of luck, you just need to get it over one, and then leverage the end of the wrench against the center stud on the water pump. The setup in the image below works just fine.
-
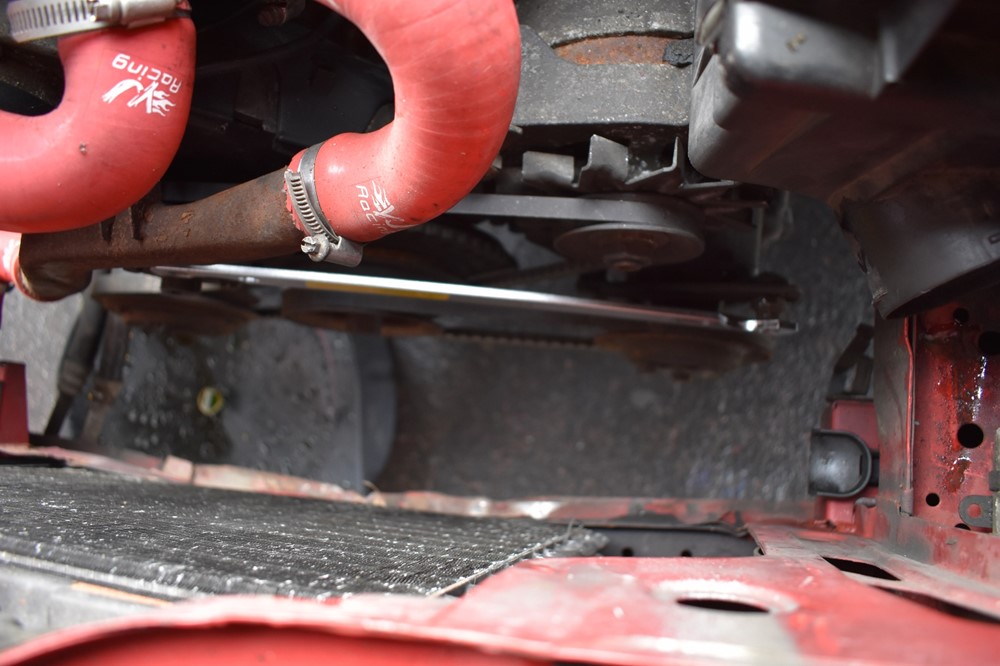
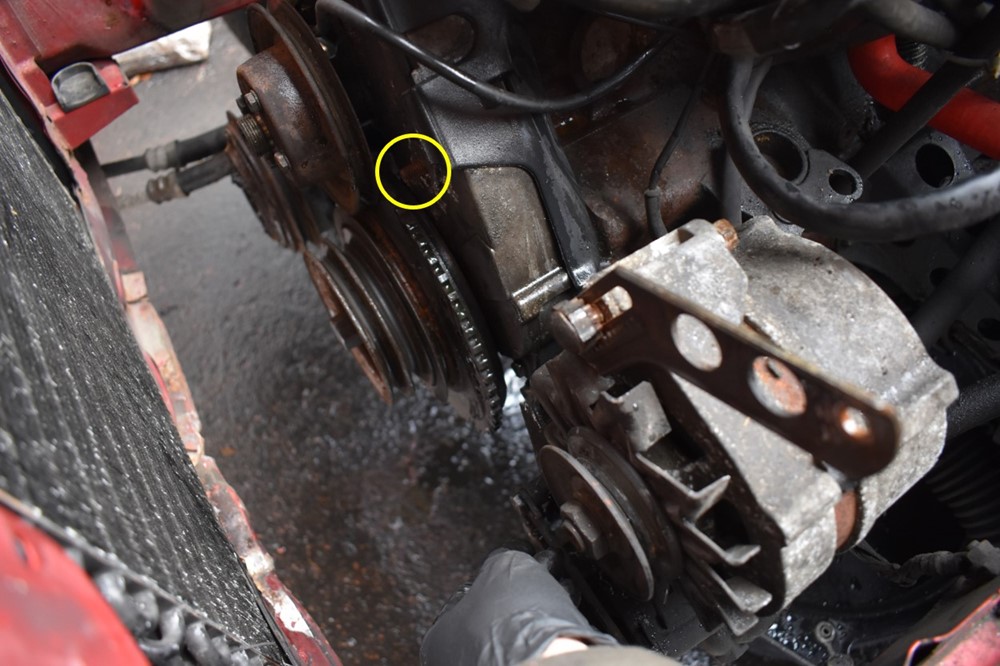
Now to remove the fan clutch, you need to get both these wrenches in place at the same time. It looks sort of like this. The box wrench is in the foreground, and the pulley wrench is circled.

-
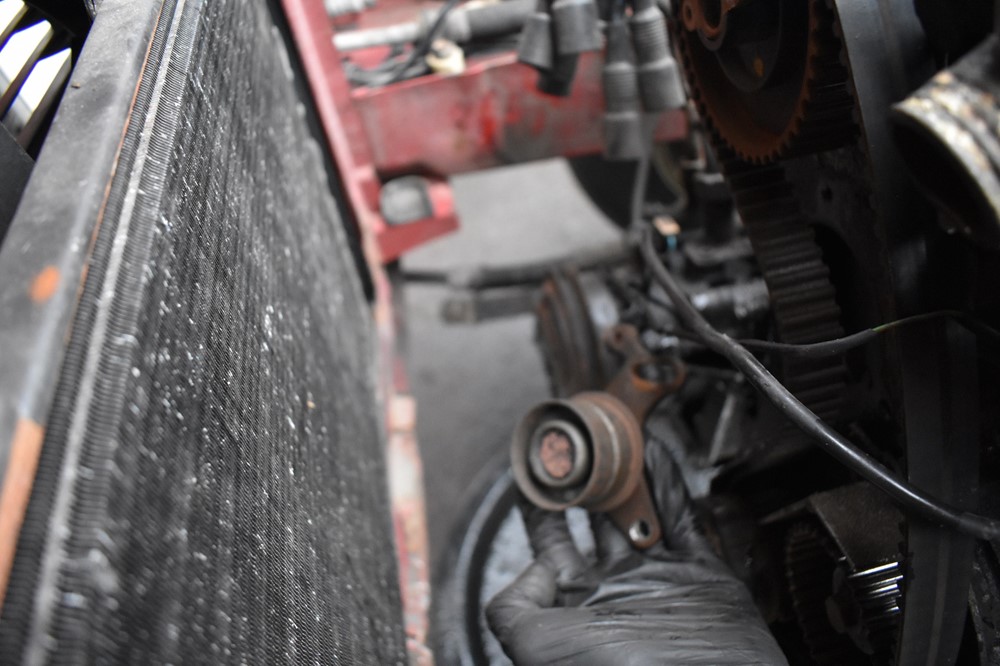
If you get the pulley wrench as shown as these pictures, you can prop it on the power steering pump so that you don’t have to hold it. It’s shown here after the fan clutch is removed.
- With the wrenches in place, you can break the fan clutch loose. This is reverse threaded, so if you’re standing in front of the car looking at the fan, you need to turn the box wrench clockwise. If it’s really stuck, you can give the wrench a tap with a mallet, once it breaks loose it should be relatively easy to turn off. Remove it and set aside.
- Follow up through Step 9 of distributor replacement to remove the distributor, rotor, and dust cap.
- With the fan out of the way, this is a good time to remove all the accessory belts. Follow up through Step 16.
-
Pop the tabs on this rubber cover up, and pull the cover out.

-
Next we need to remove the upper timing belt cover. Use the 10mm socket to remove these two bolts.

-
There’s a nut that holds the cover on at the bottom. You had to loosen it to remove the alternator belt, go ahead and remove it completely.
-
Now you can pull the camshaft pulley cover out, and remove the engine hoist bracket.

-
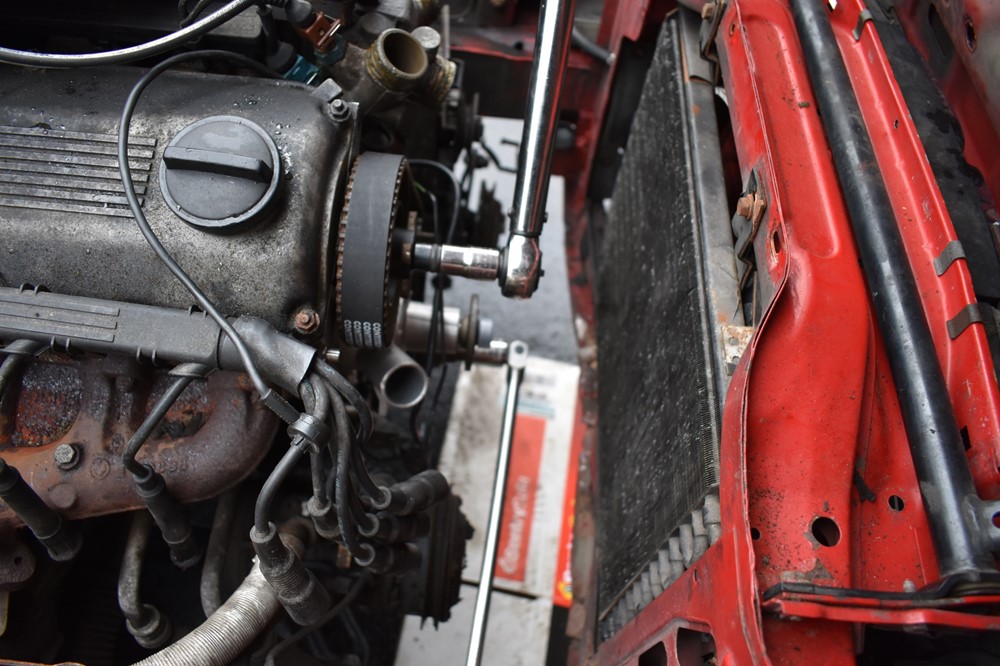
At this point, you need to remove the crankshaft pulley. Use a large socket wrench and 22mm socket on the crankshaft bolt, and a smaller socket wrench and 13mm socket with extension on the pulley bolts. Turn the engine clockwise as needed to access all of the pulley bolts.
-
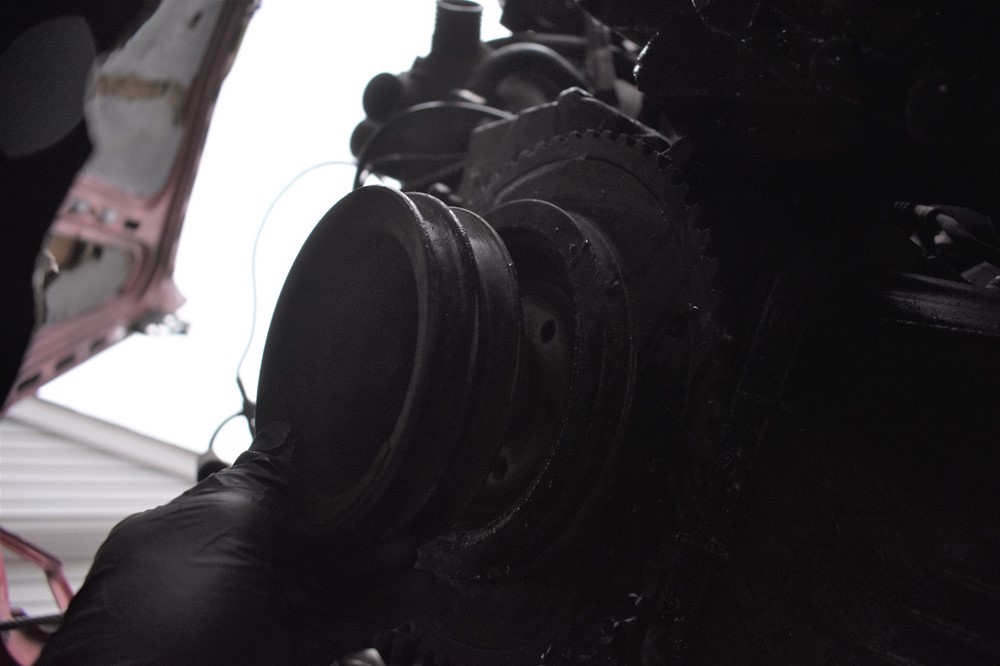
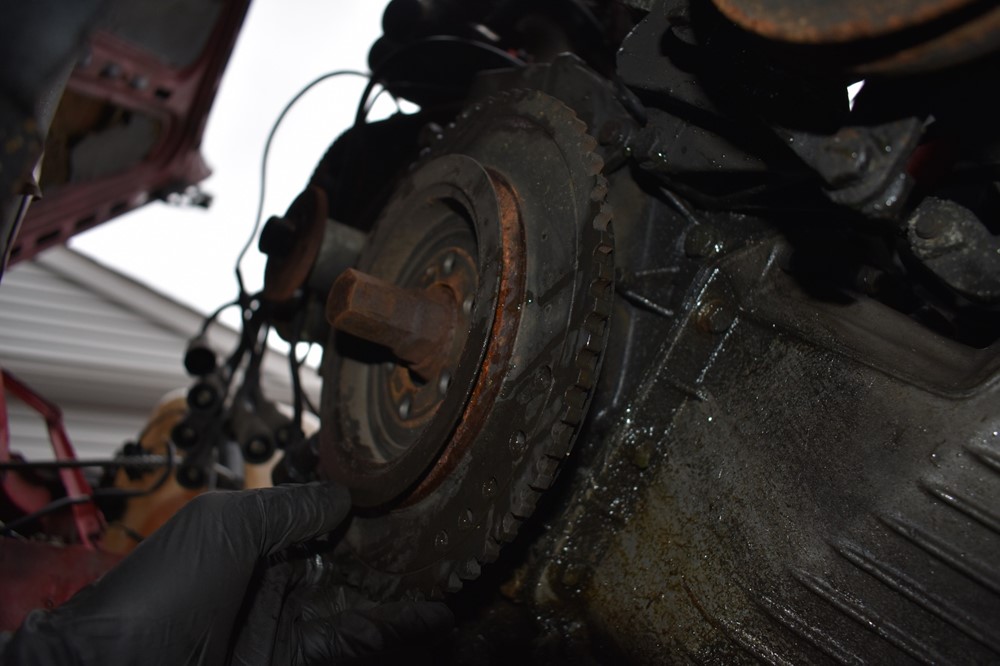
With all of the bolts removed, you can pull the crank pulley off. It may be stuck on pretty well, use a rubber mallet if necessary to knock it loose.
-
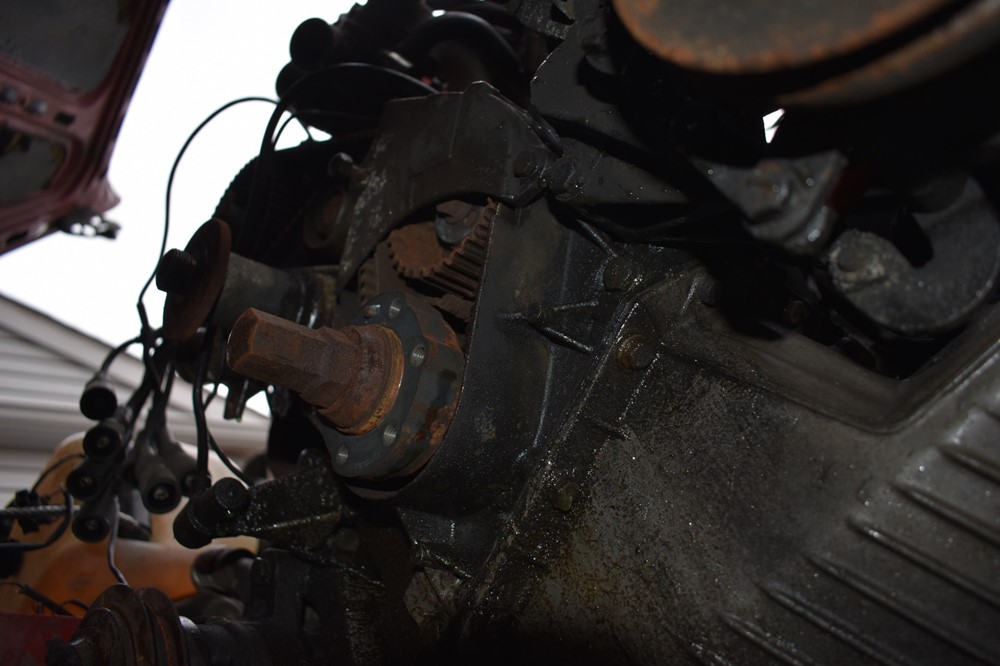
With pulley off, the harmonic balancer is next. There’s nothing holding it on now, but chances are this will be pretty stuck as well. If you can get it loose with a rubber mallet, great! If not, you may need to use a piece of 2×4 and a metal mallet to knock it loose. If this is the case, just be careful. Knock the harmonic balancer from back to front, and keep turning the engine between hits to keep it loosening evenly. With a little work, it should come off. Keep in mind that there’s a pin that keeps the harmonic balancer in the right orientation, so you won’t be able to twist it to get it off.

-
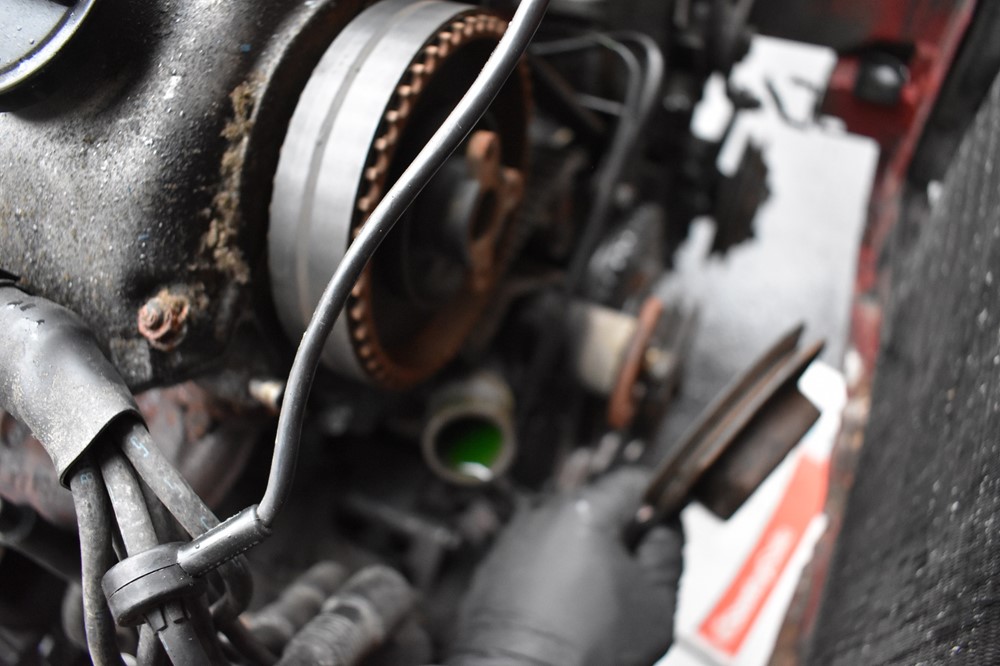
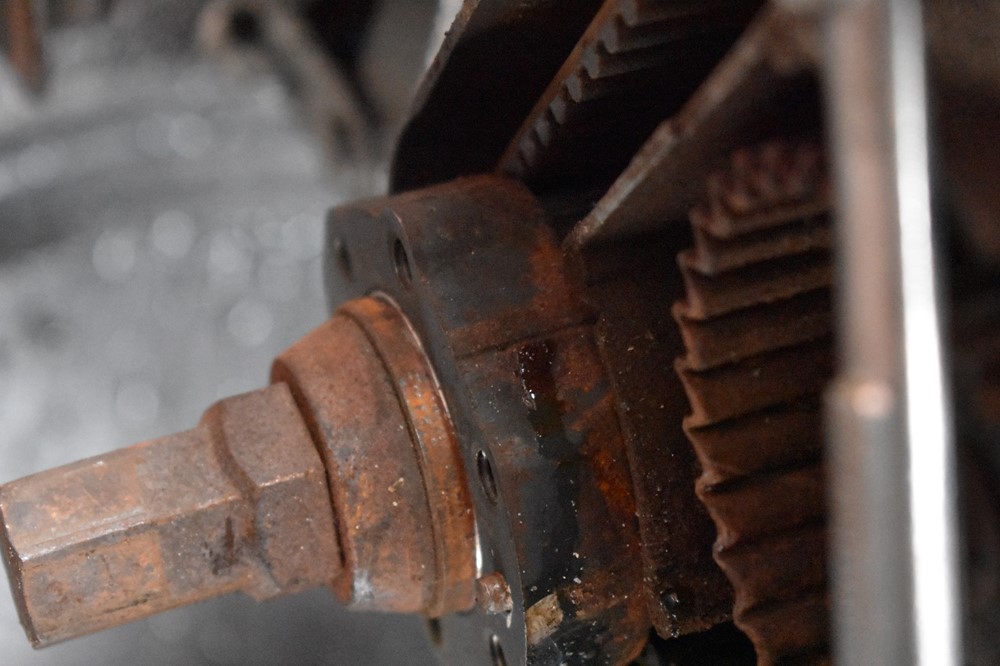
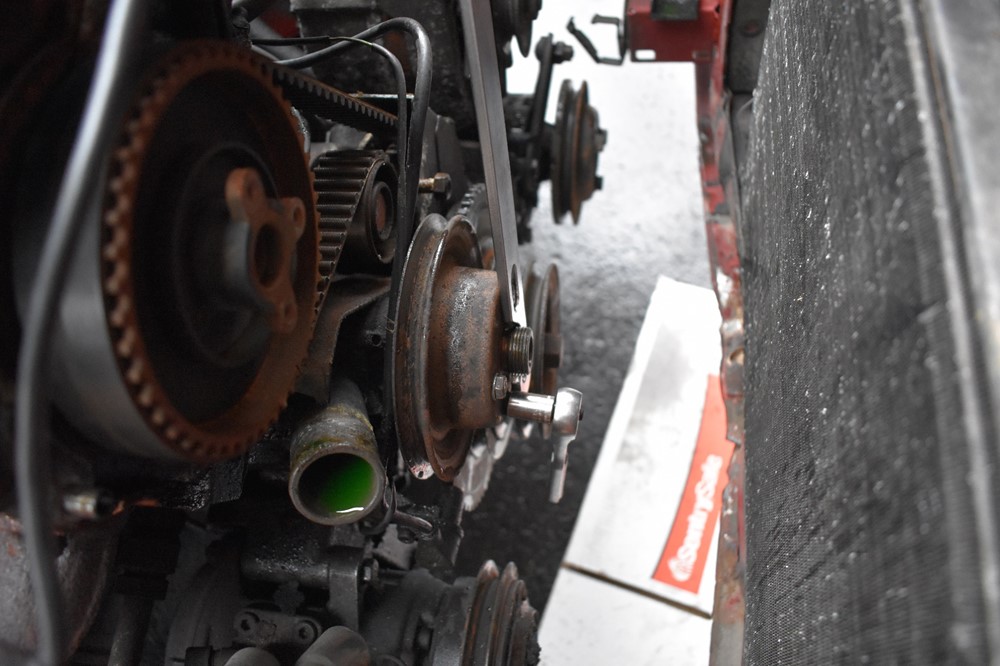
Next, remove the water pump pulley. Use your pulley wrench from the fan clutch to hold the pulley still, while you use a socket or wrench to loosen each of the 4 bolts. It’s important that you loosen all of the bolts before removing any; if you remove 3 before loosening the last one, you won’t have any way of holding the pulley still to break the last bolt loose. If you’re having trouble with this step, you can wait until the water pump is out of the car to remove the pulley, there’s just not a lot to hold onto once it’s out.

-
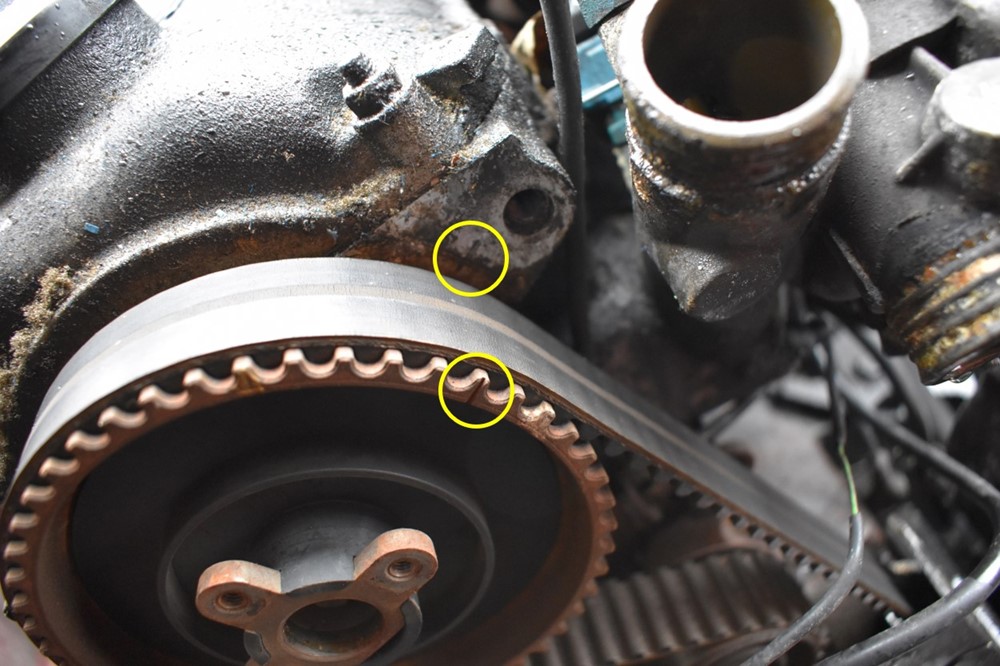
Before you go any further, it’s critical that you get the engine to top dead center (TDC) for cylinder 1. Using a large socket wrench and 22mm socket, turn the crank clockwise until you get the tick marks on the camshaft pulley and cylinder head as perfectly aligned as you can. Make sure the car is in neutral (don’t ask me why I know to check this). If you’re having trouble turning the engine due to compression in the cylinders, remove the spark plugs.
-
Double check and make sure the tick mark on the crank shaft and the notch in the housing also aligns close to perfect.
-
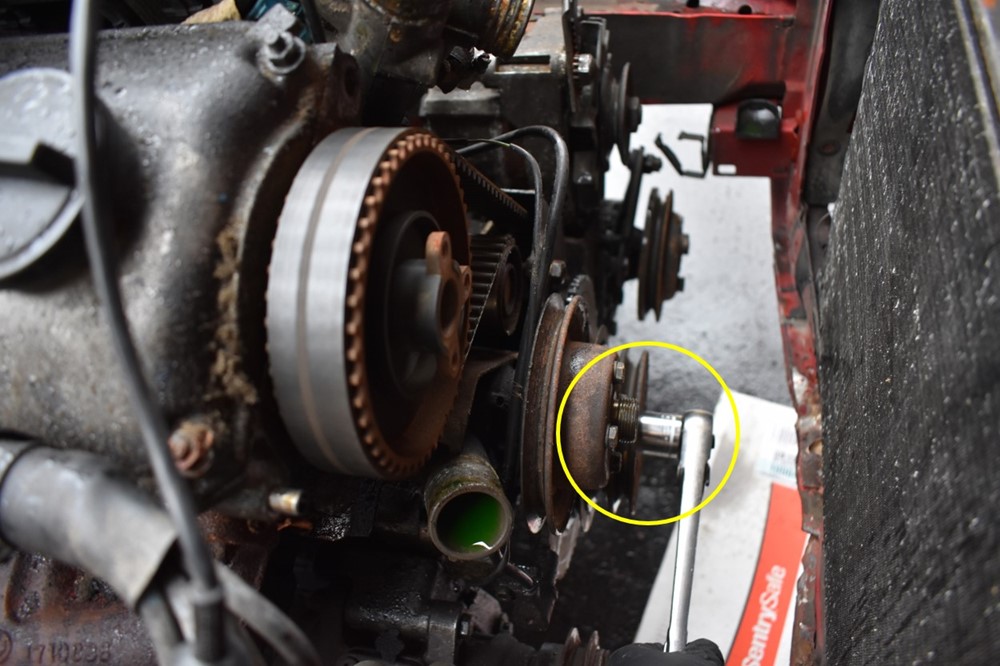
At this point, decide if you’re going to replace the camshaft seal. It’s a good idea to do it, since you’ll have much easier access to it with all of these parts already removed. If you plan to, this is the time to break the camshaft pulley bolt loose. Use your large socket wrench and 22mm socket on the crank to hold the camshaft pulley in place, while you use a socket wrench and E12 socket to loosen the bolt. If you use a long breaker bar on the crankshaft, you can rest it on the passenger side frame rail to hold the crankshaft in place. Just loosen the bolt, and do not remove at this point.
-
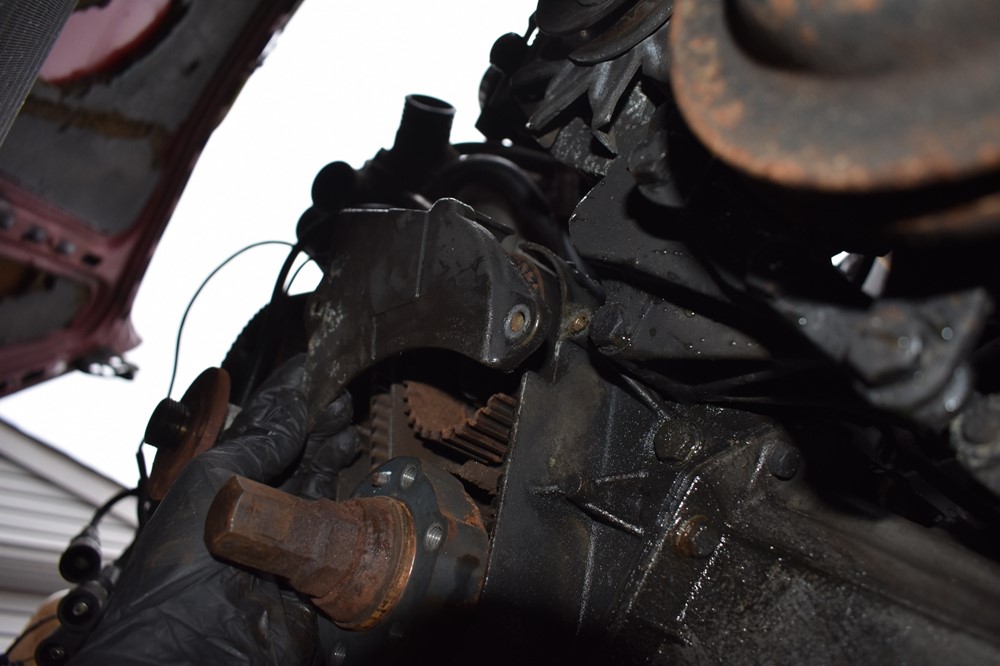
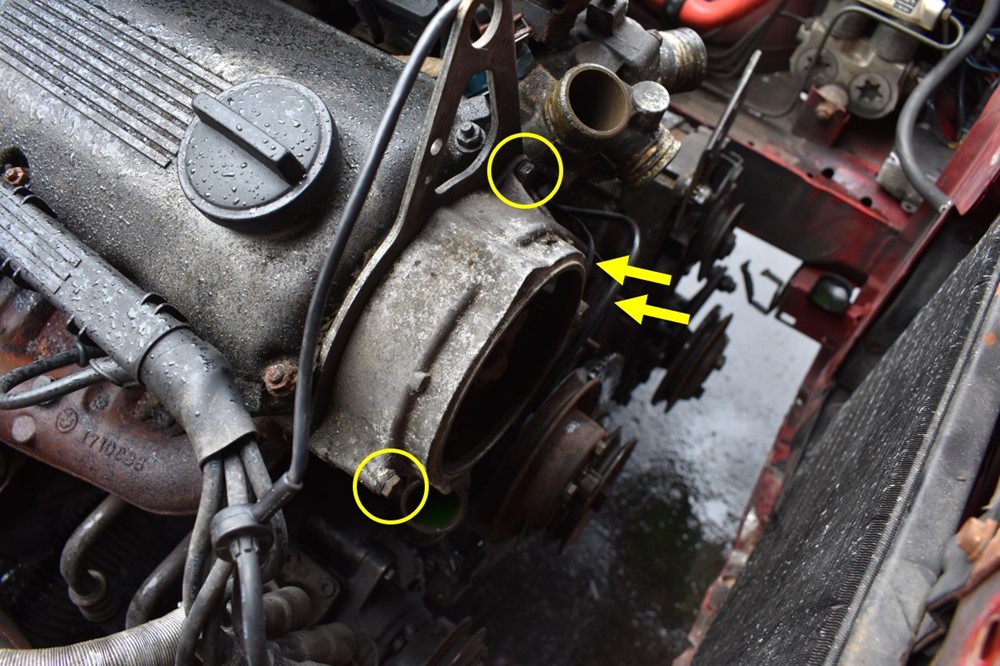
Next remove the lower timing belt cover. You removed the nut at the top of this cover when you removed the upper timing belt cover. Use a 13mm socket to remove the bolt at the bottom of the cover, and pull the cover off.
- Check the marks on the crankshaft and camshaft pulley to make cylinder 1 is still at TDC.
-
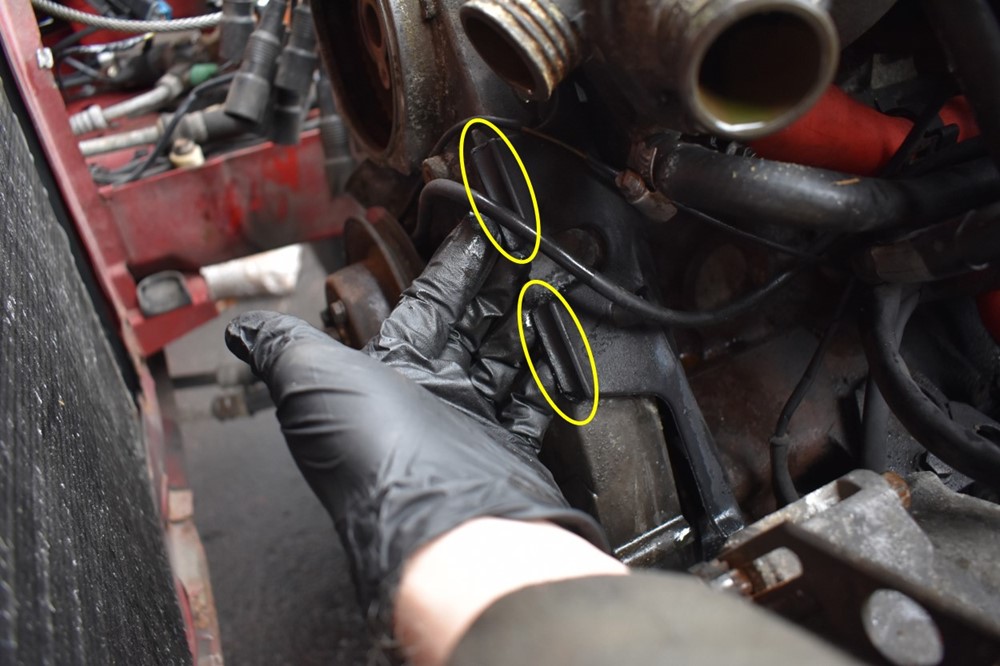
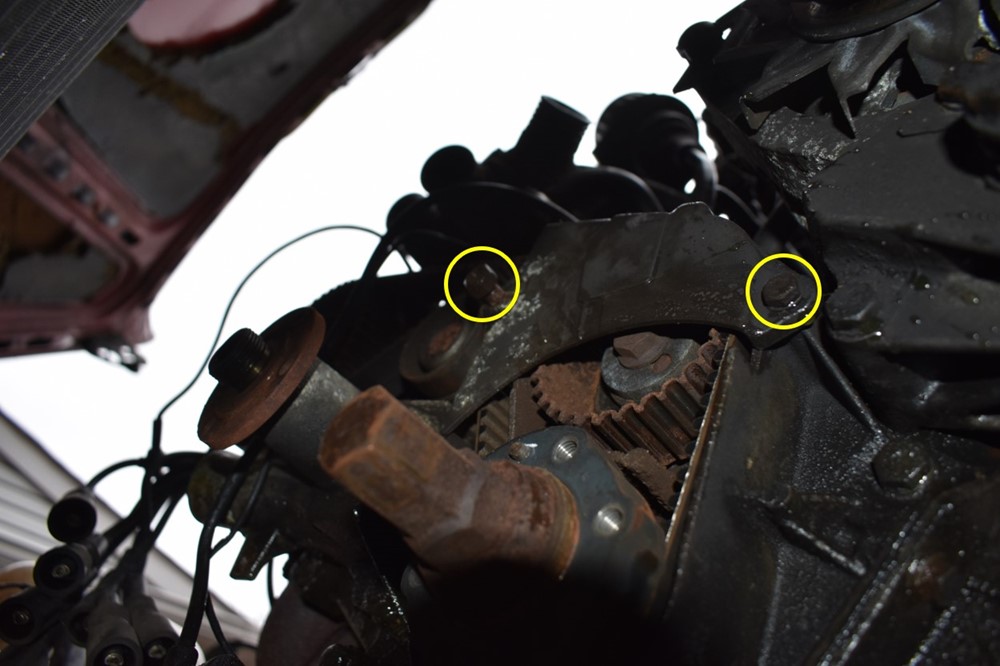
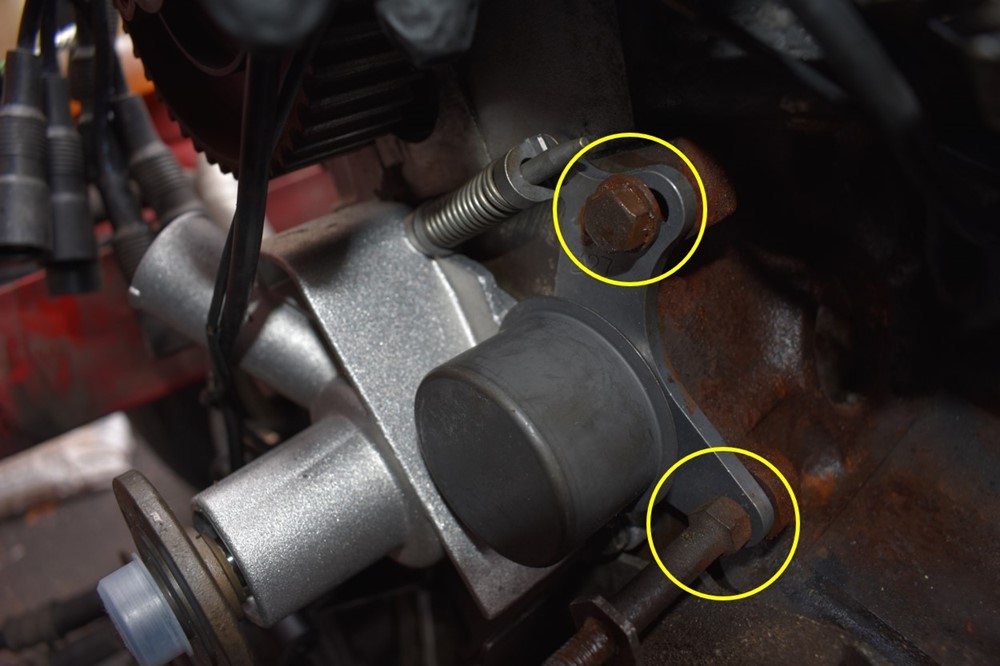
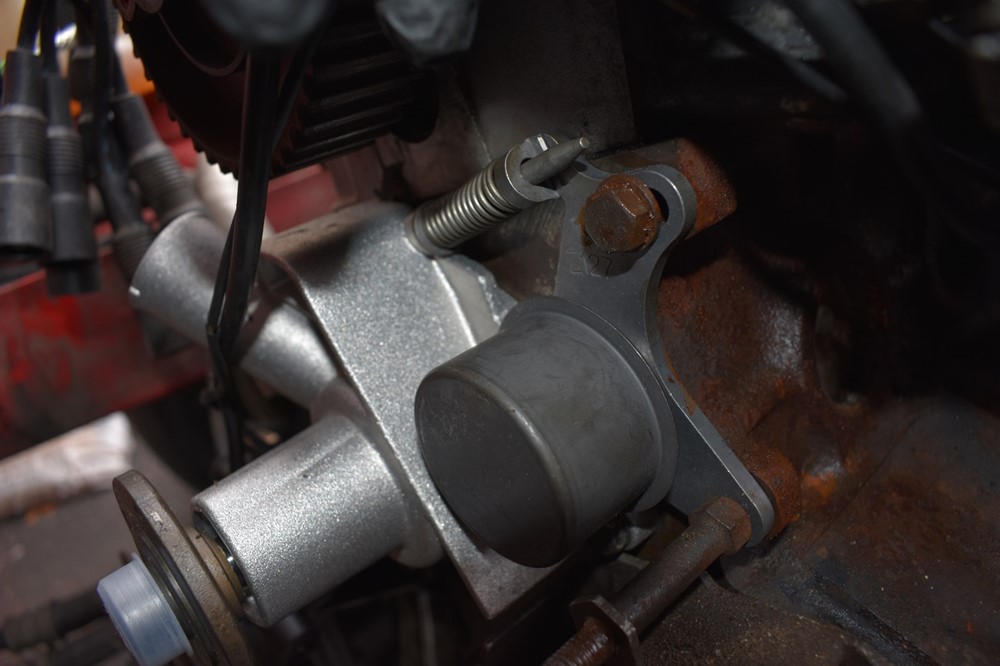
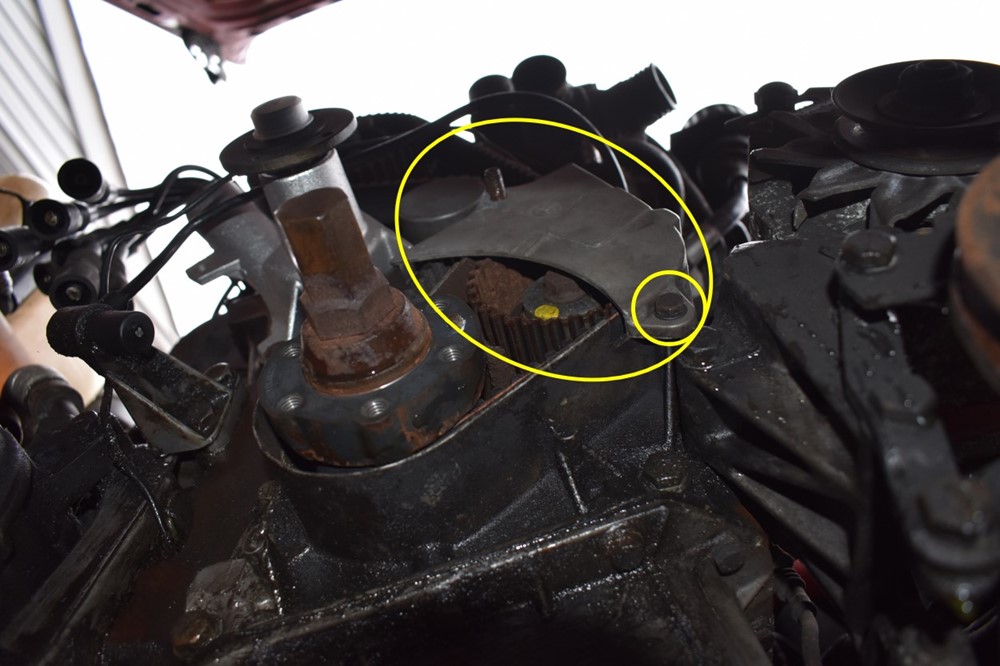
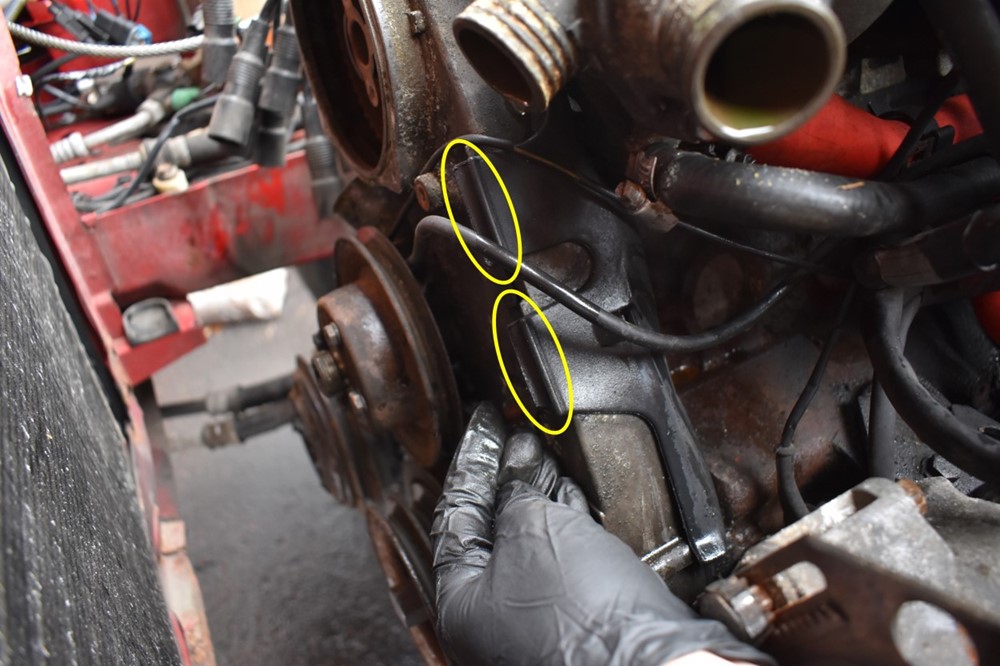
Next, you need to take tension off the timing belt. The tensioner is held in place by two bolts, one at the hinge and the other in the adjustment slot. Here’s what the tensioner looks like with the belt out of the way, with the two bolts circled.
-
Anytime you replace the timing belt, it’s a good idea to replace the tensioner too. Use a 13mm socket to a remove the adjuster bolt, and a 17mm wrench to remove the hinge bolt. Remove the tensioner, and catch the tensioner spring and guide pin as they fall out.
-
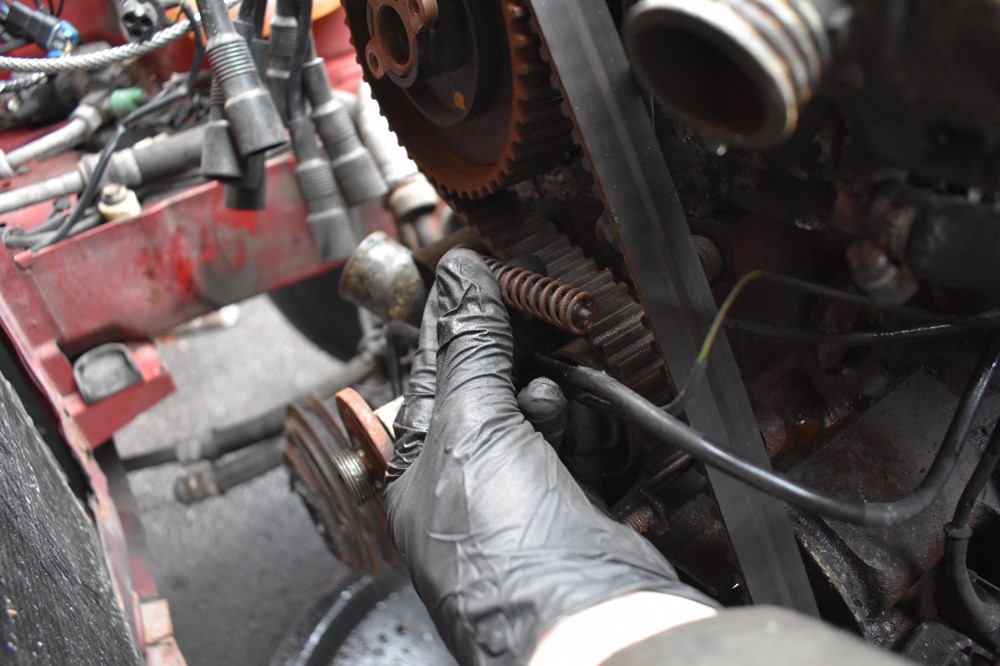
At this point, the timing belt can be removed. Start by sliding the belt off the camshaft sprocket and oil pump sprocket, then work it off the crankshaft sprocket. It will be a little snug around the bottom of the crankshaft and will take a little wiggling to remove.

- If you’re planning to, replace the water pump now. The water pump should be changed every other timing belt change, although if you’ve heard any squeaking or squealing from the pump, you should replace it regardless.
- If you’ve decided to, replace the camshaft seal now.
- If your crankshaft, or oil pump seals needs to be replaced, or the lower timing belt housing gasket is leaking, now is the time to replace them. This involves removing the crankshaft nut, which takes some doing, and won’t be covered here.
-
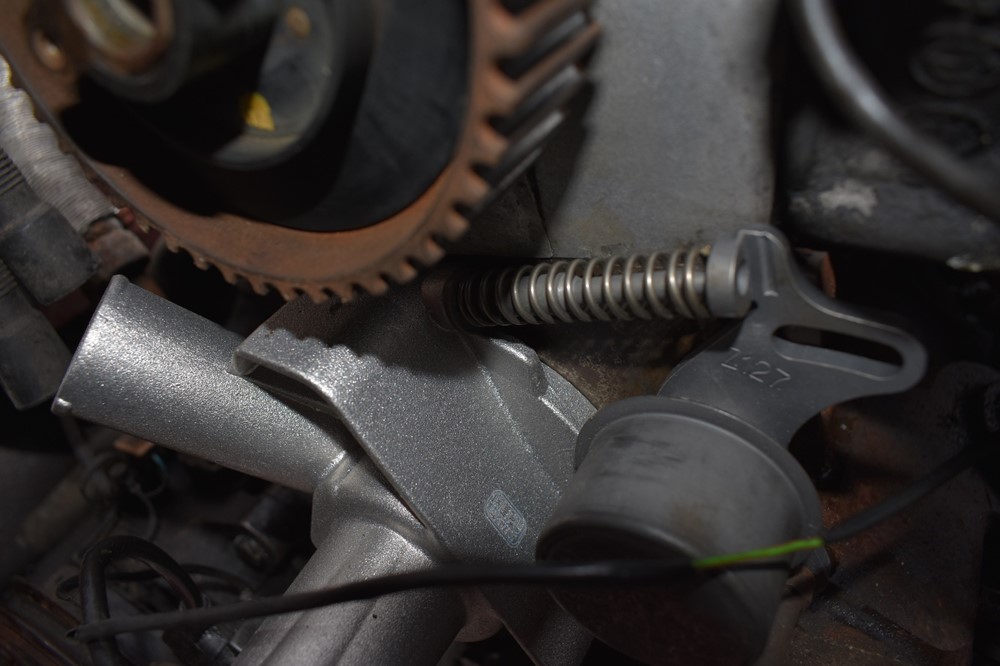
You’re ready to install the new timing belt. Start with the tensioner. Install the bolt through the tensioner hinge and hand-tighten, so that the tensioner can still turn freely. Install the tensioner spring and guide pin. The base of the pin sits in the recess on the water pump, and the pointy end of the spring goes through the hole in the tensioner, as shown. It’s a good idea to use a new tensioner spring, to ensure you’re getting appropriate tension on the belt.
-
Push the tensioner against the spring so that you can get the adjuster bolt started. Once you get it started, push the tensioner as far as you reasonably can and snug up the bolt.
-
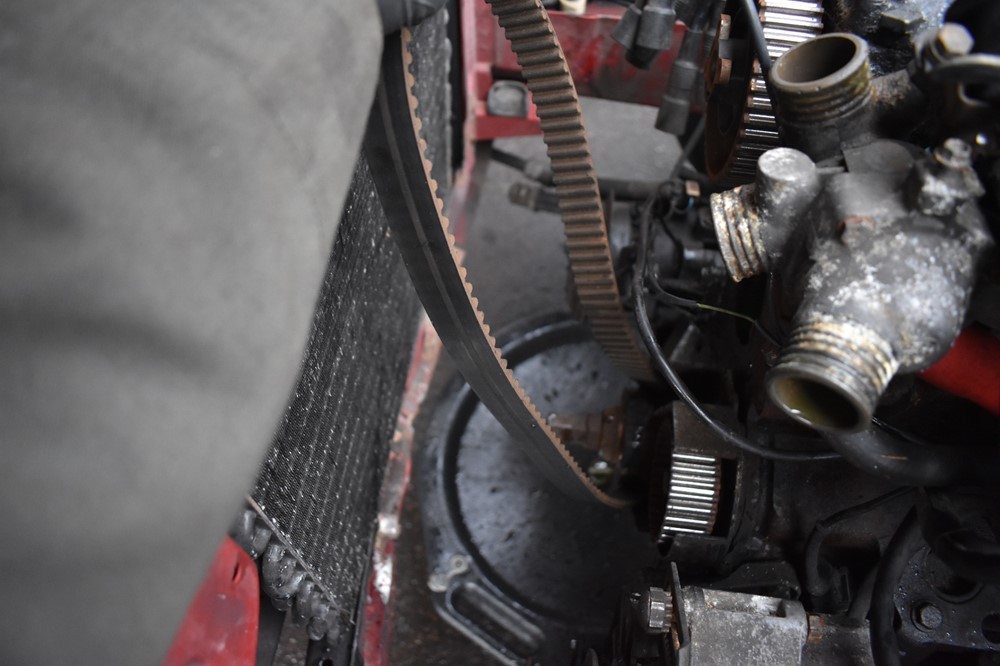
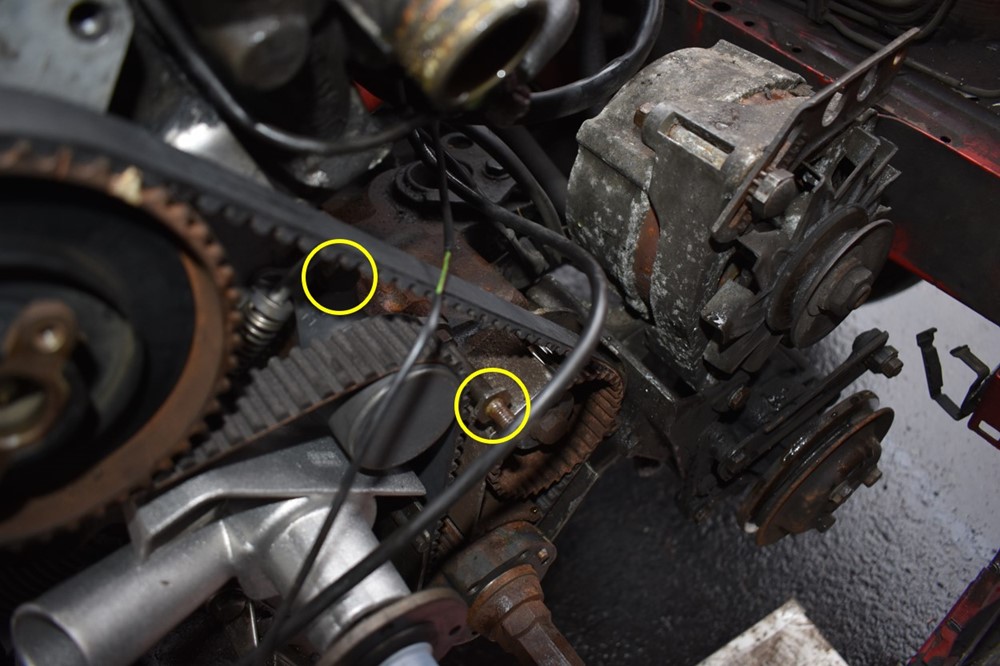
Now for the belt installation itself, this is the most critical part of the job. Insert the belt around the crankshaft sprocket first (Yellow). Work it in until it’s positioned fully on the sprocket. Double check that the groove on the sprocket is still in the center of the notch in the housing (see step 19). Moving counter-clockwise, pull the belt around the oil pump sprocket (Red). The next part is the most critical. Double check that the tick mark in camshaft sprocket (Blue) is still aligned with the groove in the cylinder head (see step 18). Pull the belt up tight from the crankshaft and oil pump, and carefully slide the belt onto the camshaft sprocket. You’re trying to achieve zero slop in the path from the crankshaft to around the oil pump to the camshaft sprocket. Wrap the rest of the belt around the sprocket, then slide the non-toothed end of the belt around the right side of the tensioner wheel (Green).

- Loosen the adjusting nut on the tensioner to allow the spring to push the tensioner against the belt.
-
Using the 19mm socket, slowly turn the engine over clockwise (looking at the front of the car) twice. Turning only clockwise, center the crankshaft groove with the notch, and confirm that the camshaft tick mark is also very closely aligned with the groove in the cylinder head. It’s not bad if it’s off by a hair, but anything more than 1/8 of an inch (roughly a belt tooth’s width) indicates you’re not aligned correctly. If this is the case, take the tension off the tensioner, pull the belt off of the camshaft sprocket, re-align it with the cylinder head groove, and install the belt again. Repeat steps 32 and 33 to confirm you’ve gotten it right.

-
At this point, snug up the tensioner hinge bolt, then fully tighten the adjuster bolt. Now fully tighten the hinge bolt. The purpose of snugging, then fully tightening, is to make sure you’re not torqueing the tensioner into the belt and increasing the belt tension.
-
With the belt properly tensioned, now is the right time to go back and torque the camshaft sprocket bolt to spec. Use a breaker bar and 19mm socket to hold the crankshaft in place (best bet is to trap it against the top of the passenger side frame rail), and use a torque wrench and E12 socket to tighten the camshaft sprocket bolt.
-
At this point, you basically just need to put everything back together. Install the lower timing belt cover first, and only install the lower bolt, not the upper nut (the upper cover and alternator tensioner go on first.)
-
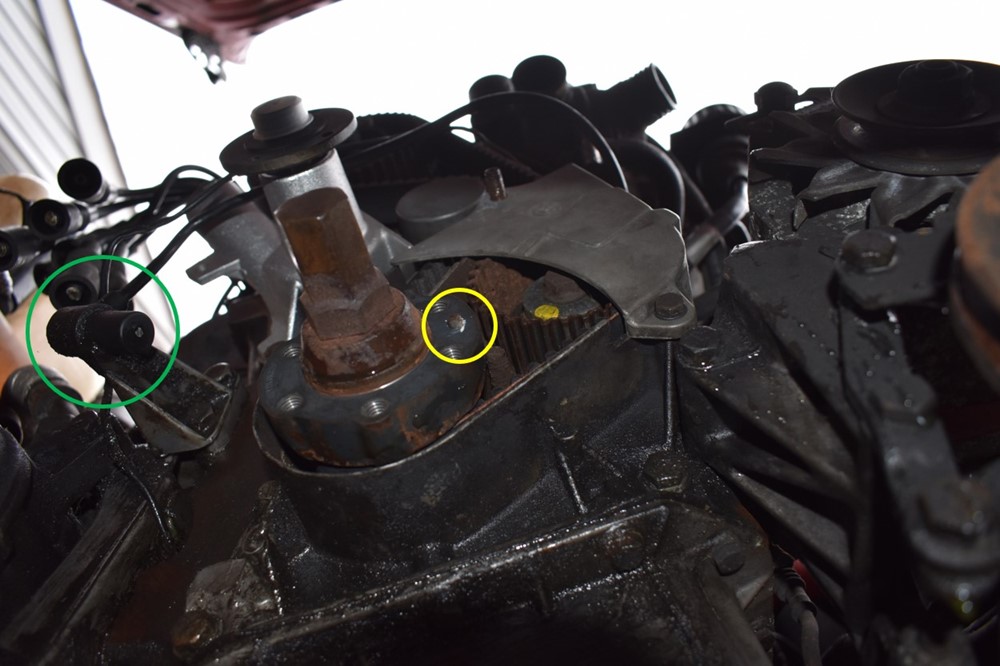
Next is the harmonic balancer. Before you install it, take the opportunity to wipe off the front of the crank position sensor (Green). Place the harmonic balancer over the crankshaft, making sure to align the pin with the hole in the balancer (Yellow).
-
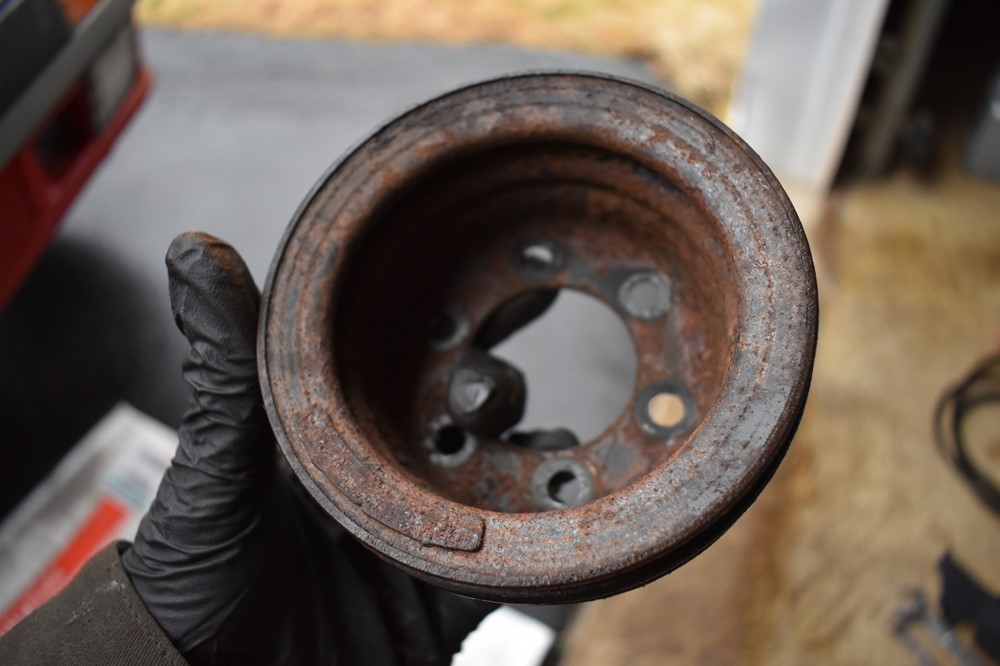
Install the accessory belt pulley over the harmonic balancer. It has no special orientation, other than needing to line up the 6 holes with the balancer.
-
Reinstall and tighten the 6 bolts into the crankshaft, using the 19mm socket to hold the crankshaft while tightening. Rotate the crankshaft as needed to access all 6 bolts.

-
Reinstall the water pump pulley. Hand tighten all 4 bolts, then use the special wrench to hold pulley still while you tighten each one.
-
Reinstall the engine hoist point and upper timing belt cover, tightening the upper two bolts but still leaving the nut at the bottom alone. Make sure the two wires (crankshaft position sensor and oil level sensor) are in front of the cover, not caught behind it.
- Reinstall the distributor.
-
Reinstall the rubber timing belt cover. Hook the back of it behind the wall of the upper timing belt cover, then pull the two straps (circled) forward into place so that they snap over the front edge of the upper timing belt cover.
- Reinstall the accessory belts.
-
Thread the fan back onto the water pump. Remember that it’s reverse threaded, so turn it counter-clockwise as you look at the front of the engine. Like you did for removal, use the pulley wrench (circled) to hold the water pump in place, then use the box wrench on the fan clutch hex to tighten it.

- Reinstall the radiator and bleed the coolant system.
- You’re done! Congratulate yourself on completing a critical job that should keep your E30 on the road for many years to come.
Sign up to never miss a new How-To from Classic Bimmer Bits!